
Both beginners and experts can enjoy books.

Prevents bleed-through and protects every design.

Every design is created by skilled human artists.

Trusted and loved by coloring fans worldwide.
You have questions? We're here to help.

Fuzzy Buddies is an enjoyable coloring book. I love seeing the pages come to life after coloring. Great buy.
Amazon customer
I bought this for my fiance and she loves it! It's adorable and she says it's fun to draw. I love it! It also came in a day early!
Amazon customer
Such a cute and fun book to color. I can't put it down! I love how easy they are.
Amazon customer
This book is a gem: the drawings are very well done, clear and realistic. The scenes are very varied. Well suited for coloring with alcohol markers in this case. I recommend +++
Amazon customer
This colouring book is so cute! The line art is black and thick which is ideal for colouring with alcohol markers. The designs are all super cute! There are pages in this book that I haven’t seen in other books. I recommend 👍
Amazon customer
I caved and joined in the cute Halloweeny colouring bandwagon! I'm happy with this book, it's so cute! I like the size, it's not too big so it's easier to complete. Very cute designs. The paper is thinner than I'd like but it's okay if you put card behind the page you're working on.
Amazon customer
What a dream to have a pleasant time at any age coloring these very funny drawings. Really I recommend it feels good and relaxing as much as possible doing mandalas for those who like it.
Amazon customer
I bought it for my grandma so she wouldn't be bored this winter, she loves everything related to the fairy world, goblins etc... The designs are very cute and varied! The leaves look fine so in my opinion it is not made for people who have alcohol markers.
Amazon customer
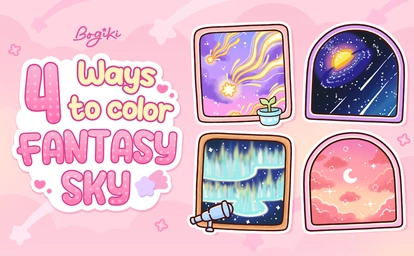
Fantasy skies are where magical effects come alive: soft glow, gentle shimmer, and a dreamy atmosphere that makes the whole page feel like a story. In this guide, you will learn how to draw sky backgrounds using a few cozy fantasy tools like a Glow Map, Nebula Layer, Star Field, Trail Shimmer, and Aura Blend. We will build four styles you can reuse in any fantasy coloring book: a galaxy sky, a northern sky aurora, a dreamy sky twilight, and a shooting star sky full of wishing trails.
These mini techniques are the shortcut to the fantasy effect. Keep them simple and repeat them often.
How to draw sky with a shooting star feels magical because it captures motion, like the sky is quietly making a wish with you. The key detail is Trail Shimmer: tapered lines, soft glow along the edges, and a tiny sparkle finish that makes each trail look like it is still drifting through the air.

If your trails look stiff, curve them slightly and vary the length. Nature rarely repeats the same arc twice.
A galaxy sky is a dreamy choice for fantasy coloring books because it stays beautiful even if your blending is a little imperfect. Start by placing a simple Glow Map, then let your Nebula Layer float in like mist, and finish with a Star Field that feels scattered, alive, and quietly deep.

If you ever wonder how to draw sky so it feels deep, do not add more stars first. Darken the edges slightly. Depth usually comes from contrast, not decoration.
A dreamy sky at twilight is one of the gentlest backgrounds you can create, especially when you want your page to feel soft and calm. How to draw sky is mostly just one smooth gradient and a few cloud shapes that stay light and rounded. For the Soft Bloom, think of highlights as the last touch, added after the shading, so the glow looks natural instead of rushed.

When someone asks how to draw a beautiful sky, the answer is often “leave more quiet space.” A dreamy sky needs room to breathe.
A northern sky aurora feels dreamy because it balances two opposites: crisp ribbon shapes and a soft haze that melts into the night. Aura Blend helps you keep that glow believable. If the background looks slightly darker than you expected, that is perfect, because it gives the aurora room to shine.

If your aurora feels too harsh, soften just one edge with Aura Blend. A single softened edge can make the whole band feel more natural.
If you want a softer, everyday version of these ideas, sky drawings ideas for cozy coloring books will give you calm sky variations that feel simple and comforting. When you are ready to take these techniques into bigger, more detailed scenes, a fantasy coloring book is the nicest place to practice Glow Maps, Nebula Layers, Star Fields, Trail Shimmers, and Aura Blends without pressure. The more pages you try, the more natural how to draw sky becomes, until it feels like a quiet little ritual.
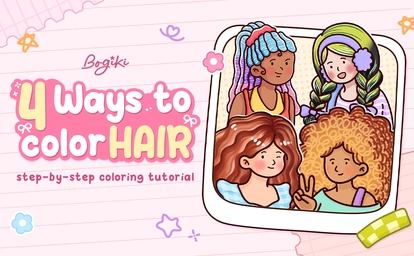
Hair drawing often feels like the hardest part of coloring, especially for beginners working on girl coloring pages. Flat shapes, stiff lines, or missing texture can subtly detract from the joy of drawing hair. In this guide, we explore 4 easy hair drawing ideas, from soft curls to flowing waves, braids, and locs. Each hair drawing style comes with clear step-by-step guidance to help your hair drawing feel natural, expressive, and beautifully balanced.
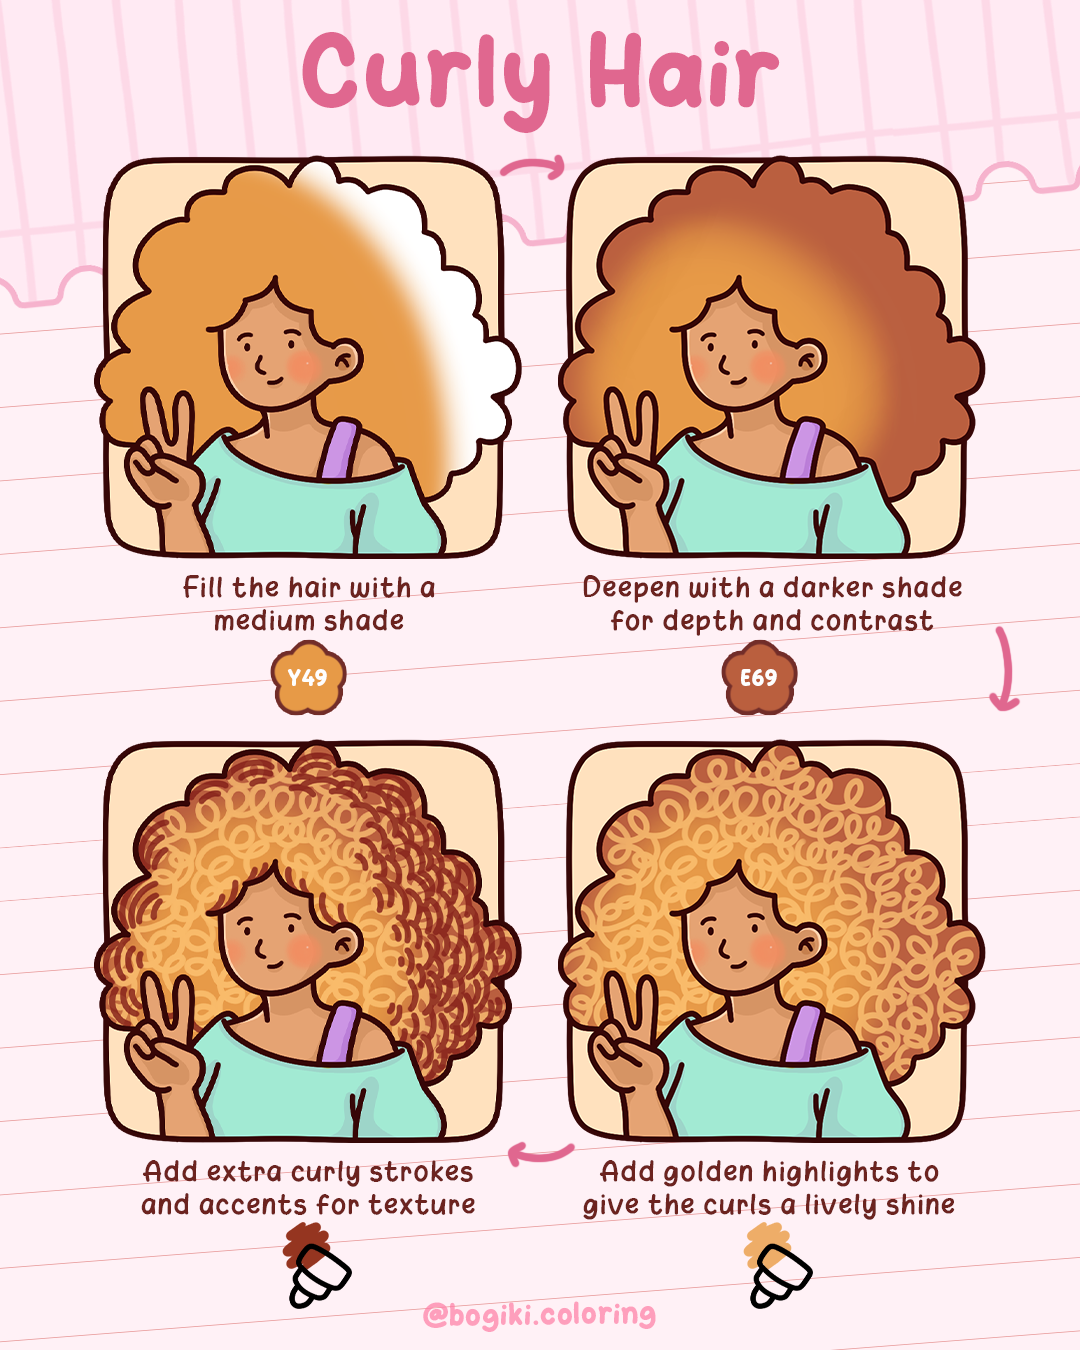
Curly hair instantly brings warmth and playful energy to a character. It feels lively, friendly, and a little nostalgic, making it perfect for girl coloring pages with a joyful or expressive mood. What makes curls beautiful is not precision, but volume and rhythm. Instead of focusing on individual strands, you build soft shapes, gentle contrast, and light that dances across the surface. When beginners search for how to draw curly hair, this approach helps them understand that curls grow from layers and flow, not from drawing every single curl.
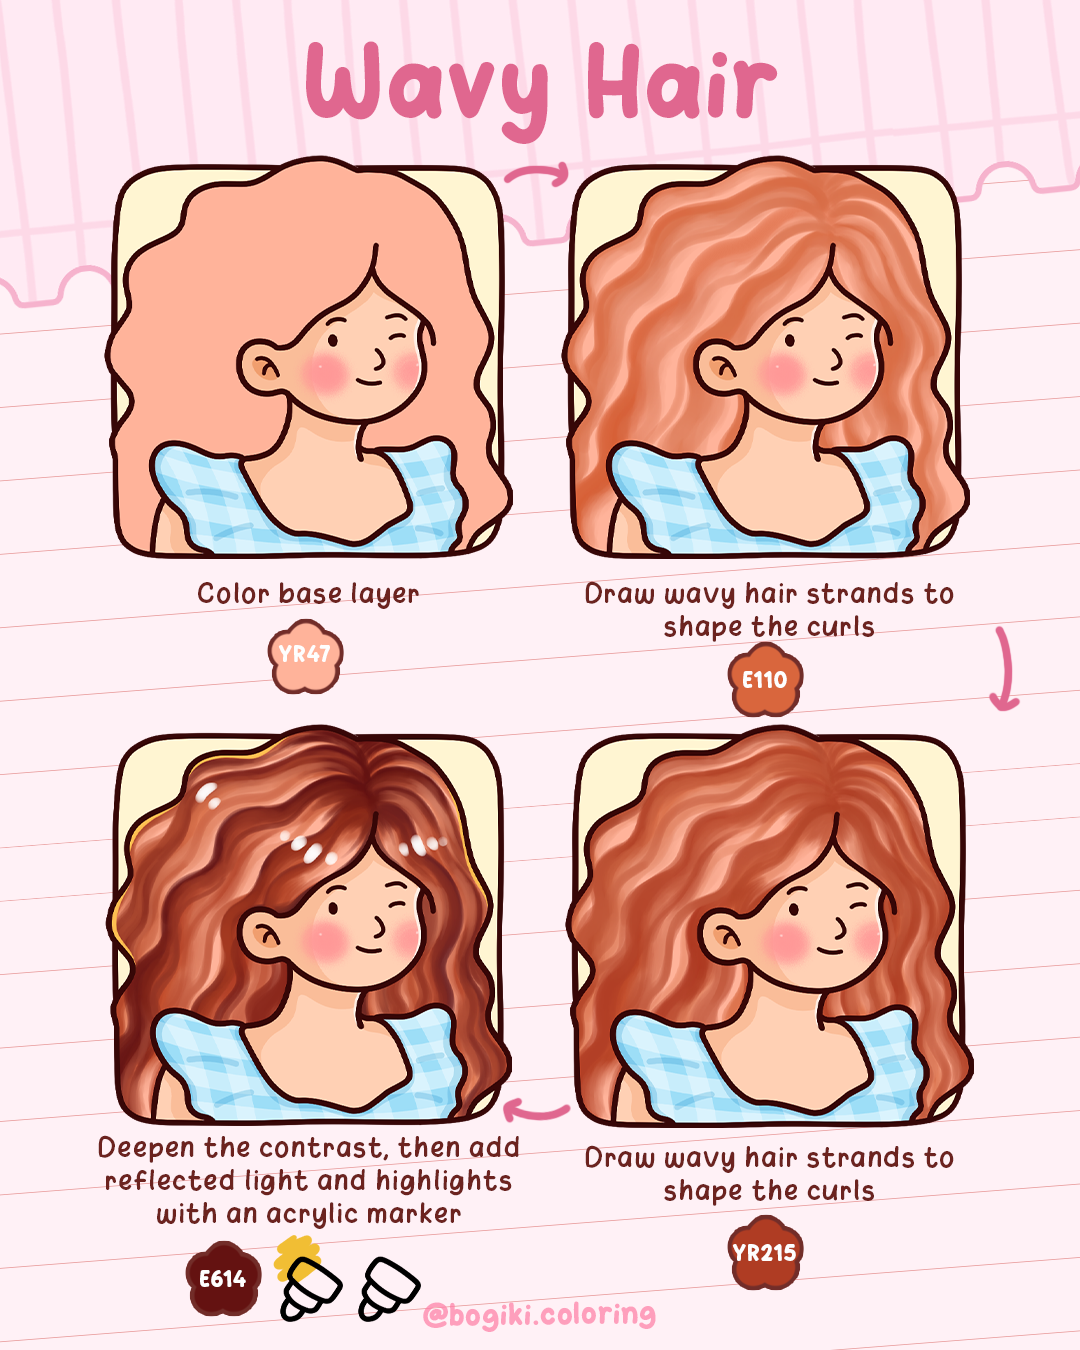
Wavy hair feels like a quiet movement, soft and effortless, as if a gentle breeze is always passing through it. This style works beautifully for calm illustrations, feminine characters, or scenes that need a sense of ease and balance. The charm of wavy hair comes from its natural flow and subtle depth, where each curve supports the next. For anyone learning how to draw a wavy hairstyle, focusing on smooth direction first, then adding contrast and reflected light, helps the hair look polished without feeling stiff or overworked.
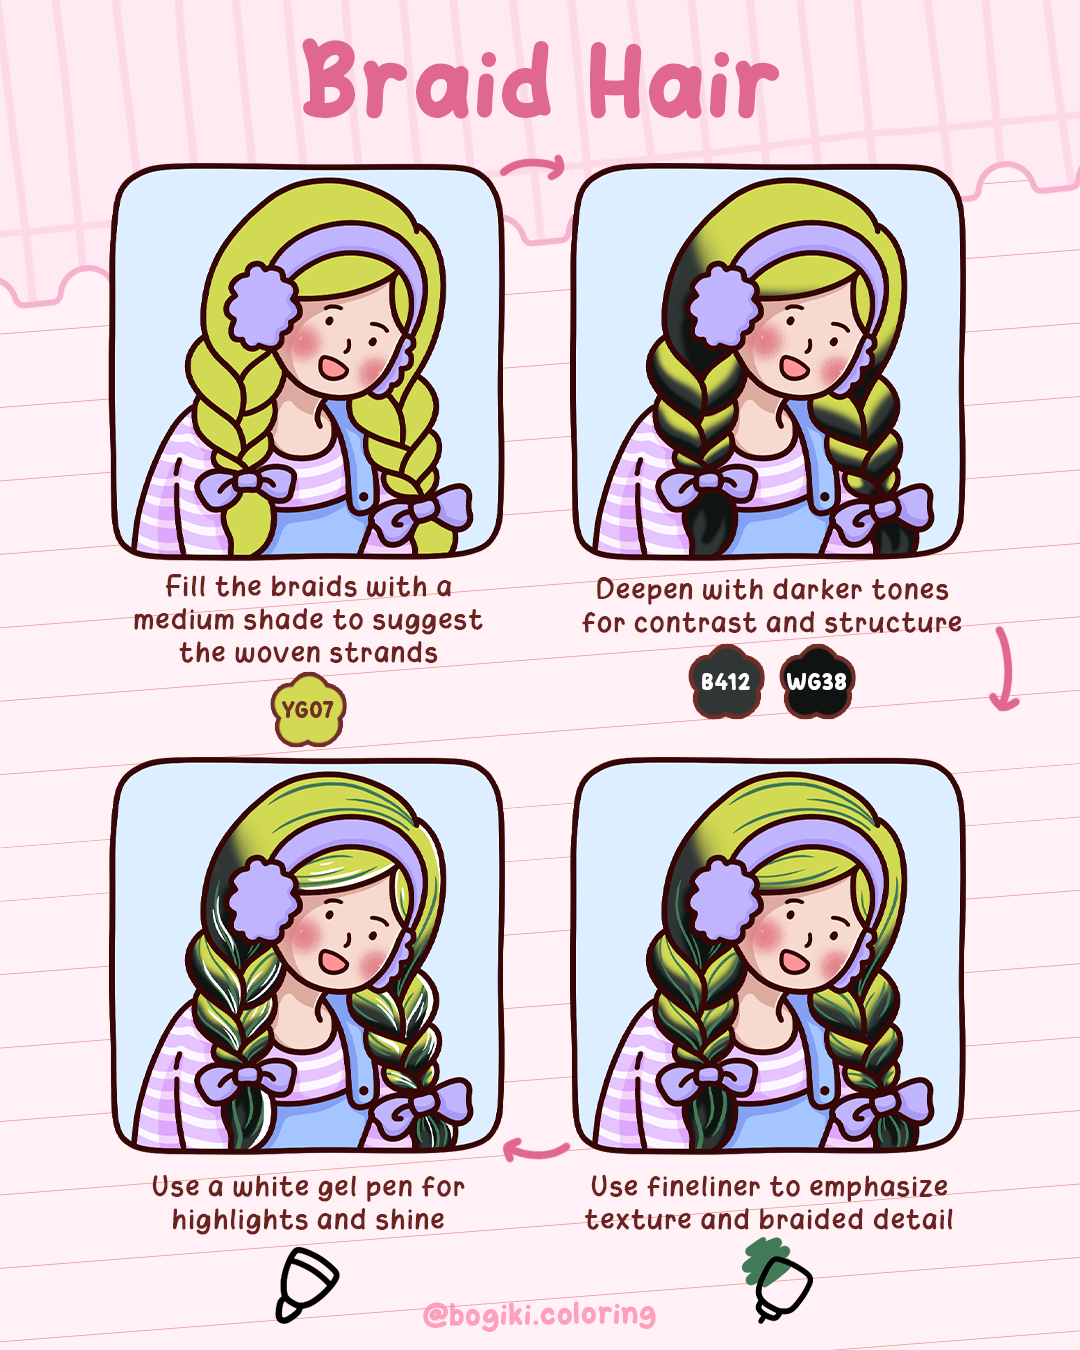
Braided hair carries a sense of care and intention. It feels neat, cozy, and slightly storybook-like, often reminding us of school mornings, quiet routines, or gentle outdoor moments. This hairstyle is especially suitable for girl coloring pages with detailed outfits, as braids bring structure without overpowering the illustration. When people look for how to draw braided hair, what they really need is clarity: understanding where strands overlap, where shadows sit, and how light touches the raised sections. With a steady base and thoughtful highlights, braids become soft, readable, and deeply satisfying to color.
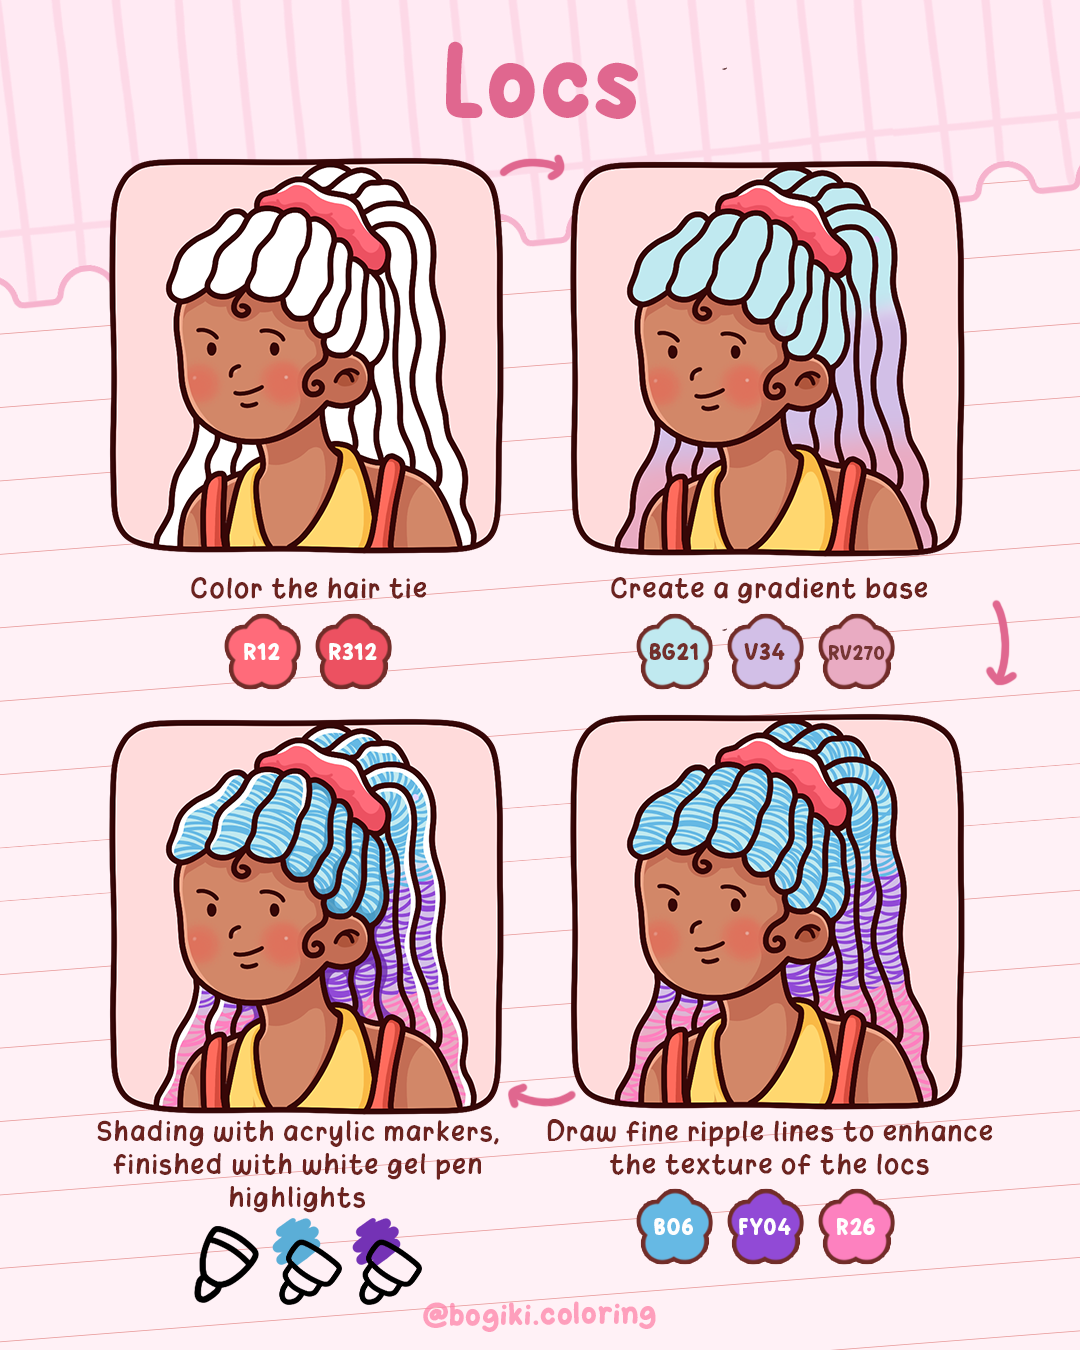
Locs have a strong yet relaxed presence, full of rhythm and individuality. This hairstyle fits perfectly with characters that feel confident, creative, or a little free-spirited. Rather than focusing on complexity, locs rely on repetition, texture, and gentle variation to feel alive. Each loc holds its own shape, but together they create a flowing pattern across the page. For beginners exploring how to draw locs hair, learning to balance gradient, shading, and fine texture lines helps the hair feel dimensional while keeping the process approachable and expressive.
Hair drawing often feels overwhelming when approached all at once. By breaking each style into clear steps, hair drawing becomes calmer, more predictable, and far more enjoyable. Whether you are learning how to draw hair easily, how to draw simple hair, or practicing new hair drawing ideas, the key lies in layering, contrast, and patience.
Each hairstyle in this guide shows that drawing the hair is less about perfection and more about understanding flow and structure. With practice, hair drawing slowly becomes a relaxing rhythm rather than a challenge.
These four hair drawing ideas are a gentle starting point for exploring texture, flow, and expression. As you practice curls, braids, and locs, girl coloring pages become a calm space where hair drawing feels natural and enjoyable.
For quieter, more reflective moments, Self-love Coloring Book offers thoughtfully designed pages where these techniques can be applied with ease. And if you enjoy cozy scenes filled with friendship and everyday joy, Bestie Coloring Book is a lovely place to let hair drawing feel playful and relaxed. Take your time, trust your hand, and let hair drawing grow page by page.
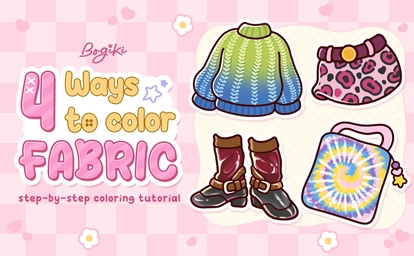
Fabric coloring is one of those little skills that quietly changes everything. The same sweater can feel flat or fluffy. The same skirt can feel playful or polished just by the way you place a few soft layers, shadows, and highlights. In this guide, you’ll explore 4 fabric coloring ideas you can use right away in cute and cozy coloring pages: knit, leopard print, leather boots, and tie dye.
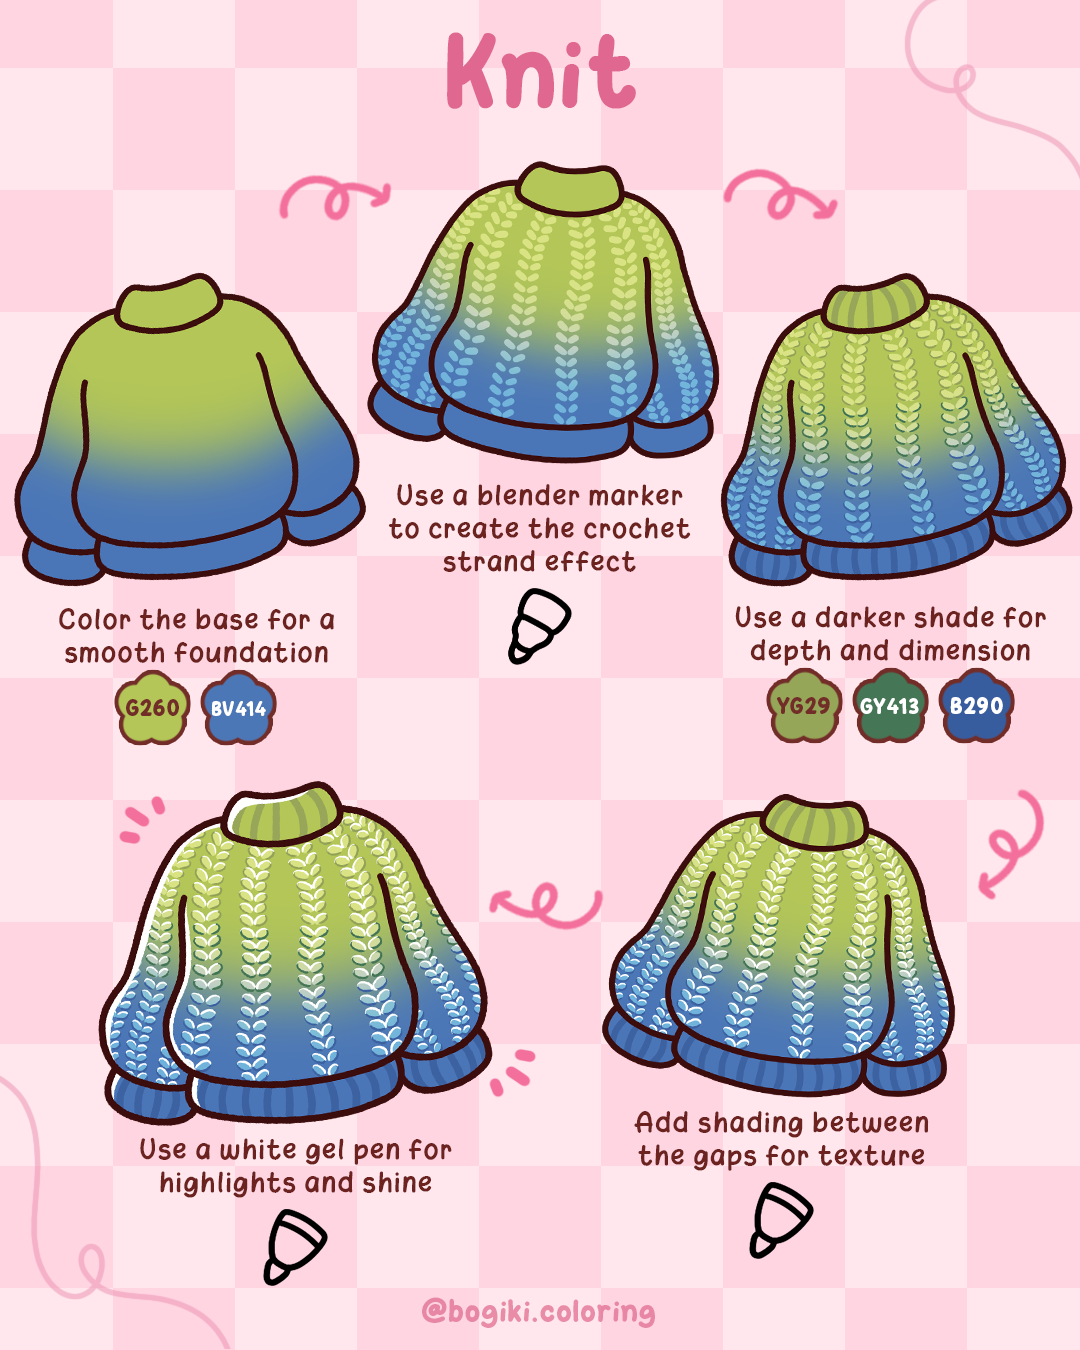
How to draw knit fabric carries a quiet sense of warmth. It brings to mind soft sweaters, slow mornings, and the comfort of familiar textures. In coloring pages, knit doesn’t need to feel detailed or exact. This approach focuses on gentle rhythm and softness, making it an easy, forgiving way to explore fabric coloring while keeping the mood calm and cozy.
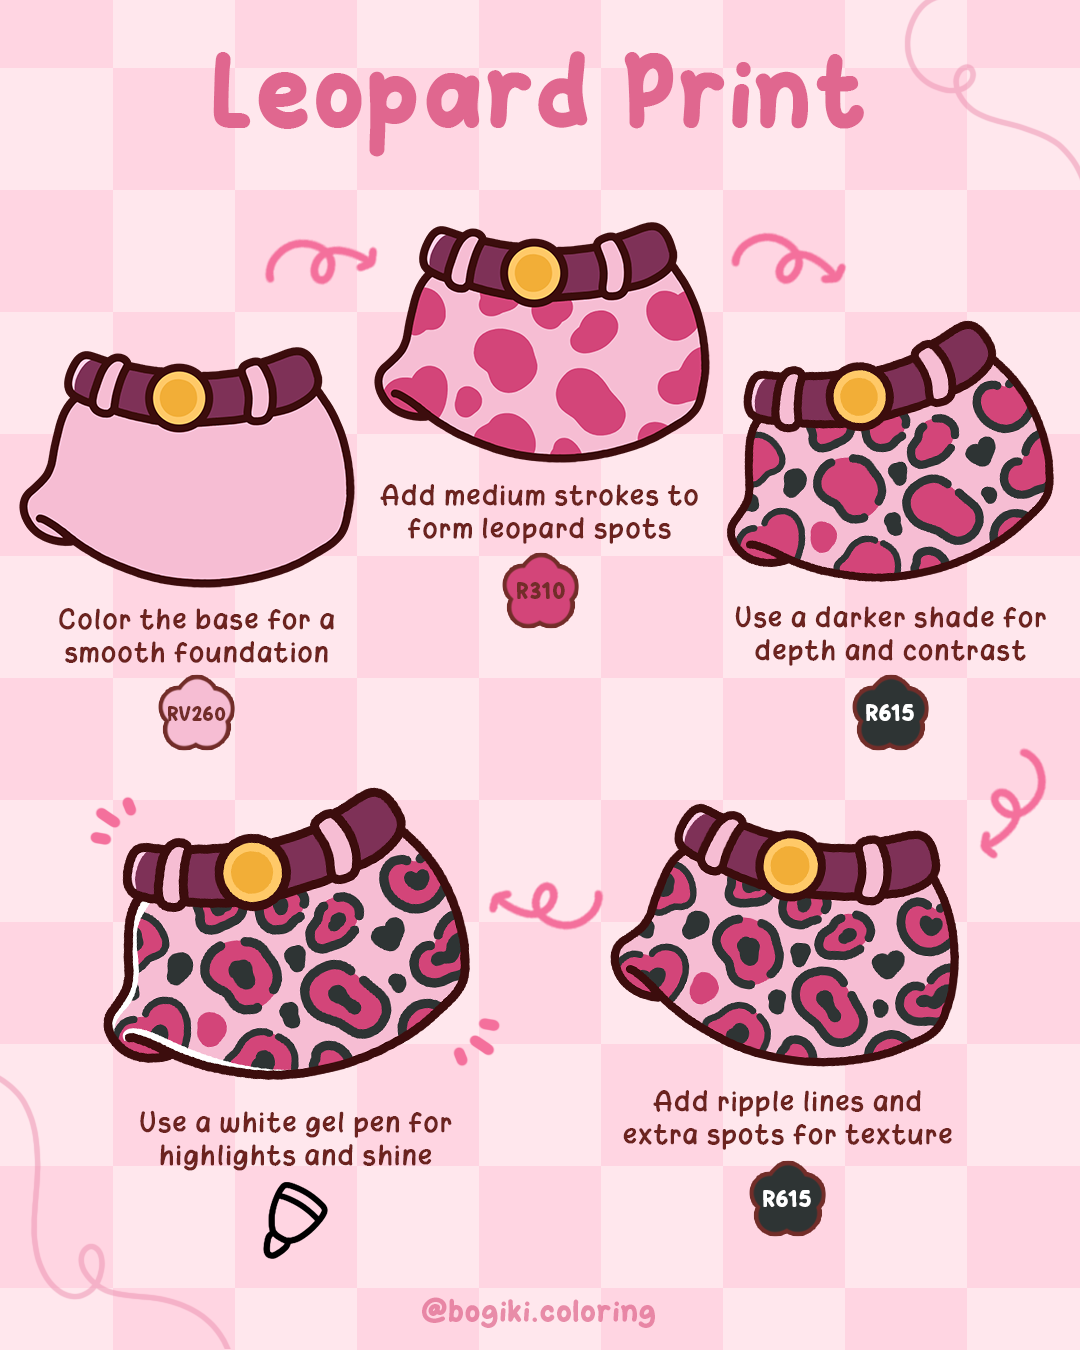
Leopard print feels playful rather than perfect. Its beauty comes from irregular shapes and natural movement, not strict symmetry. In cozy coloring pages, this way to draw leopard print allows patterns to feel lively without becoming overwhelming. By focusing on balance and contrast, leopard print becomes a relaxed way to add personality and charm to fabric coloring.
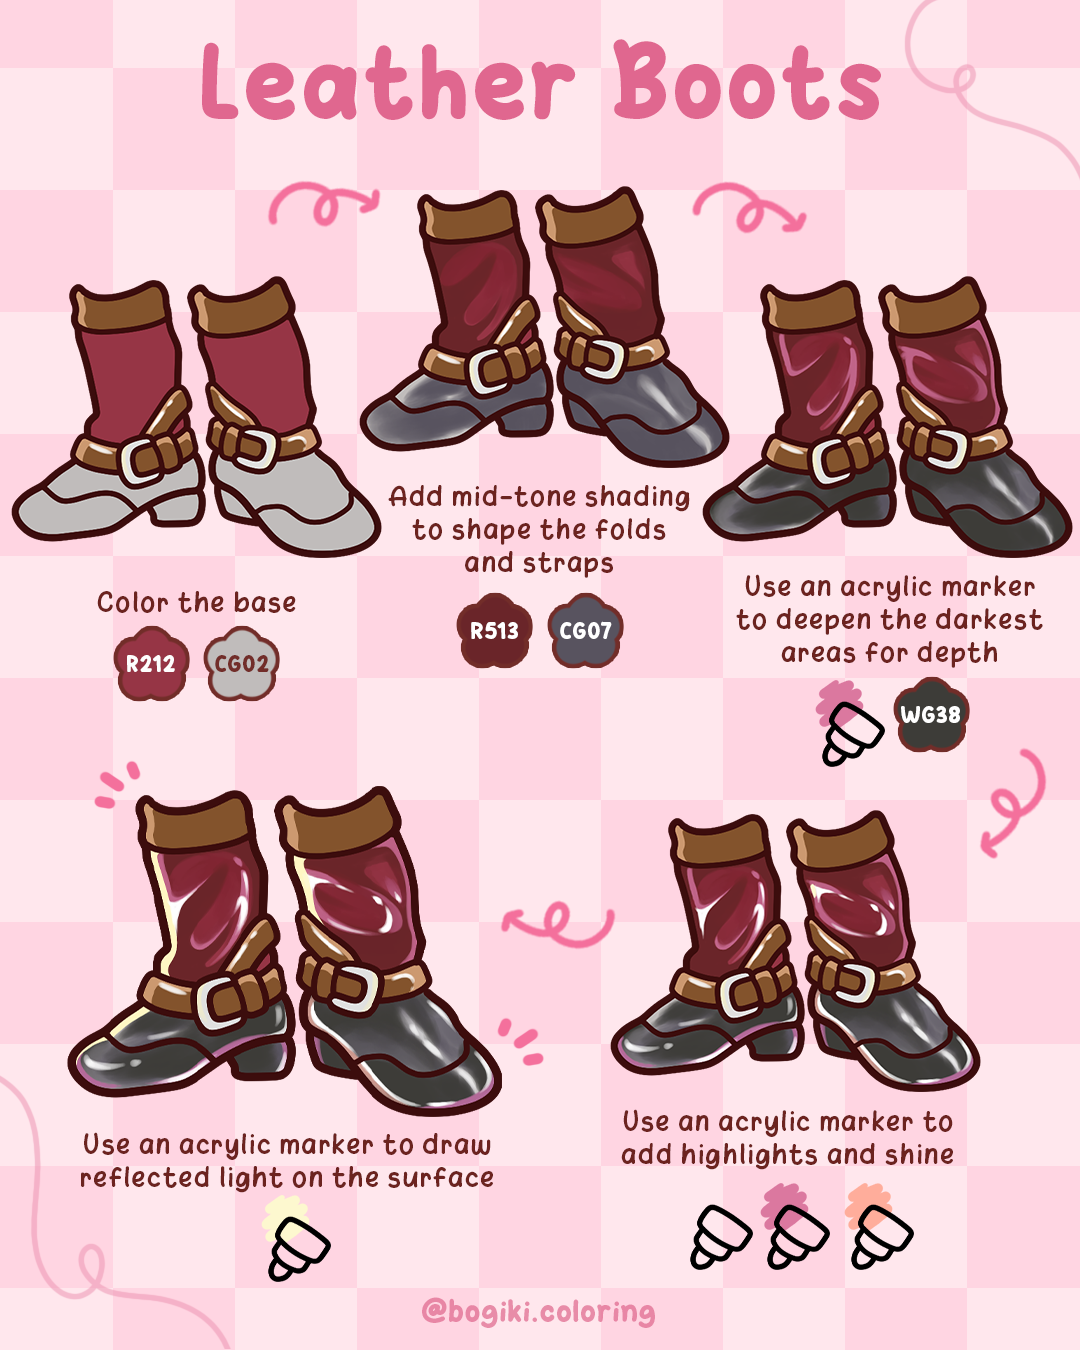
Leather boots feel grounded and steady. Their shape comes from subtle folds, soft shadows, and quiet shine formed through wear and movement. When coloring leather, gentle contrast matters more than sharp detail. How to draw leather boots, helps boots feel smooth and dimensional while keeping the overall look warm, calm, and cohesive.
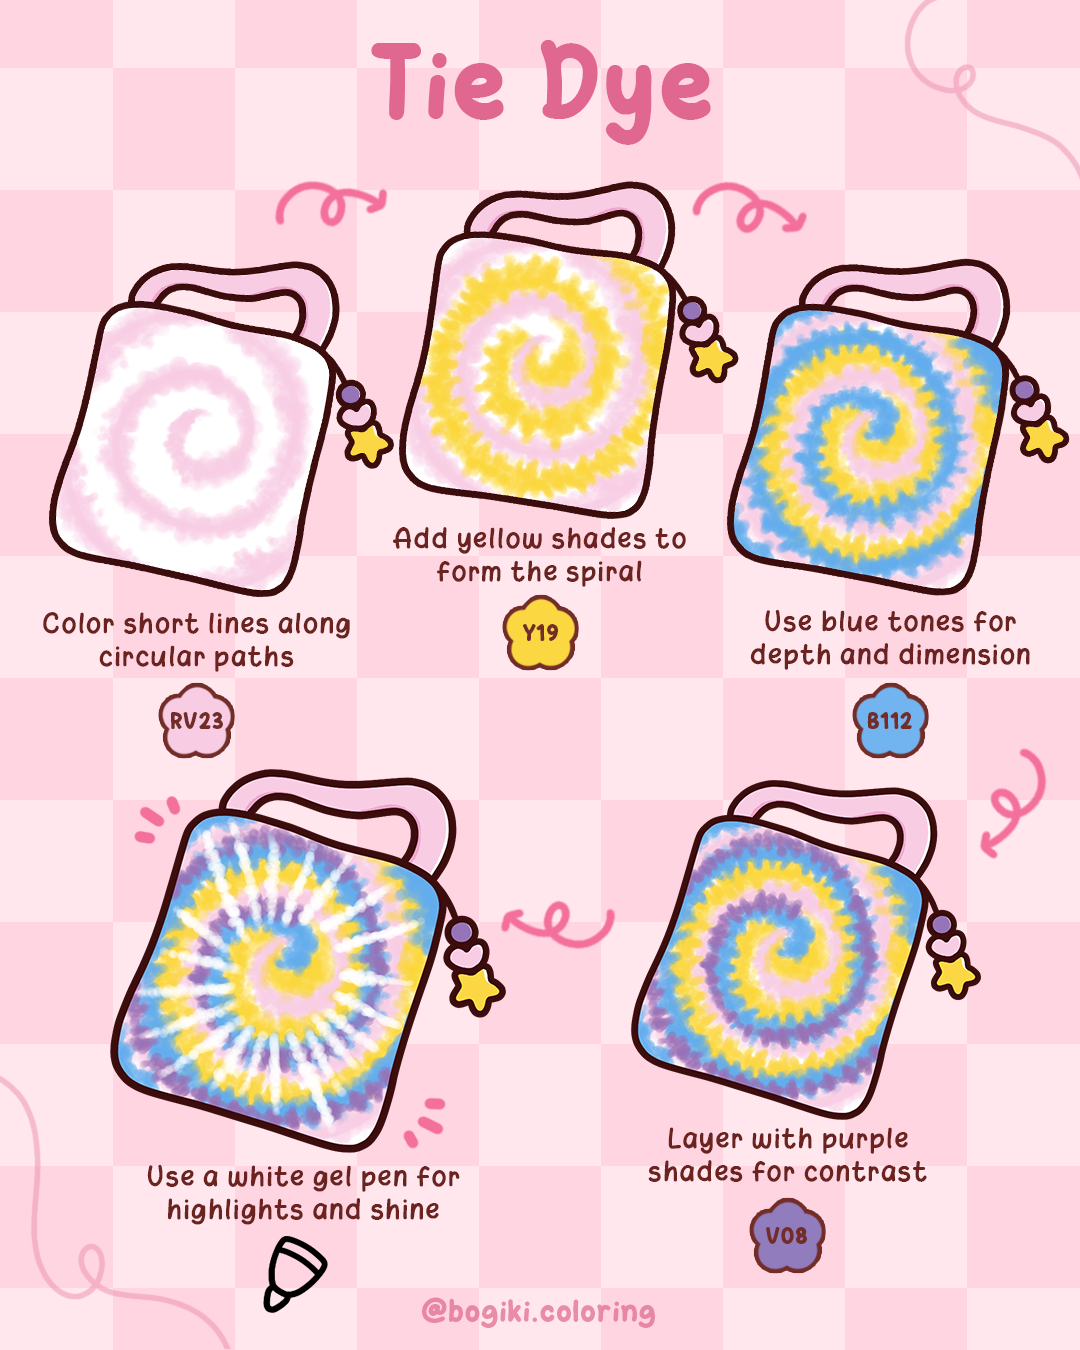
How to draw a tie dye feels light, flowing, and full of movement. Soft spirals and layered colors give the fabric a sense of freedom rather than control. In coloring pages, this style works best when kept loose and imperfect. Gradual layering allows tie-dye patterns to feel dreamy, playful, and naturally expressive.
4 fabric coloring ideas for cute and cozy coloring pages is just one gentle part of a wider coloring journey. As you practice coloring knit textures, playful patterns, and soft fabric details, you’ll begin to see how these ideas naturally connect across many cozy scenes and outfits.
These fabric coloring techniques can be explored further through 5 winter clothes coloring ideas, where textures come together in complete seasonal looks. You can also apply them inside the Self-Love coloring book, a calm space designed for slow coloring, gentle layering, and quiet creative moments. Let each page guide you forward, one soft fabric and one cozy step at a time.
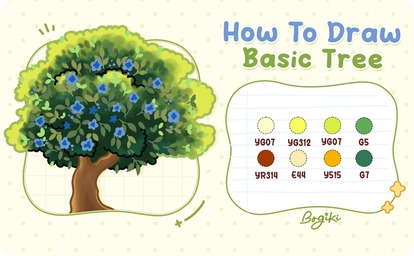
Some drawings invite you to slow down, and trees are one of them. An easy tree drawing doesn’t ask for precision or perfect lines. It simply offers a quiet space where soft colors, gentle layers, and steady strokes come together naturally on the page.
In this tutorial, we’ll explore a calm, beginner-friendly approach to creating a tree drawing that is both easy and beautiful, without pressure or complicated techniques. Whether you’re starting with a basic tree drawing or returning to drawing as a way to relax, this process focuses on feeling rather than perfection. Layer by layer, your tree will grow into something warm, balanced, and quietly comforting, just like the slow rhythm of coloring itself.
Before you begin, prepare a small, comfortable set of tools. Keeping your palette limited helps maintain a soft and cohesive look, which is ideal when learning how to draw a basic tree.
You’ll need:
This selection works well for both basic drawing of a tree style and more expressive, layered tree canopies.
Begin by lightly coloring the tree canopy with YG07. Use relaxed, circular strokes, allowing the color to sit gently on the page. As you move upward, gradually blend in YG312 to create subtle depth.
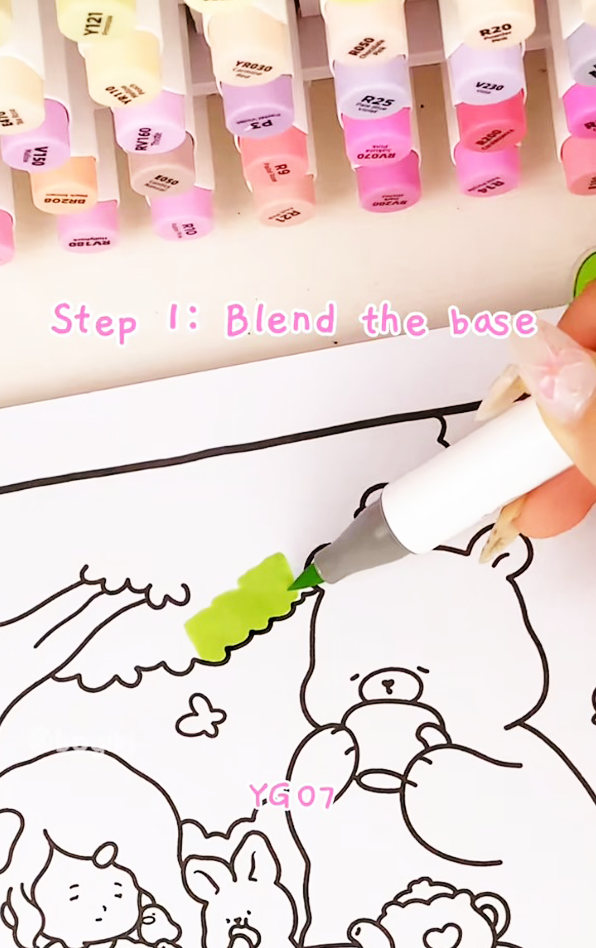
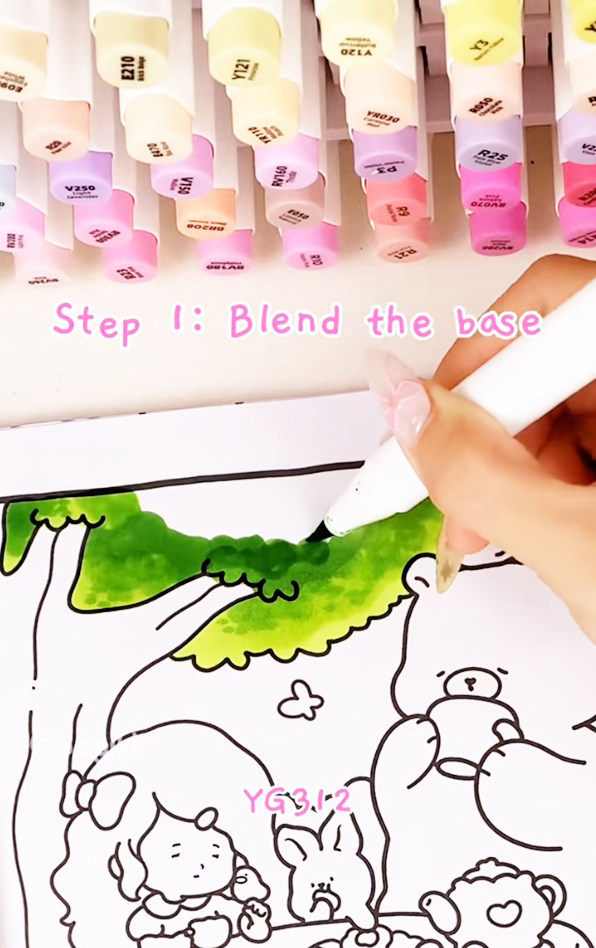
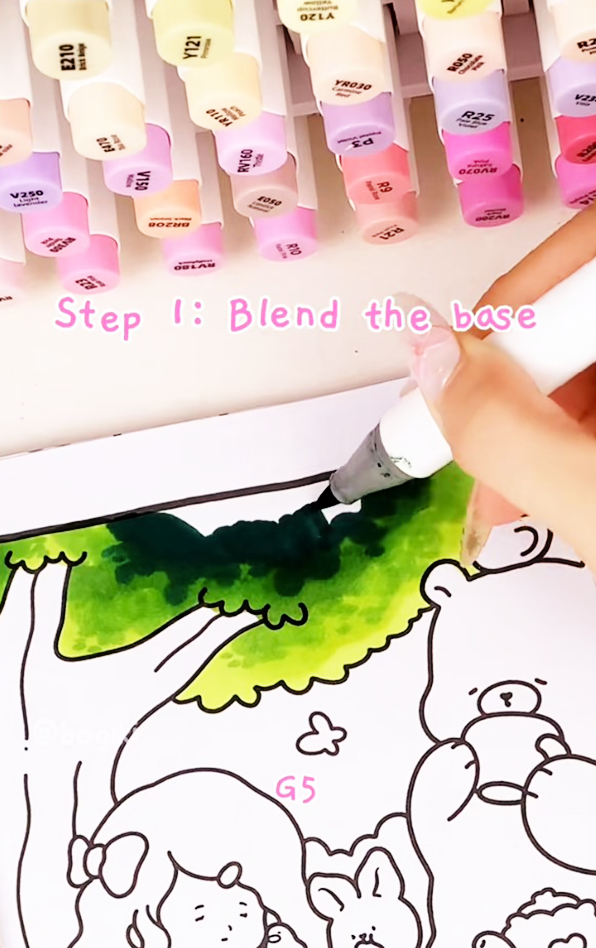
Near the top of the canopy, introduce G5, keeping your pressure light so the colors merge naturally. To add quite a contrast, place a few shadow accents using G7. These darker touches help the canopy feel rounded without overwhelming the softness. This approach is ideal when learning how to draw a tree easily, as it focuses on blending rather than strict outlines.
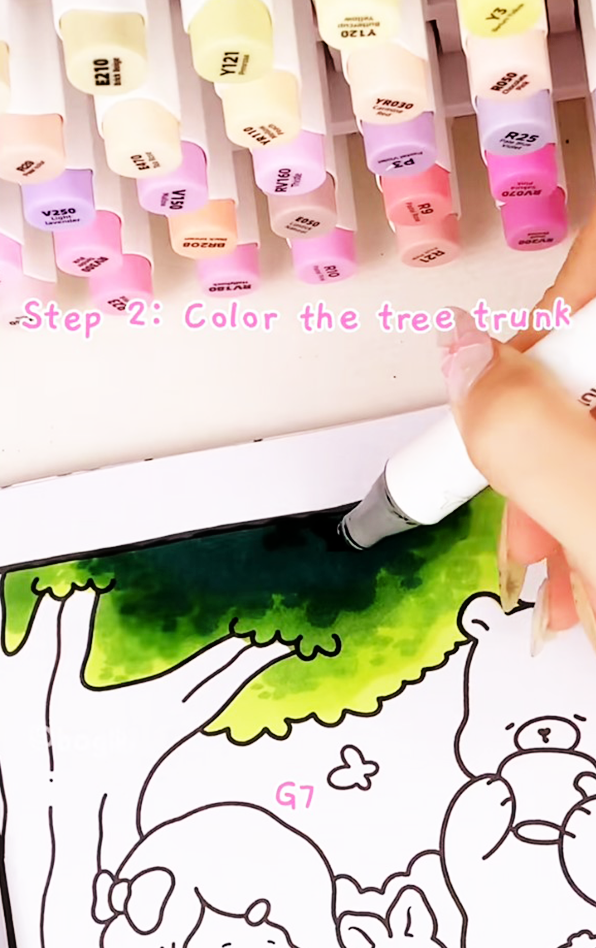
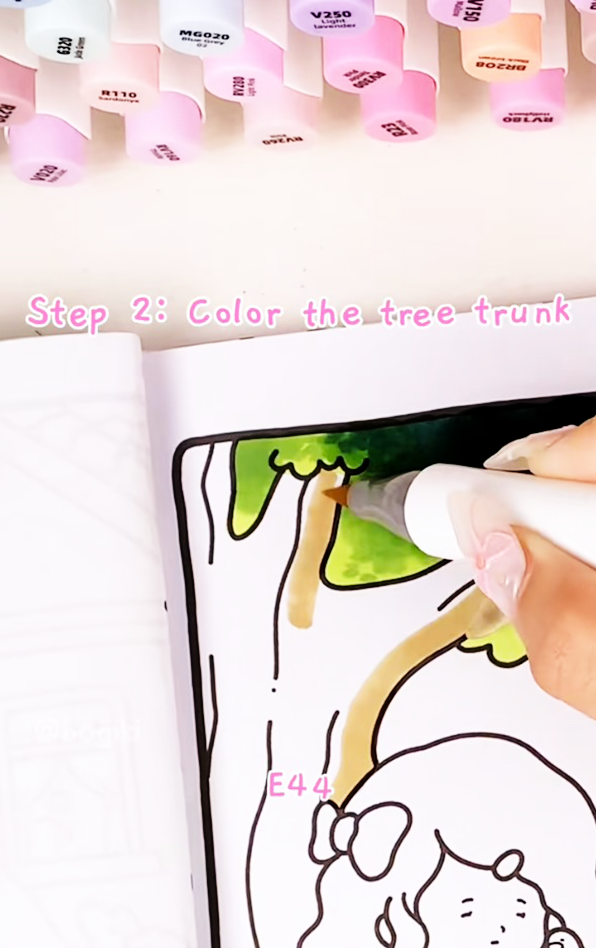
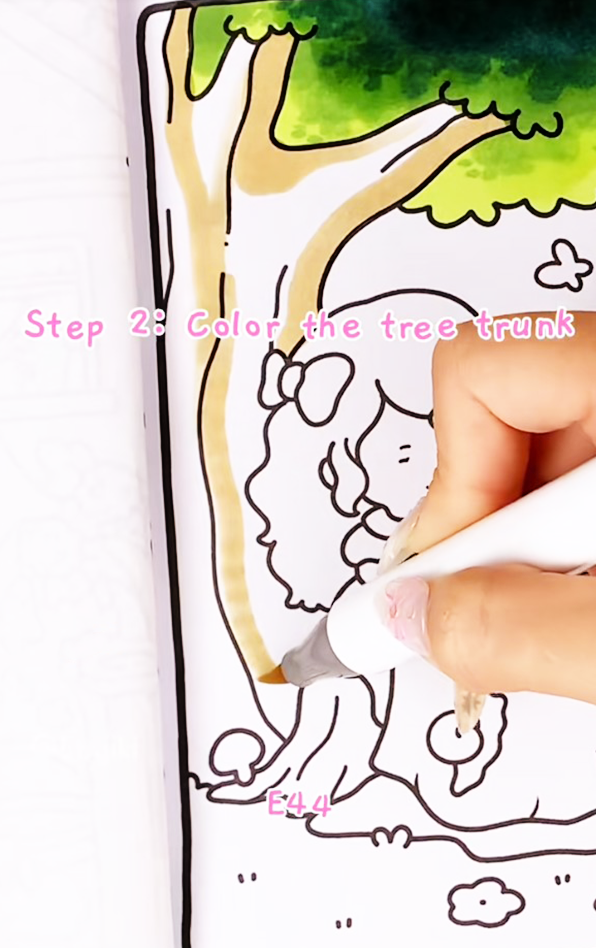
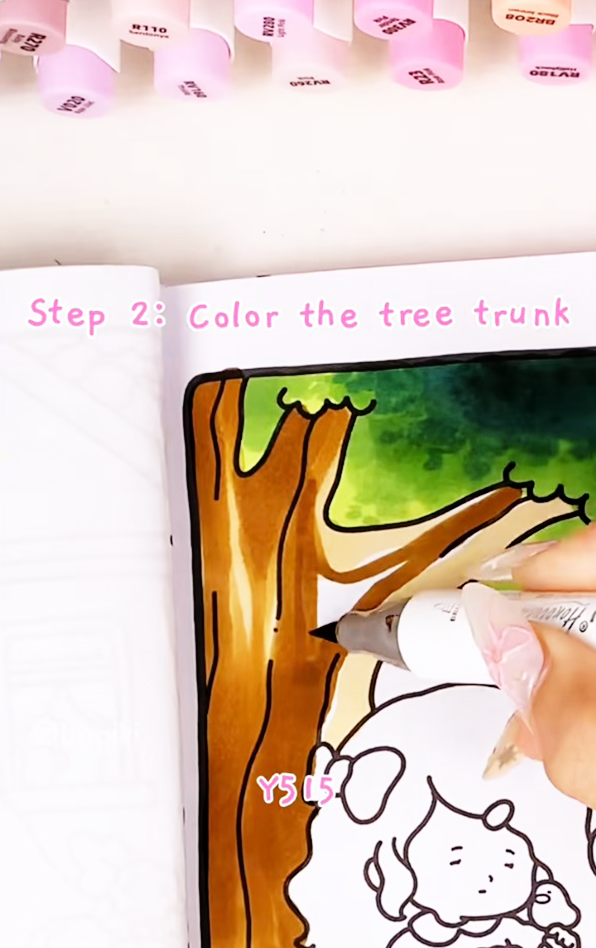
For the trunk, apply a base layer of light brown E44. Let the color flow vertically, following the natural direction of the trunk. To suggest depth and uneven texture, layer Y515 into the darker areas, especially where the trunk meets the canopy.
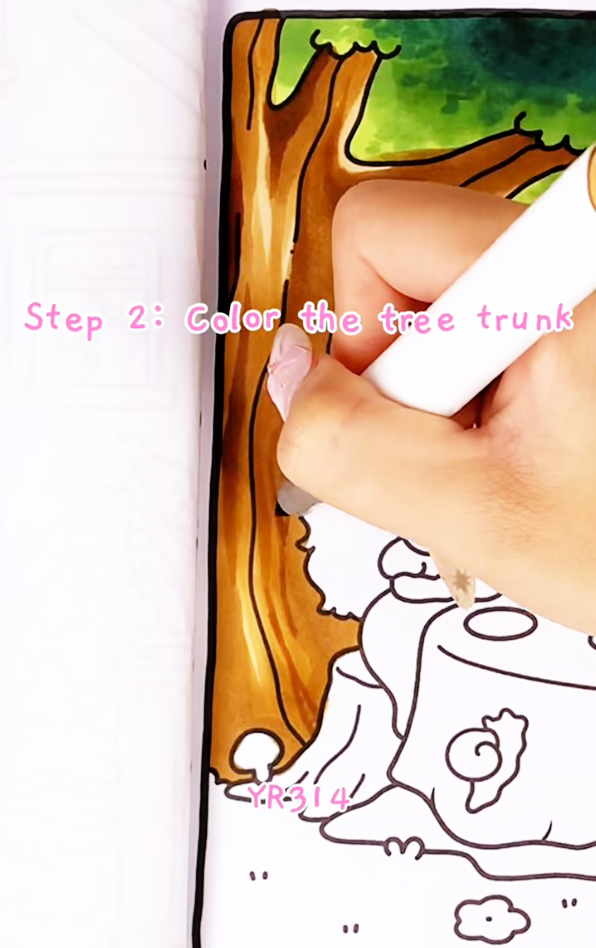
Finally, use YR314 sparingly to create gentle grooves, curves, and shadowed edges. This step transforms a basic drawing of a tree into something more organic, while still remaining beginner-friendly and approachable.
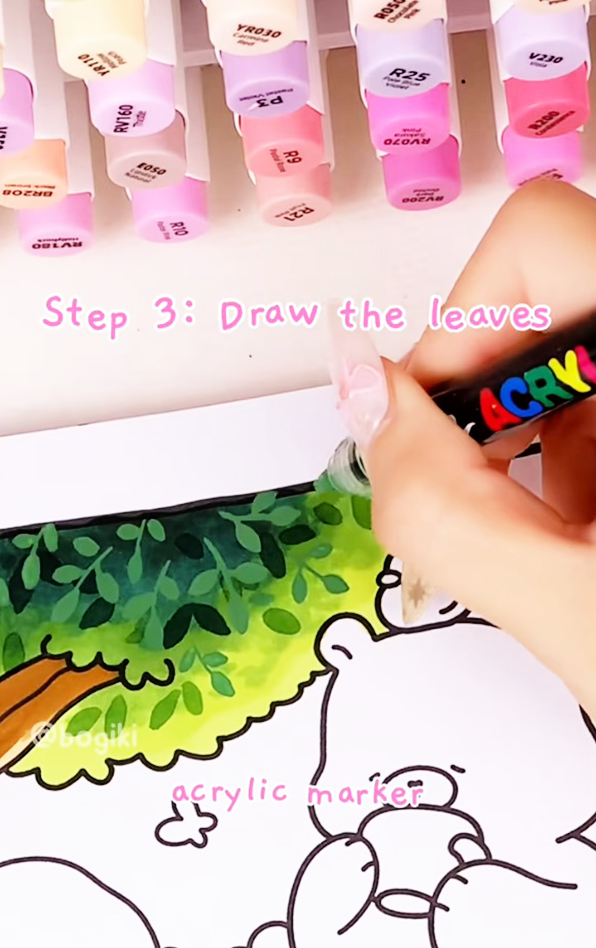
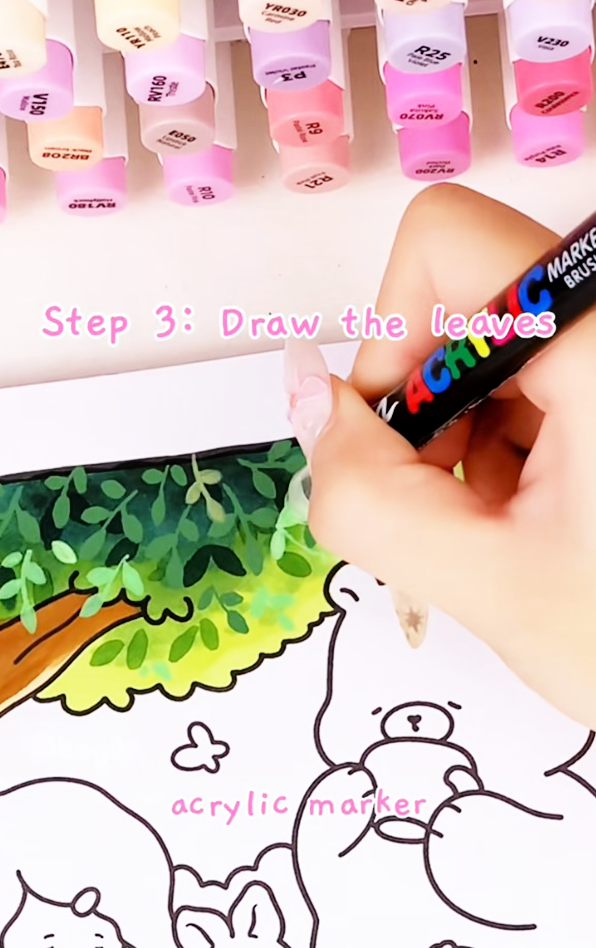
Now comes the most expressive part of the process. Using acrylic markers in various shades of green, draw small leaf clusters that overlap and intertwine. Let the leaves vary in size and direction. This layering technique creates movement and balance, even in trees, drawing in easy styles.
Avoid filling every space. Leaving small gaps allows the canopy to breathe and keeps the drawing light. This step is especially helpful if you’re practicing how to draw trees easily without making the illustration feel crowded.
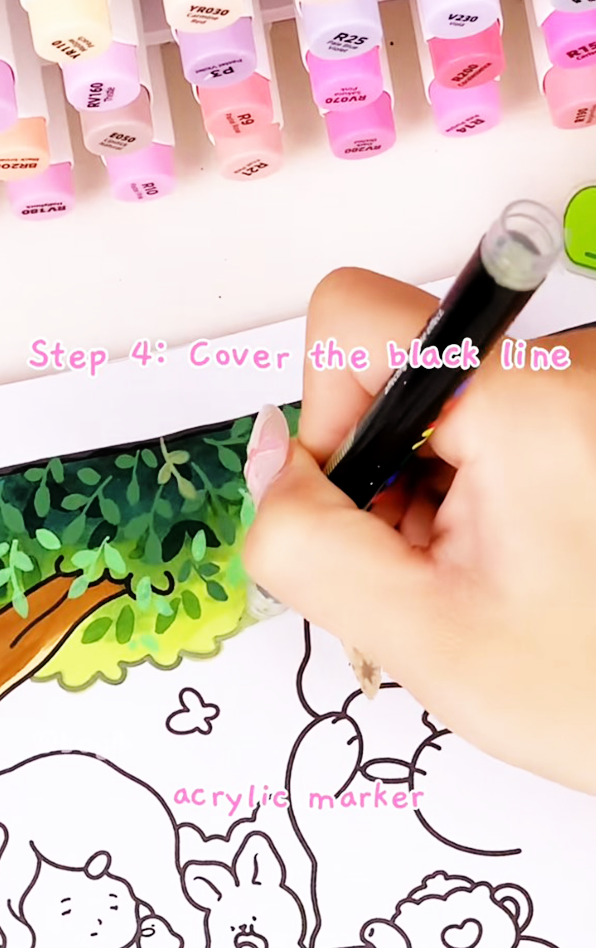
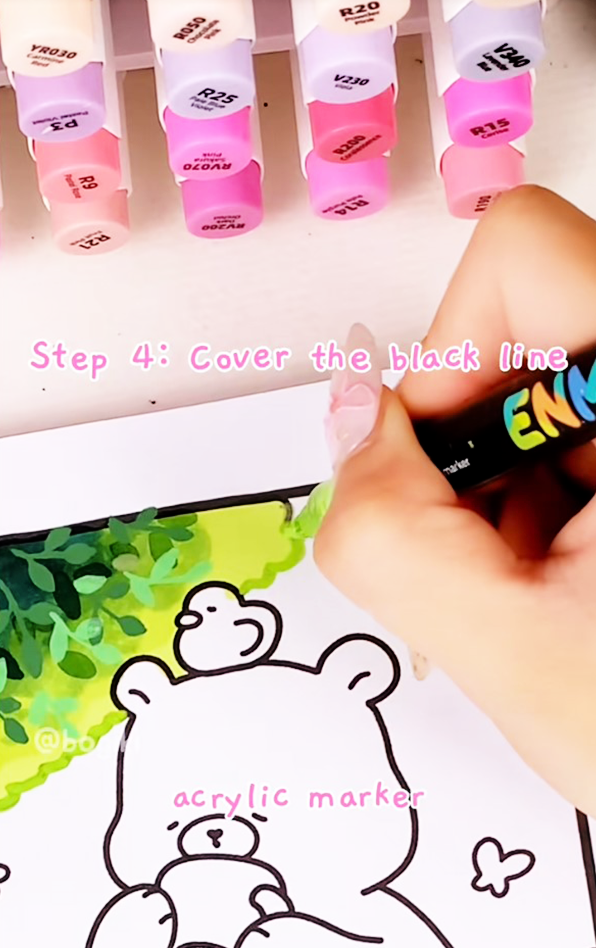
Once the leaf layers feel complete, use an acrylic marker to softly cover or blend the backline of the canopy. This helps unify the drawing and removes any harsh edges left from earlier steps.
The goal isn’t perfection, but cohesion. This technique is often overlooked in tree drawing basic approaches, yet it makes a significant difference in how calm and finished the tree feels.
To bring warmth and charm to your tree, add flowers across the canopy using a light purple acrylic marker. Place them lightly, allowing the greenery to remain the main focus. Then, use a darker purple to color the flower centers, creating a gentle contrast.
These small floral details elevate an easy-to-draw tree into a scene that feels peaceful and quietly joyful.
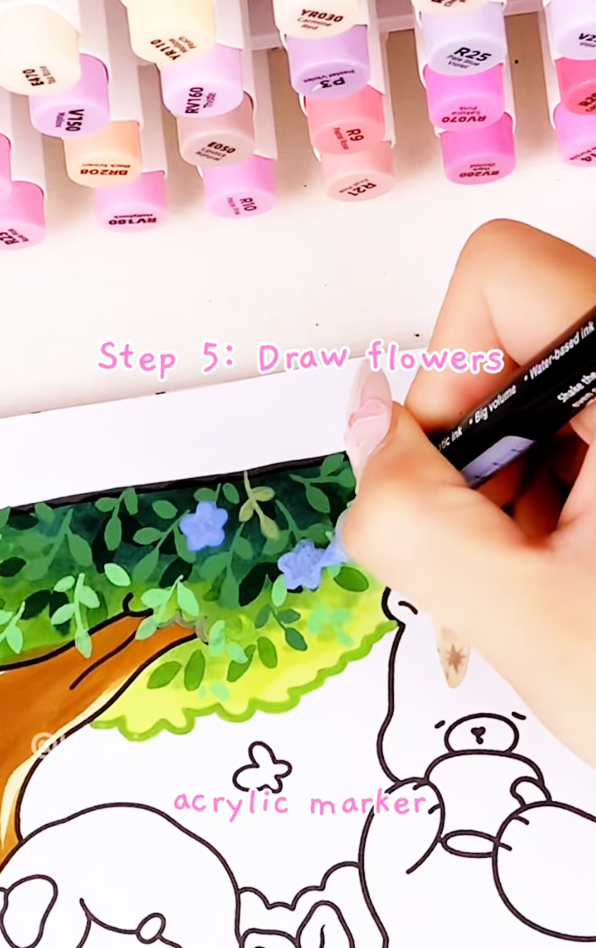
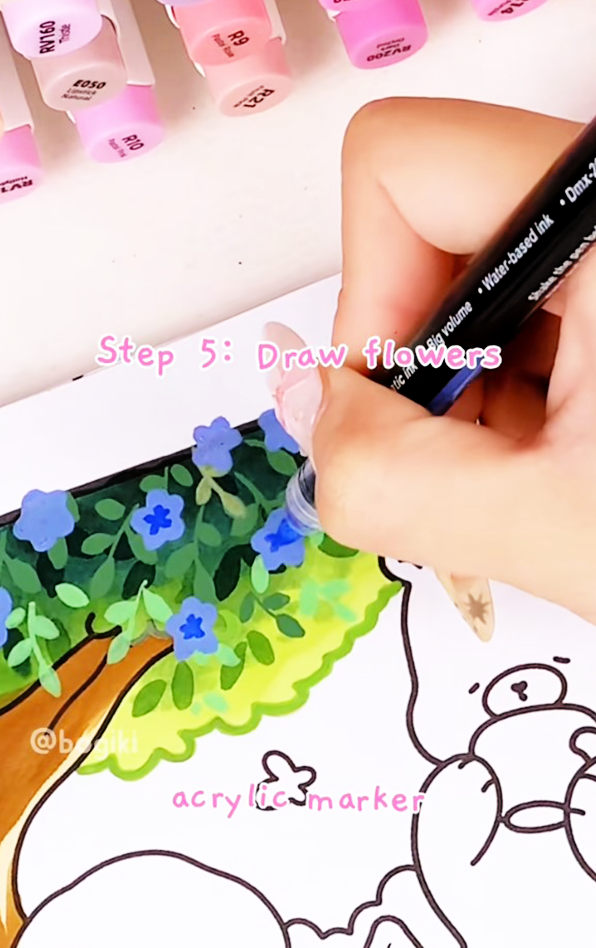
These tips apply whether you’re following the easy methods or exploring your own variations.
Once your tree feels complete, you might notice how naturally it wants to belong to a larger scene. Trees rarely stand alone; they’re often surrounded by soft grass, quiet flowers, and small details that make a page feel alive. If you’d like to continue building that gentle atmosphere, how to draw grass and flowers is a lovely place to begin, helping you add calm ground layers that sit effortlessly beneath your trees. And when you’re ready to refine the mood even further, 4 easy ways to draw a tree offers simple adjustments that can transform a drawing without changing its original spirit.
For moments when you’d rather color than plan, the Hidden Garden coloring book brings together trees, flowers, and quiet outdoor corners into peaceful scenes designed for slow, mindful coloring. Let your drawings grow naturally, one small detail at a time, without rushing, without pressure, just following the calm rhythm that feels right for you.
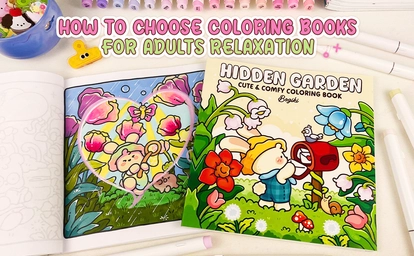
In today’s busy world, finding a truly relaxing moment can be a challenge. This is where coloring books for adults relaxation come to the rescue: helping you pause, focus on the present, and enjoy quiet, creative moments. No longer just a child’s pastime, relaxing coloring books for adults have become a favorite tool for mindfulness, stress relief, and gentle creative exploration. From simple, charming designs to intricate patterns, each adult coloring book for relaxation offers a chance to unwind, reduce stress, and spark imagination in a cozy, comforting way.
This guide will help you explore the benefits of relaxing coloring books for adults, how to choose the perfect one, and highlight some delightful options from Bogiki that make every coloring session a soothing escape.
Before picking a book, it’s important to understand why adult coloring books for relaxation work so well:
Selecting the right relaxing adult coloring book can feel overwhelming, so we’ve broken it down into key factors that impact enjoyment and stress relief
The design complexity of a book greatly affects your relaxation experience:
Simple Designs: Perfect for beginners or anyone seeking quick, soothing sessions. Large shapes and open spaces allow for easy coloring and immediate satisfaction.
Medium-Level Designs: Offer more detail while remaining relaxing. Patterns like floral motifs, daily life scenes, or repeated geometric designs strike a satisfying balance.
Intricate & Detailed Designs: Ideal for those seeking deep mindfulness, featuring mandalas, detailed nature illustrations, or whimsical fantasy scenes that invite patience and focus.
The theme sets the tone for your coloring experience. Bogiki’s collections are thoughtfully designed to suit different moods, each bringing a cozy, playful, or mindful atmosphere.
These pages invite you into simple, charming illustrations that are easy to color and visually satisfying. Each design encourages you to pause, breathe, and enjoy a calm, creative moment. With clear lines and open spaces, coloring becomes relaxing, enjoyable, and perfect for beginners.
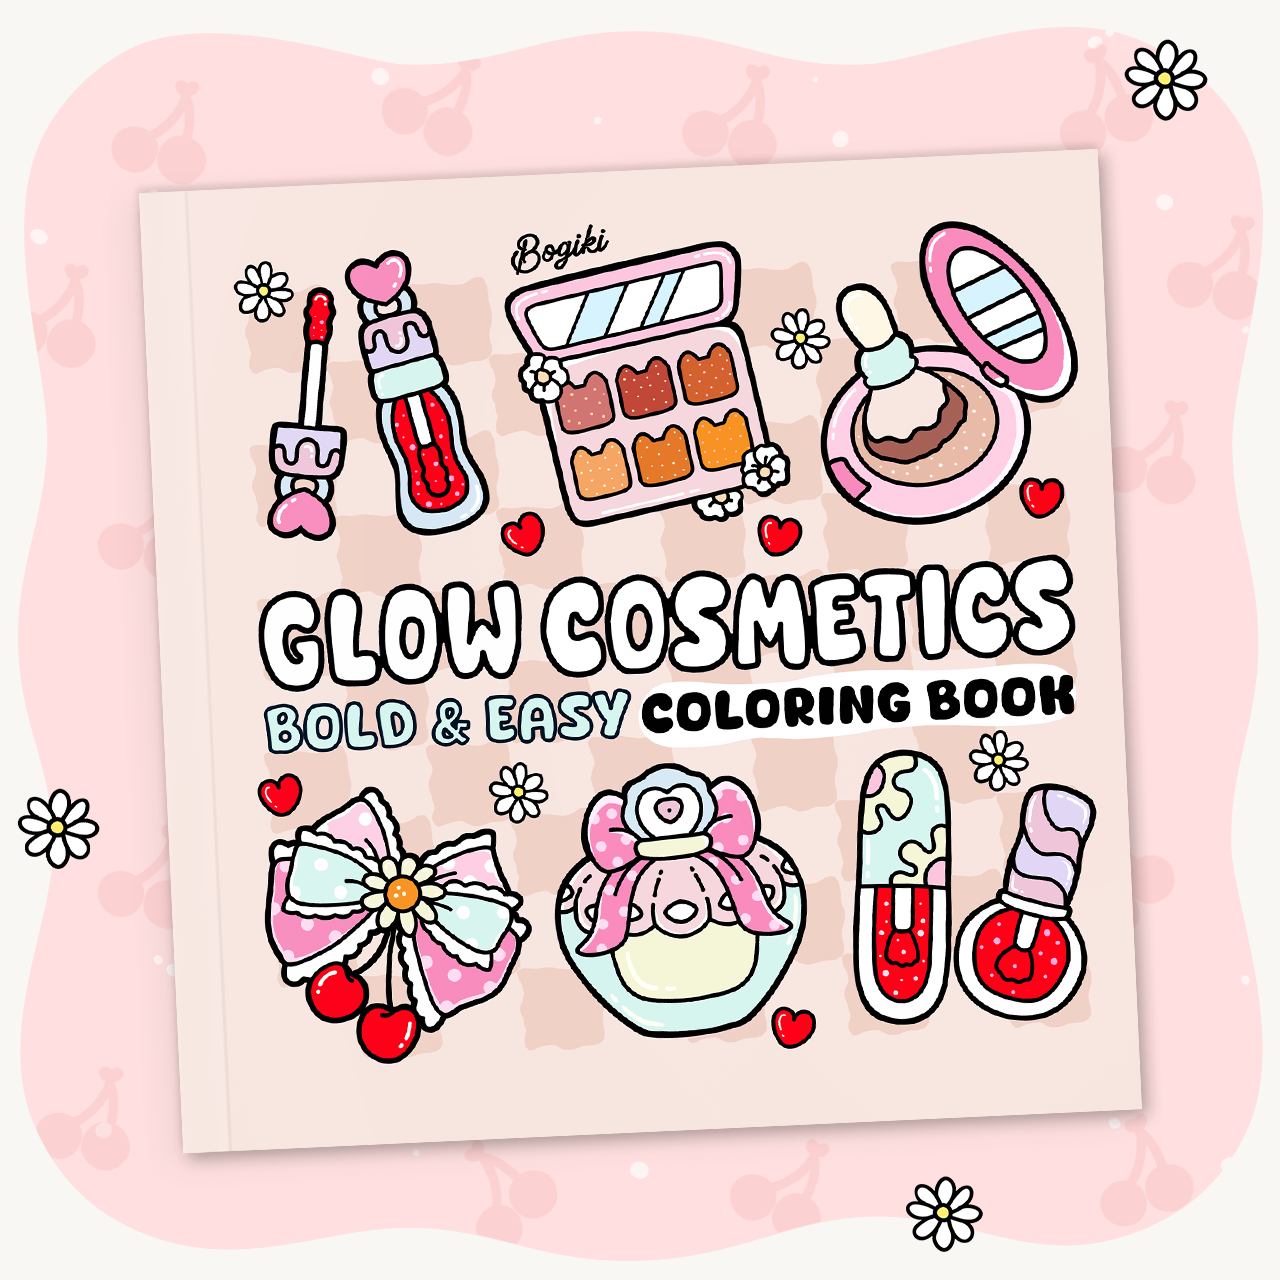
Glow Cosmetics Coloring Book |
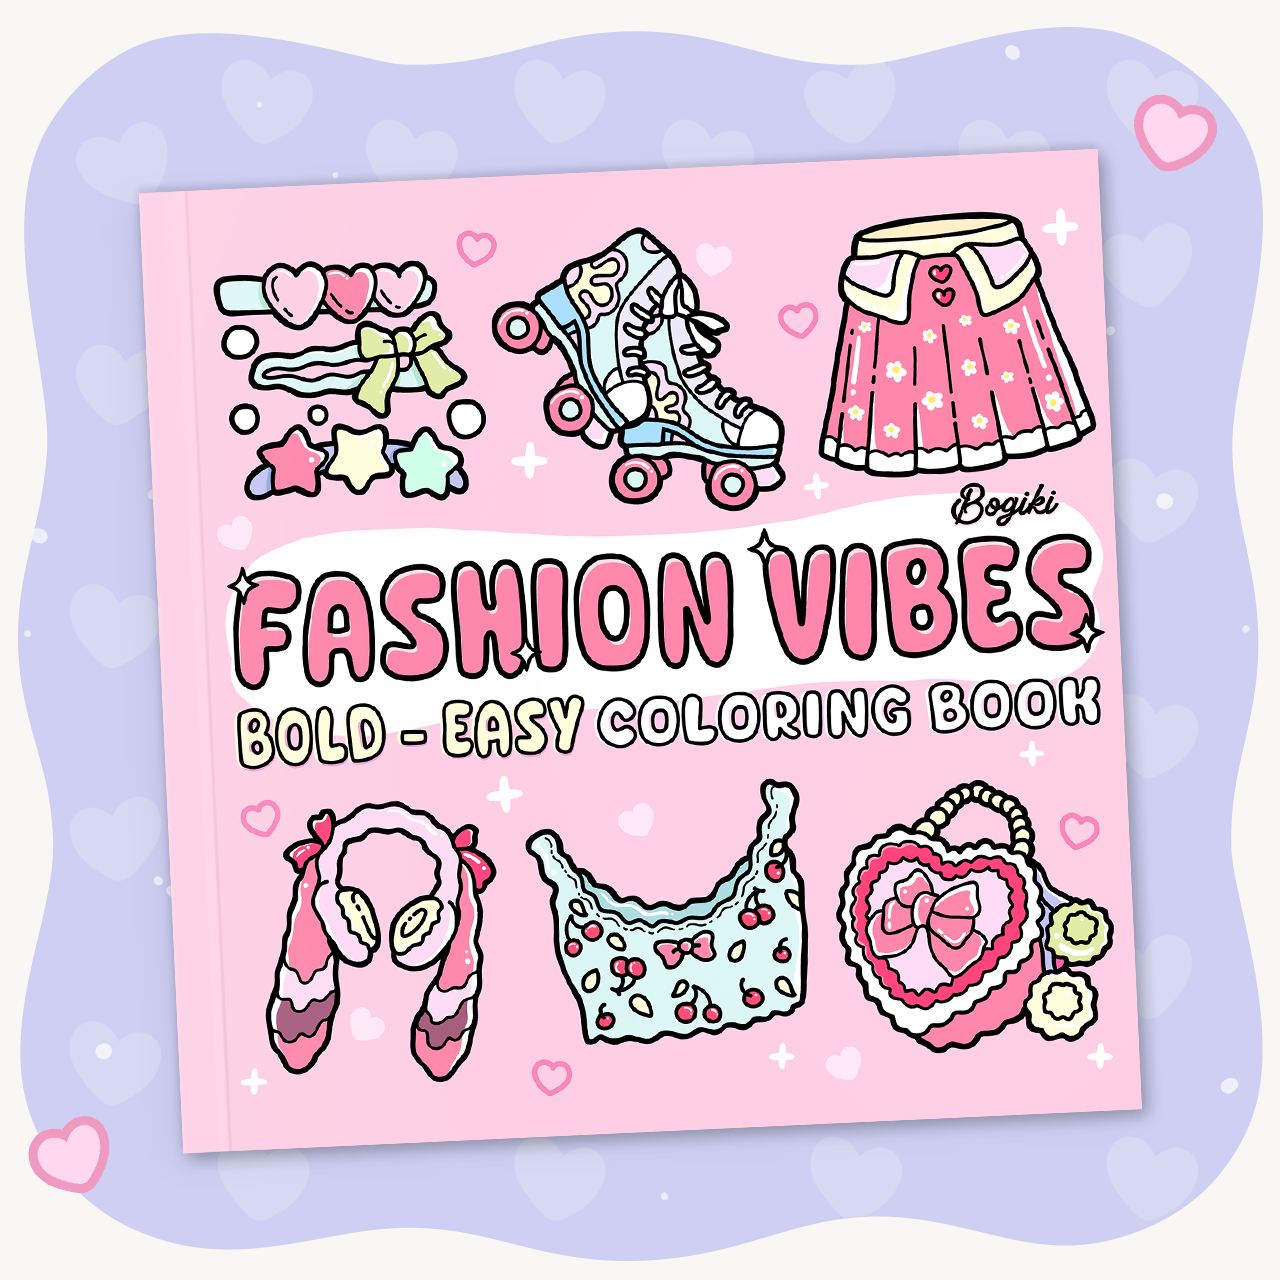
Fashion Vibes Coloring Book |
For a gentle, relaxing mood, cozy scenes are the perfect choice. These pages transport you into warm interiors, quiet daily life, and soothing activities. Each illustration invites you to pause, breathe, and enjoy a moment of calm. The designs feature soft details and open spaces that make coloring a relaxing and visually satisfying experience.
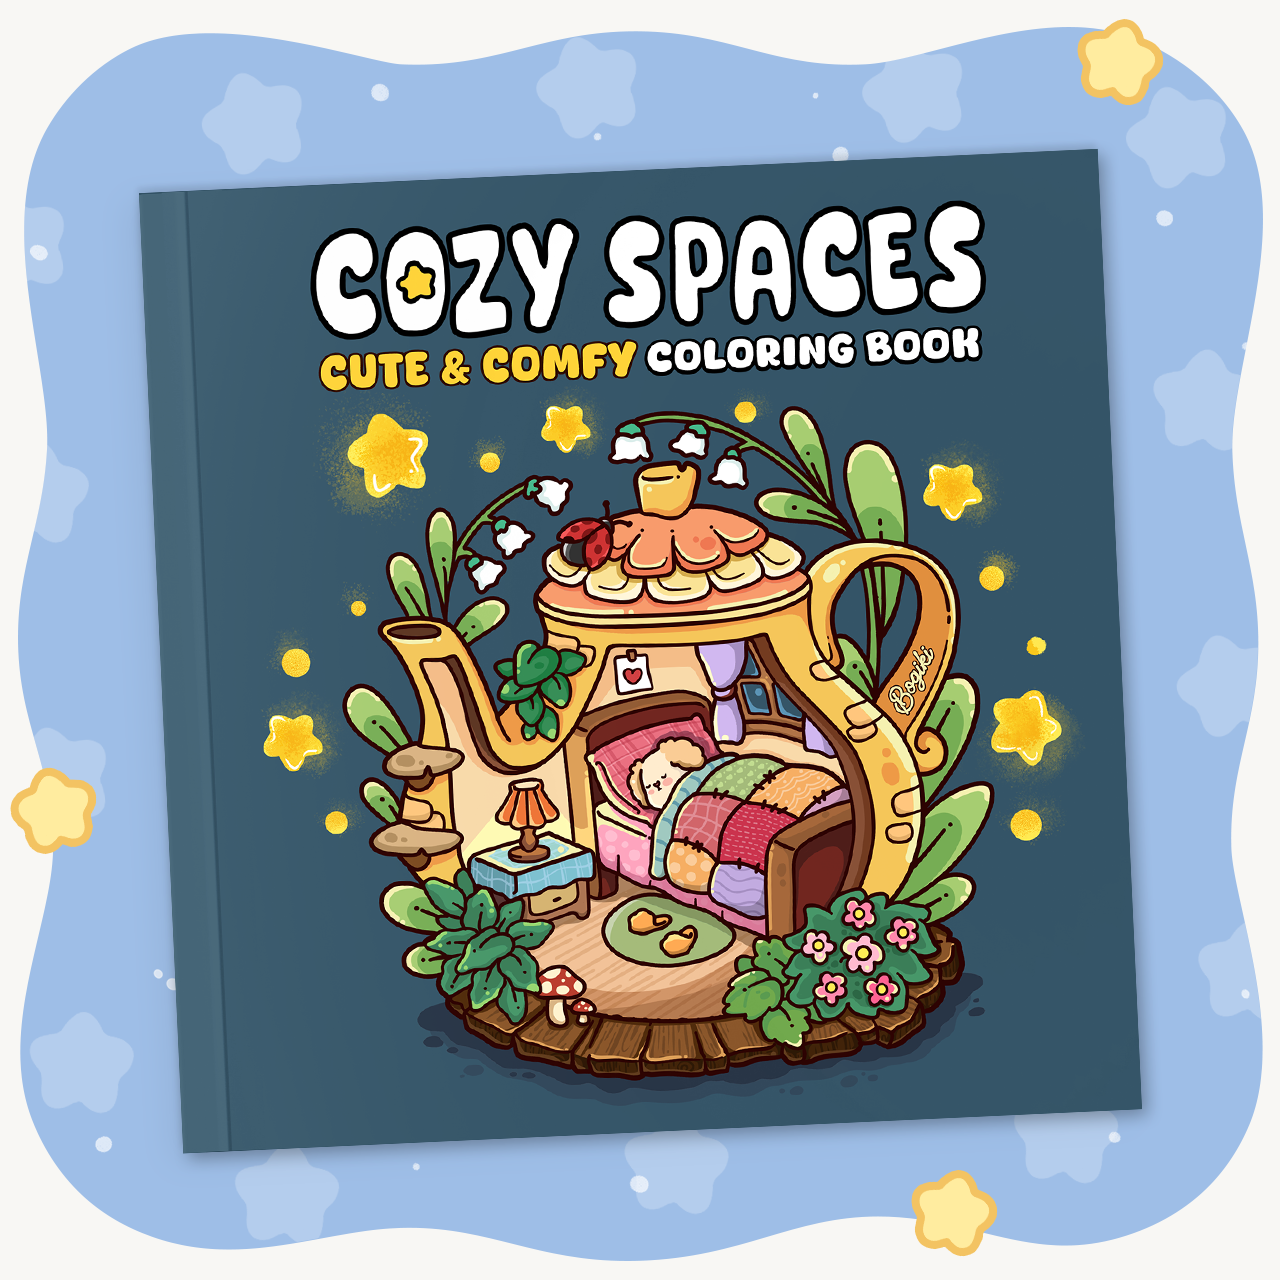
Cozy Spaces Coloring Book |
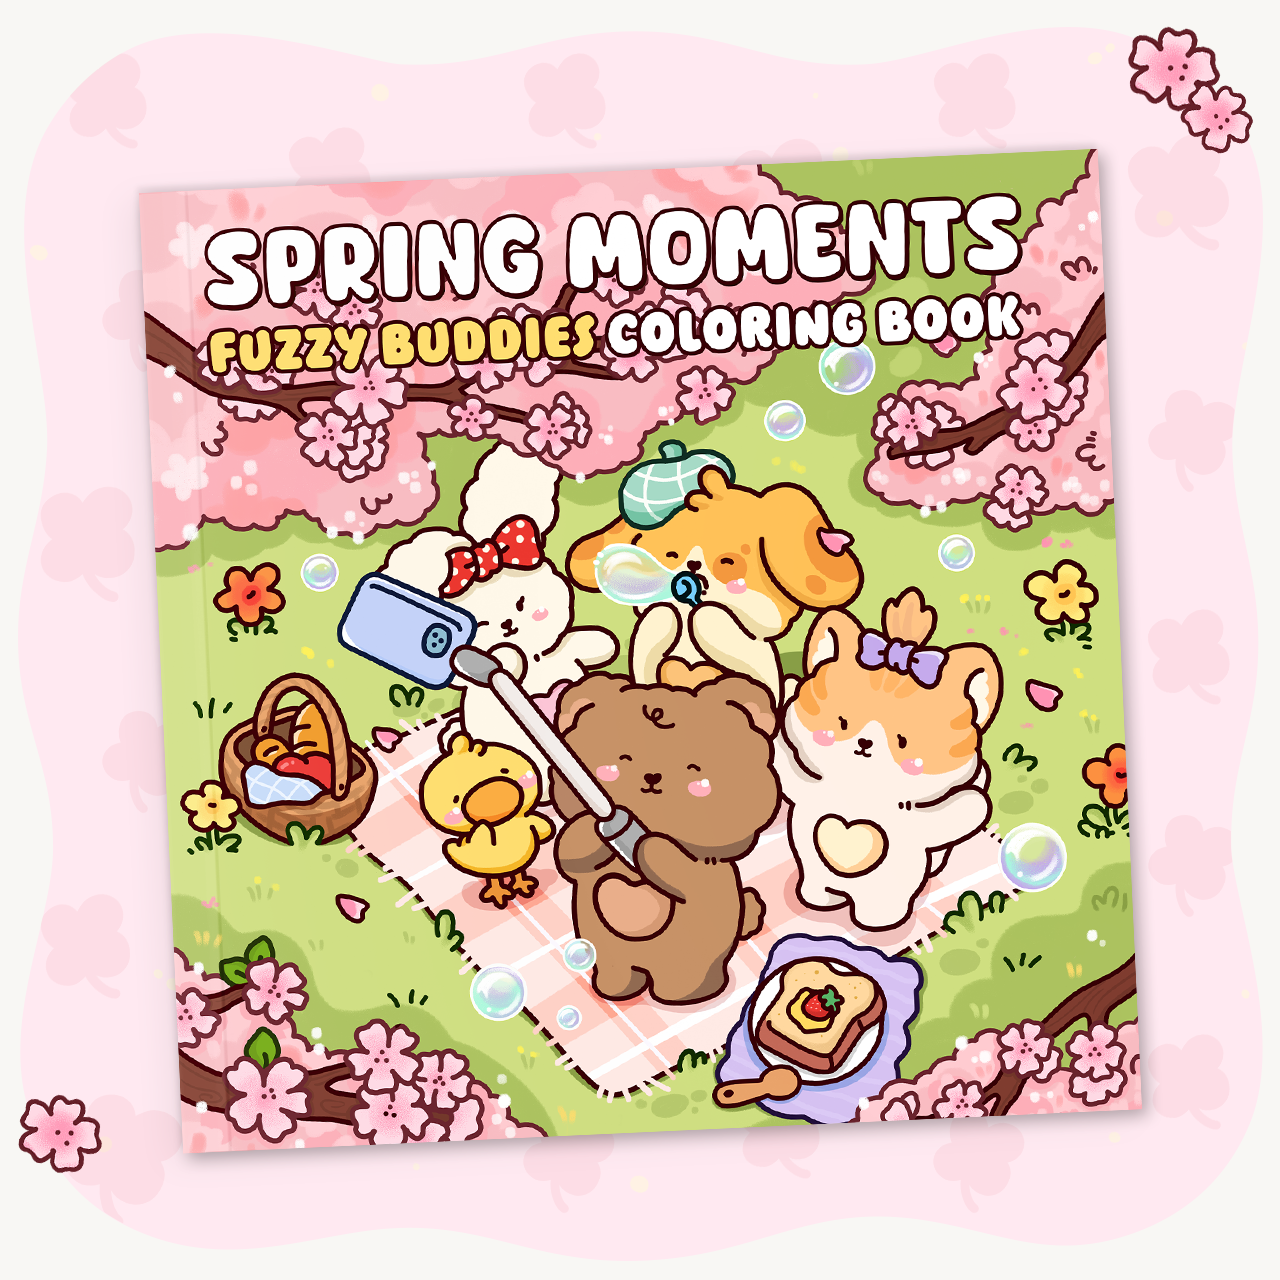
Spring Moments Coloring Book |
Bring the tranquility of nature indoors. Lush gardens, flowers, and whimsical forest scenes encourage mindfulness and focus. Each page feels like a peaceful walk through a secret garden, helping you relax and recharge.
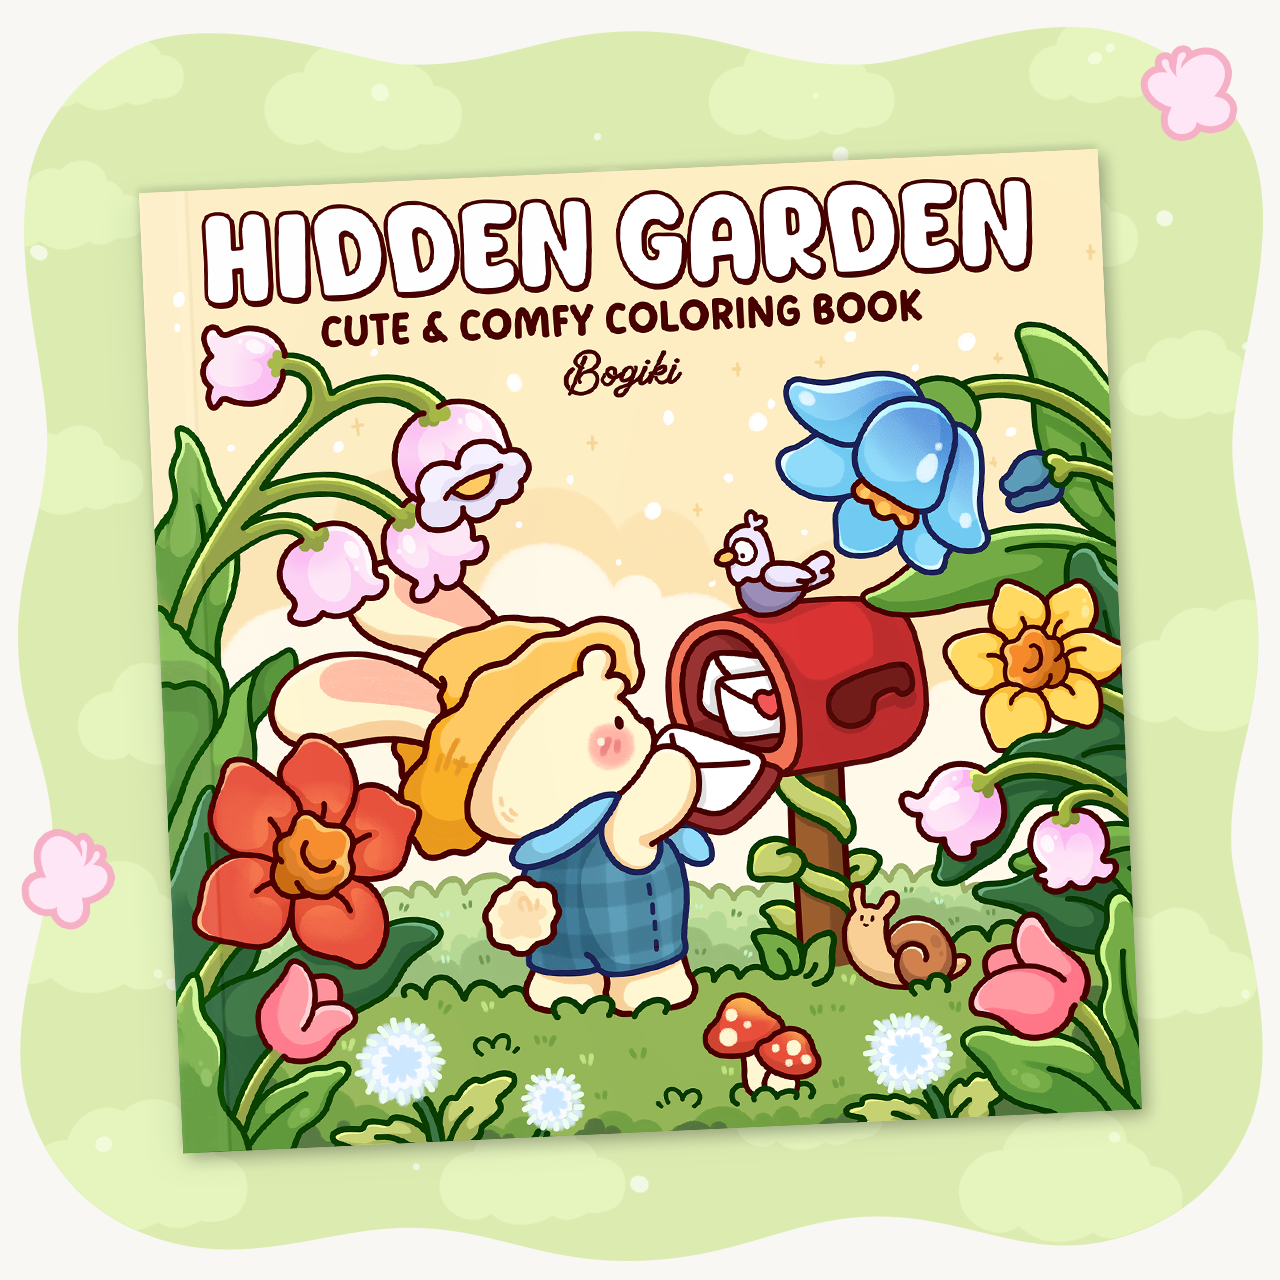
Hidden Garden Coloring Book
|
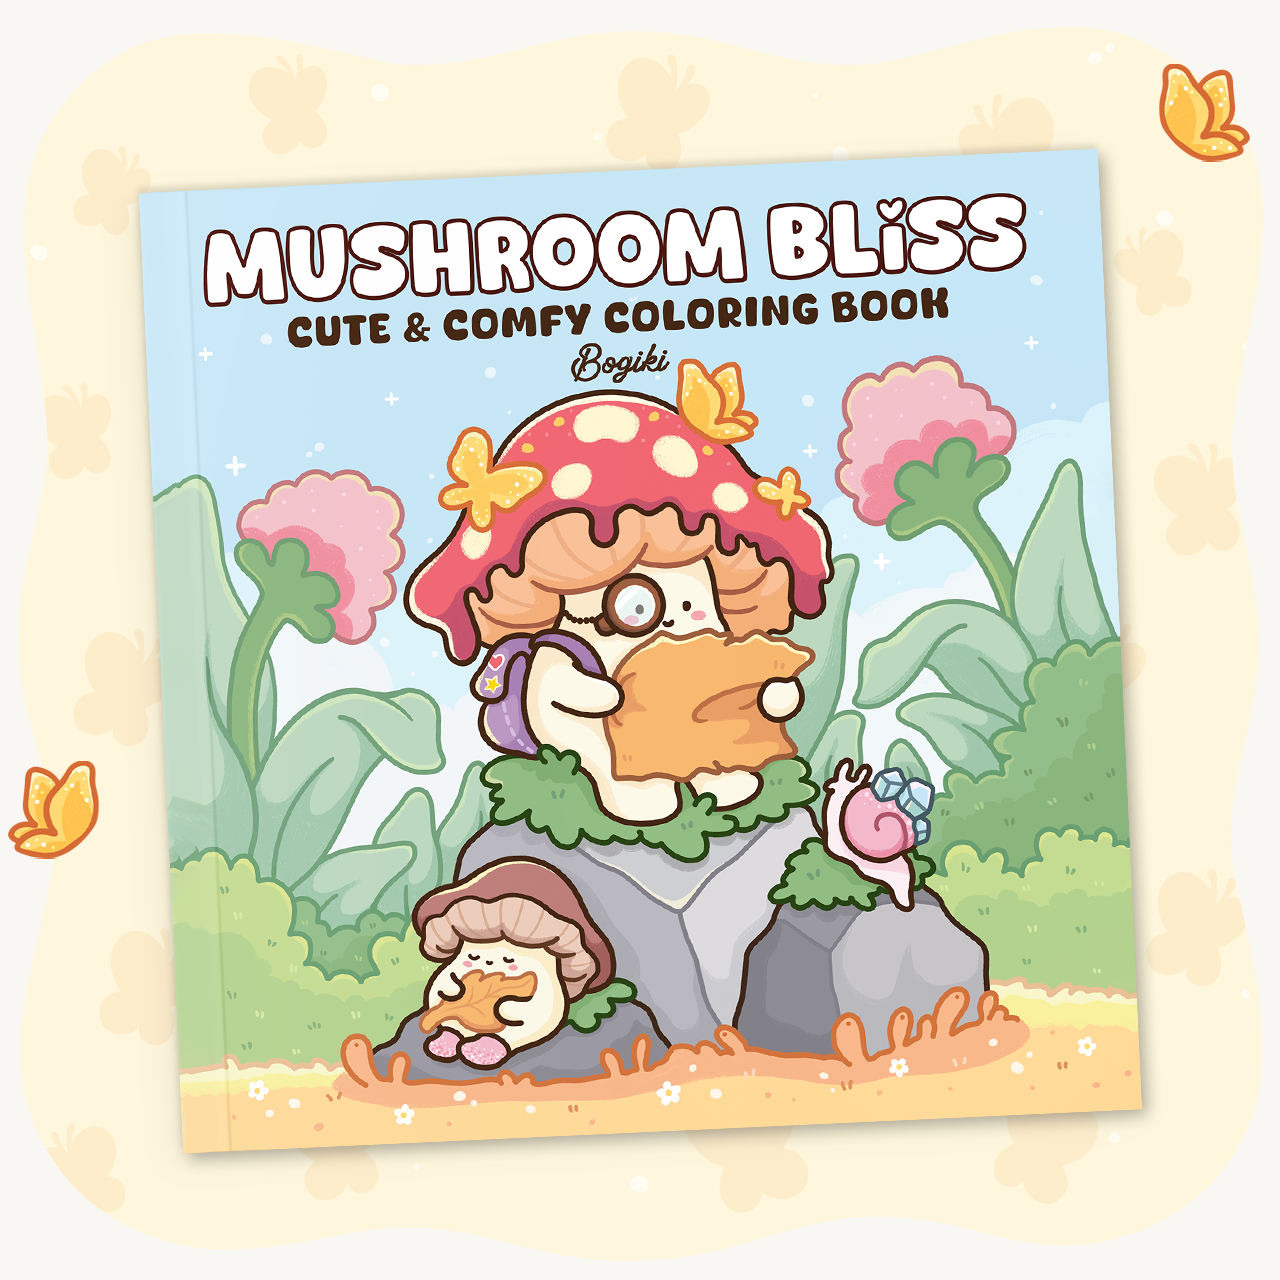
Mushroom Bliss Coloring Book
|
For playful relaxation, fantasy books offer magical landscapes, imaginative creatures, and quirky designs. Coloring these pages is like a mini adventure, letting your imagination soar while gently relieving stress
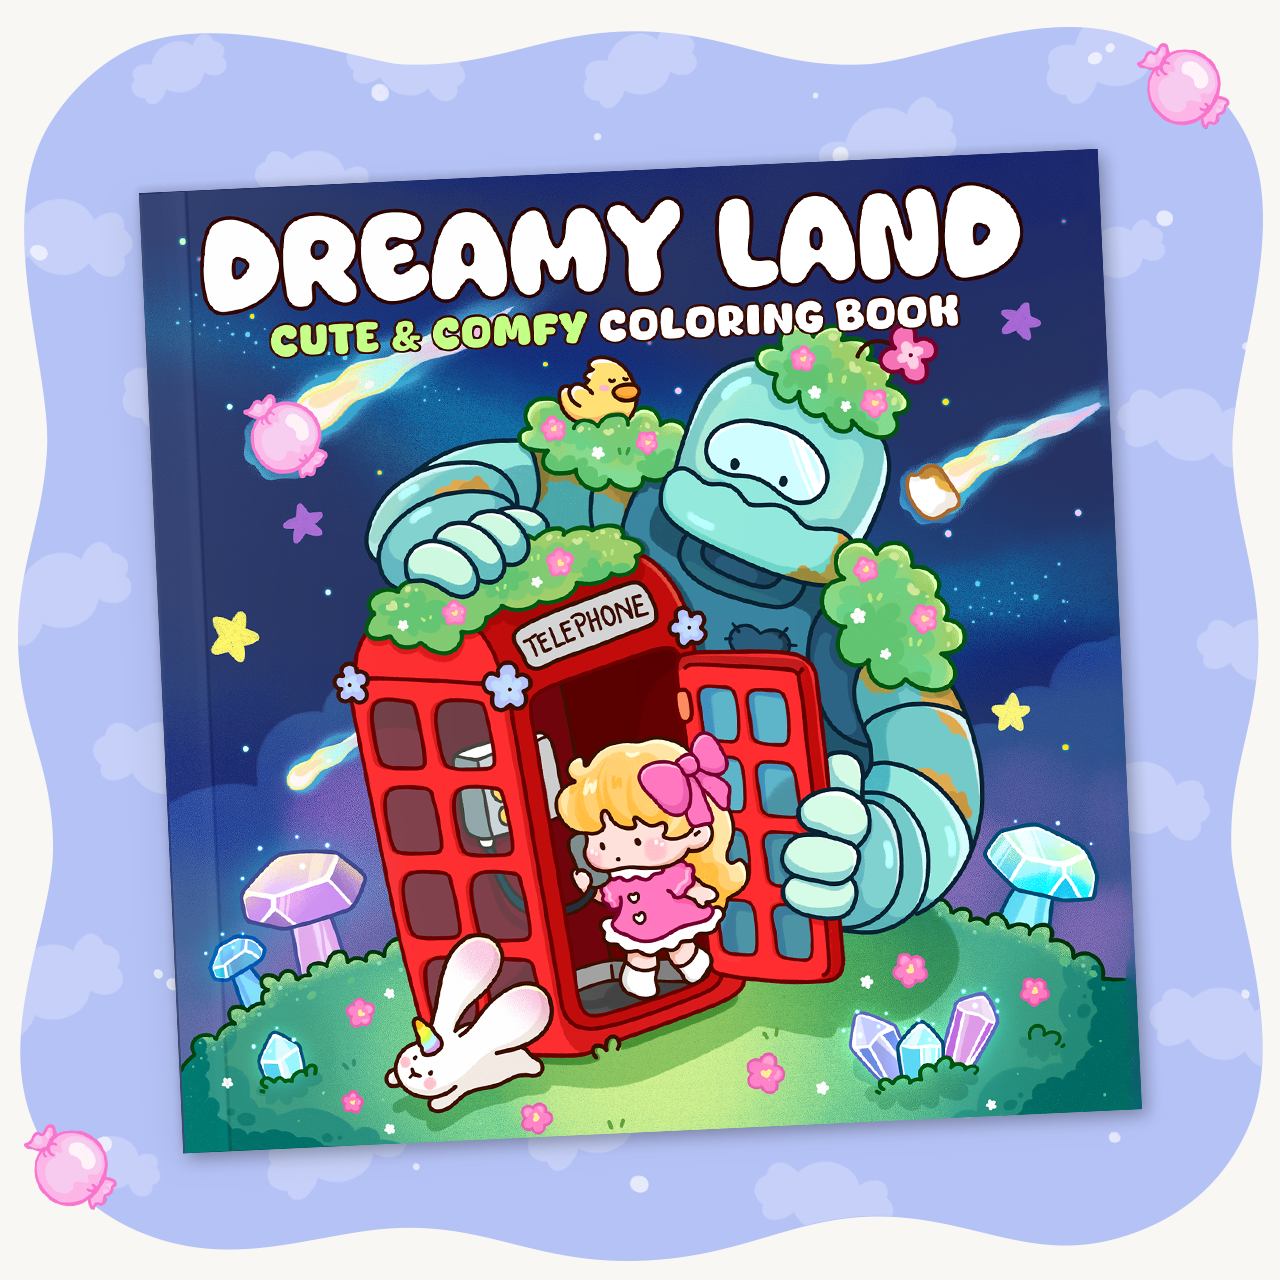
Dreamy Land Coloring Book
|
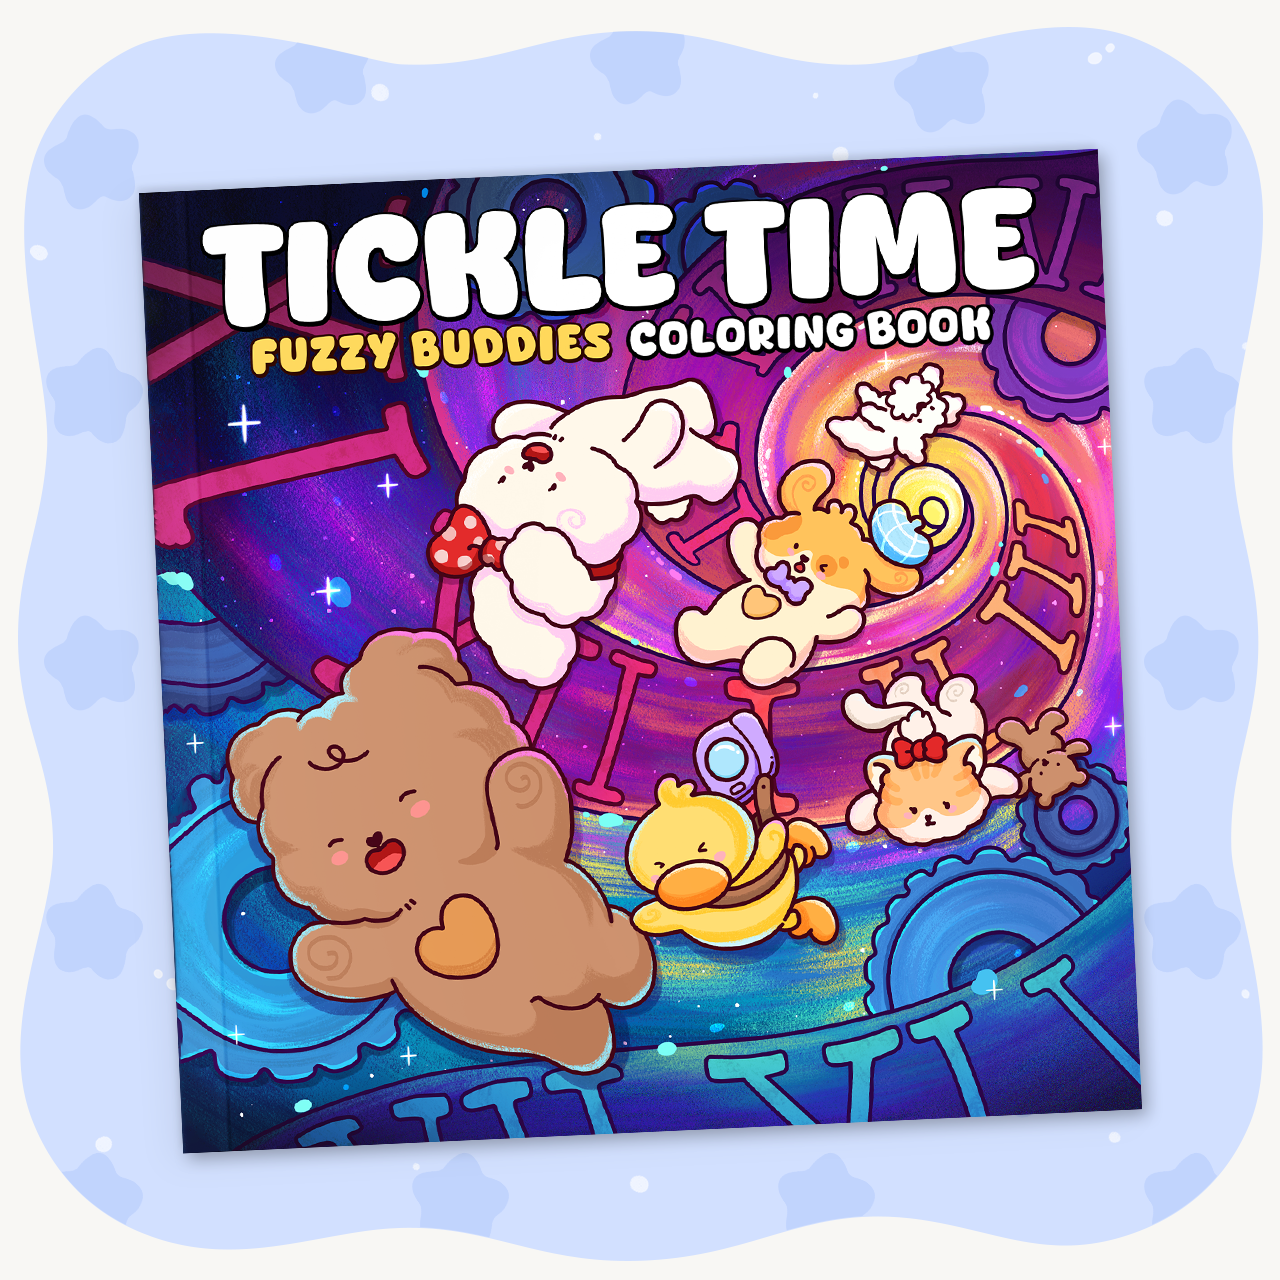
Tickle Time Coloring Book
|
The type of paper and format influences both the coloring experience and the tools you use.
Single-Sided Pages – One Side Per Page: Great for preventing bleed-through and allowing easy removal and display.
Double-Sided Pages – Two Sides Per Page: Compact, with more pages in a single book.
Printed Books – Traditional Print: Provides a tactile experience and a sense of immersion in coloring.
Digital Coloring Books – E-Books & Apps: Flexible, reusable, and space-saving.
Selecting the right tools enhances your experience with coloring books for adults relaxation. Consider these options:
To get the most from your coloring sessions, match your chosen book with the tools that feel the most enjoyable. Exploring different mediums with the 5 essential tools can open new ways to play with colors, textures, and techniques—making every page a fresh, relaxing experience and giving your creativity even more room to shine.
From easy starters to dreamy, detailed pages, here are three Bogiki picks for anyone seeking stress relief and mindful creativity.
These books are perfect for days when you just need a break. They’re forgiving and fast, ideal for those new to coloring or wanting a light, soothing activity.
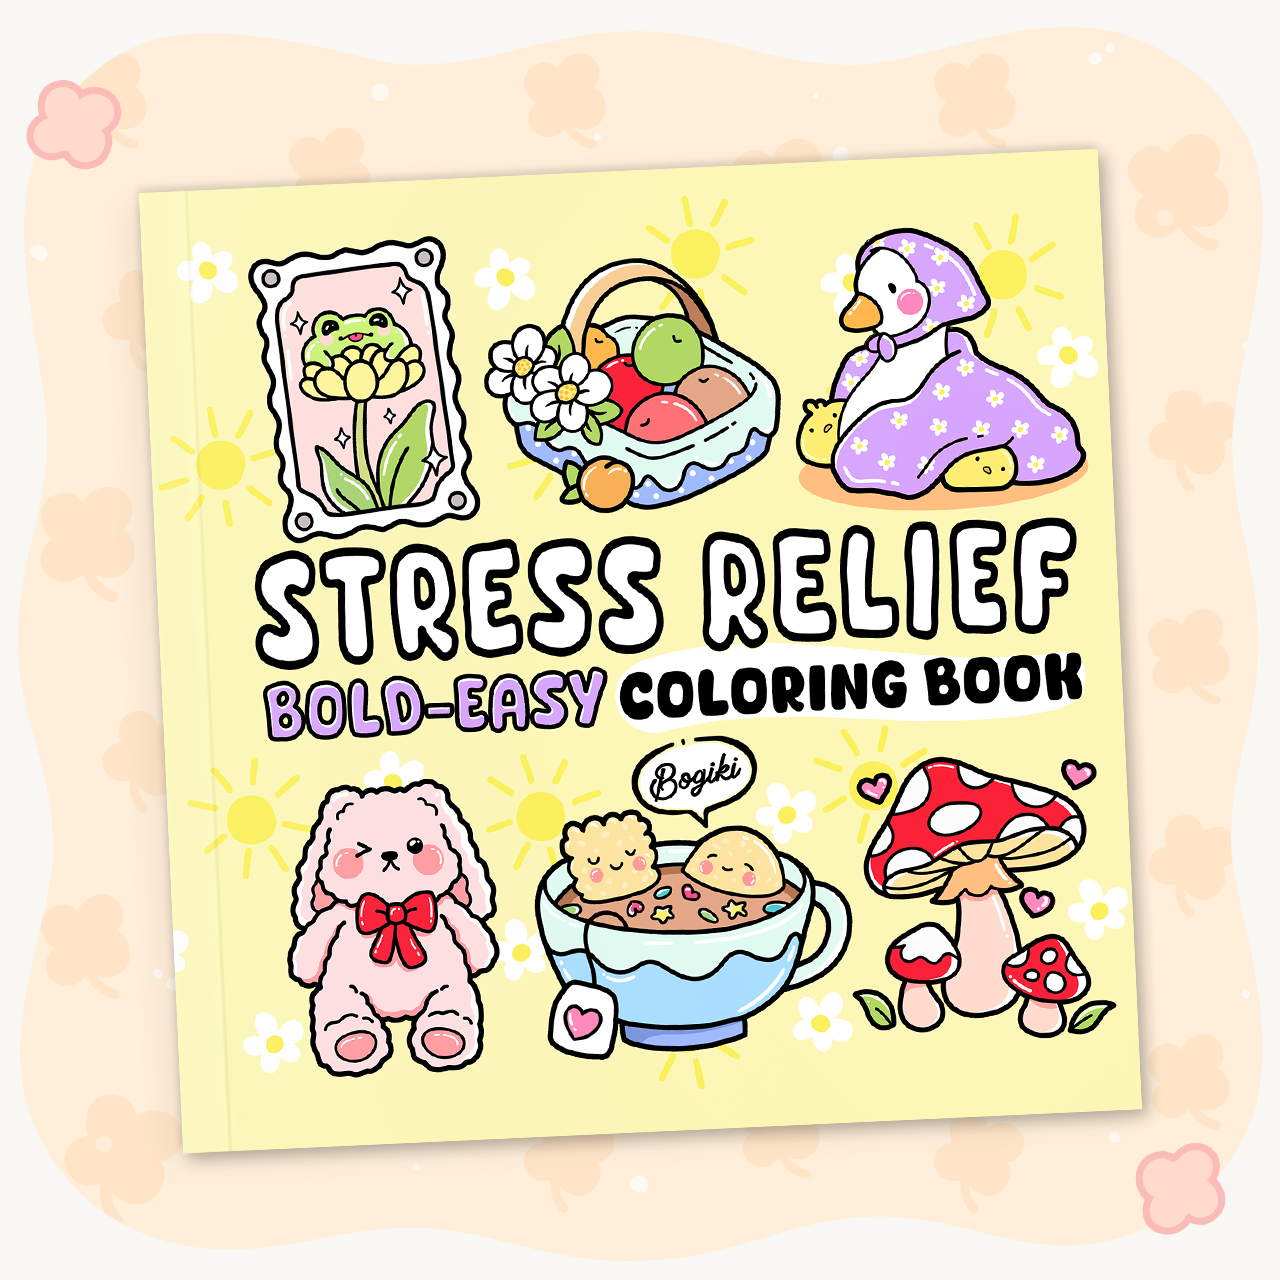
These books strike a perfect balance—not too detailed, not too simple. Coloring them feels like wrapping yourself in a warm, cozy blanket.

Fuzzy Buddies combines mindfulness with fun. Its approachable patterns and charming themes make it one of the best adult stress relief coloring books, offering gentle relaxation through creativity.
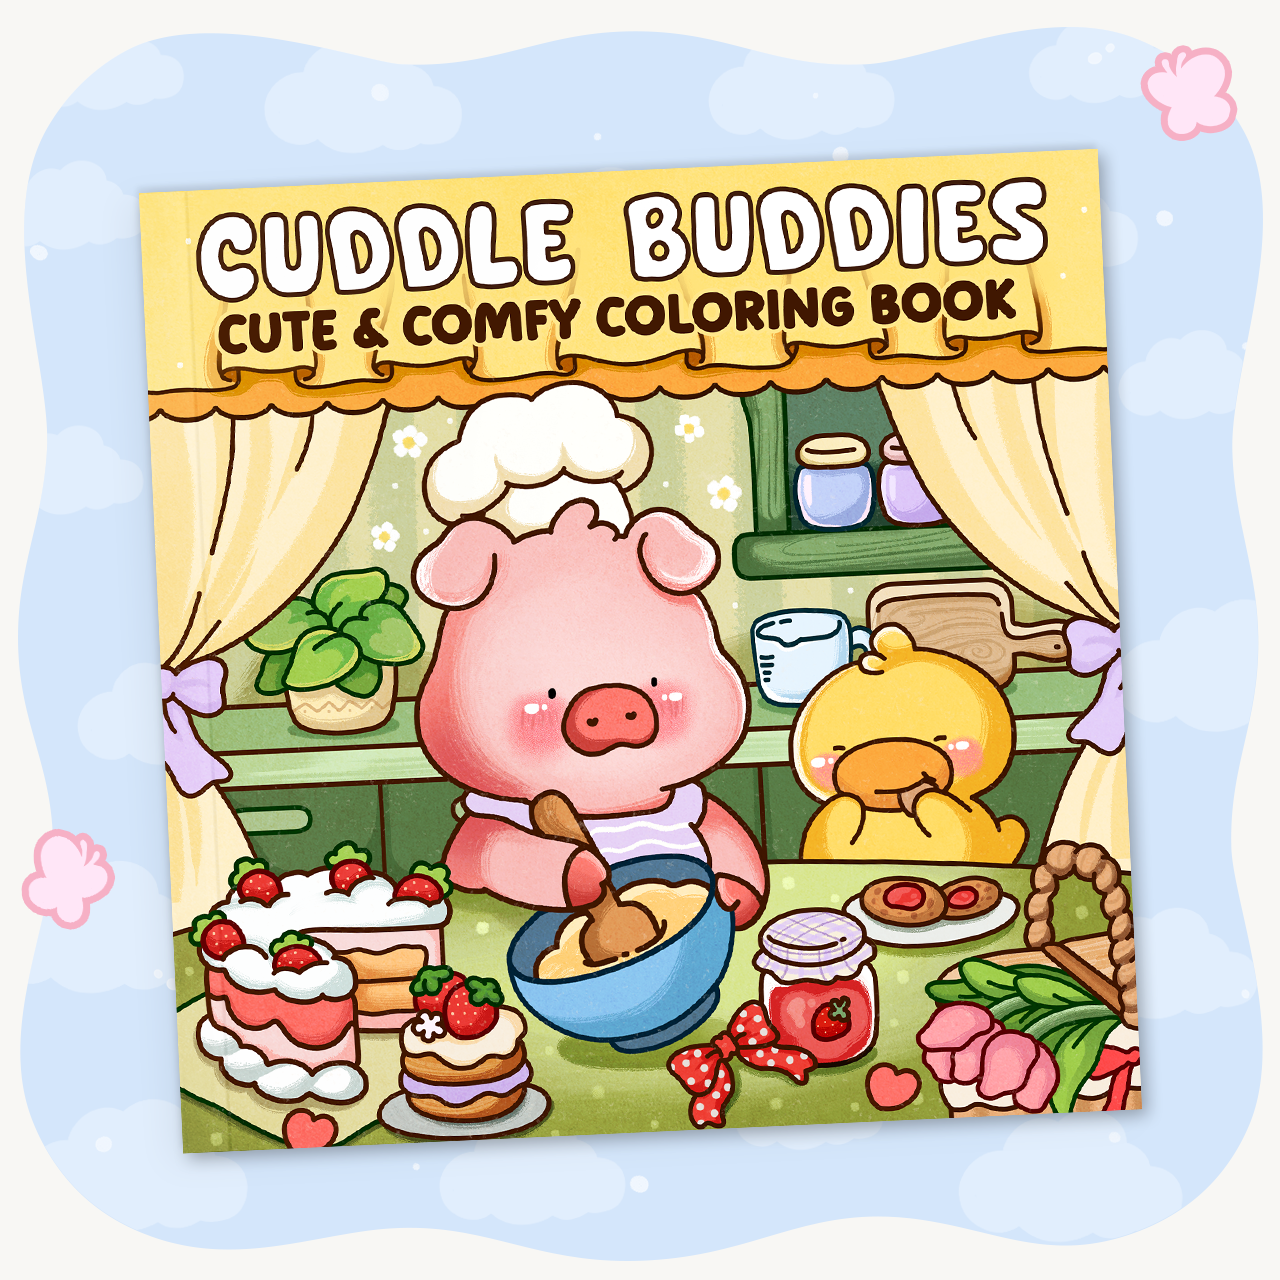
Designed for gentle self-care days, this book feels calm and forgiving. Easy pages help you slow down, relax, and enjoy quiet moments of coloring without pressure or perfection.
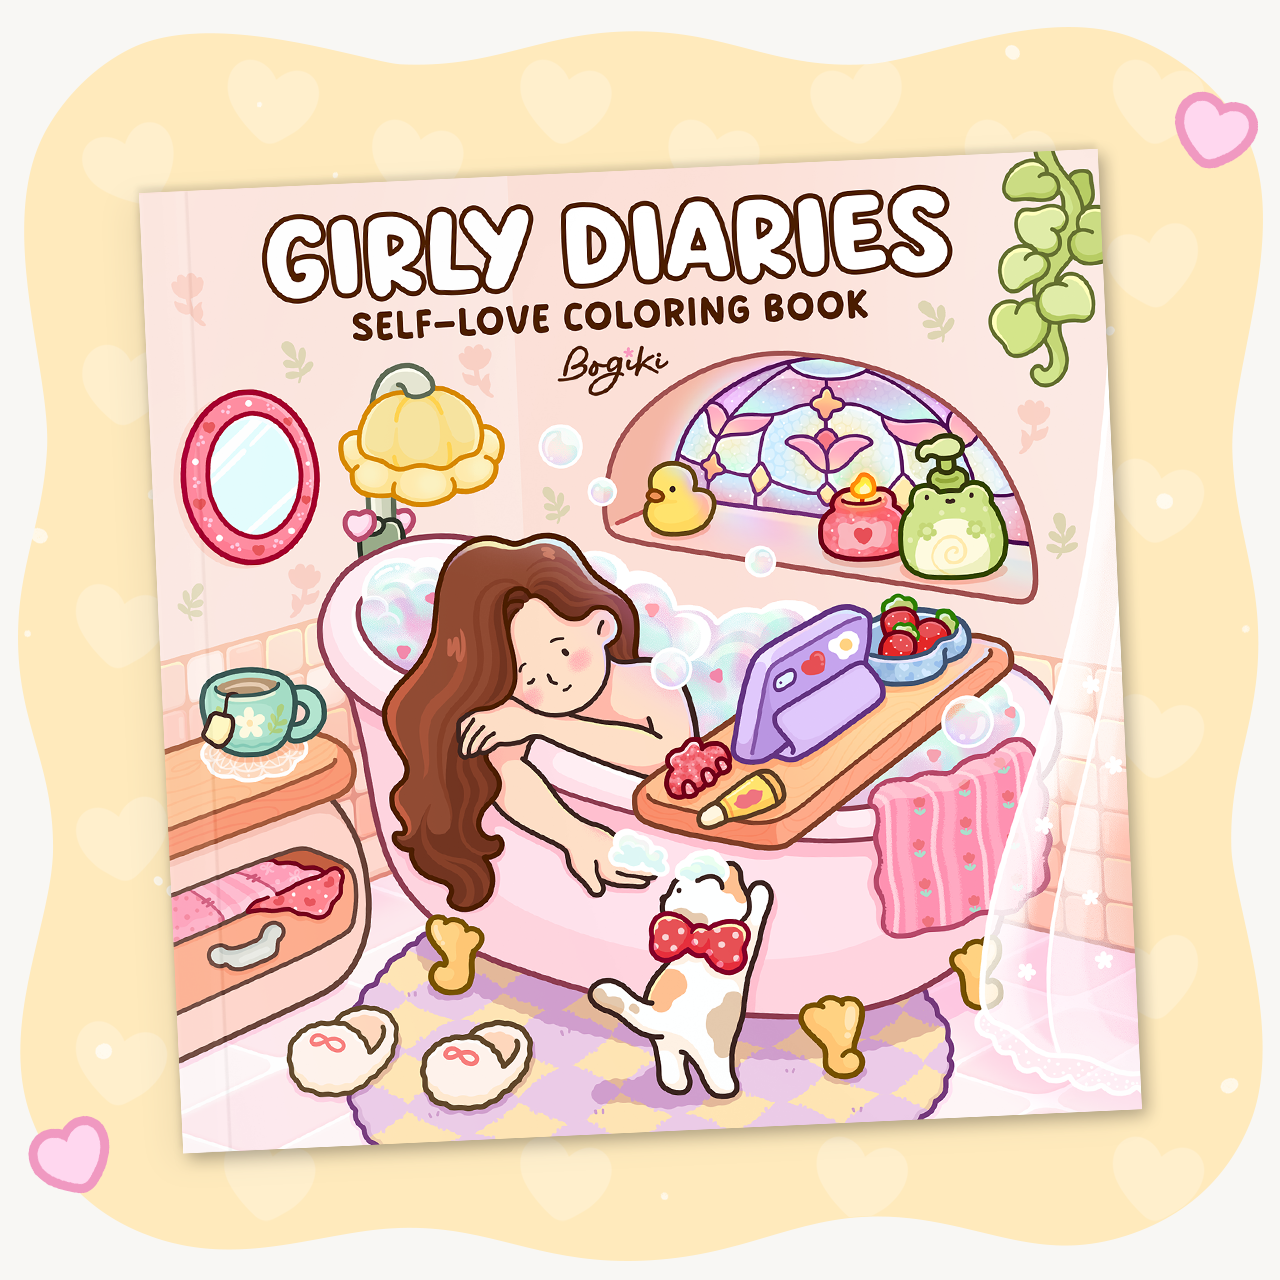
Choosing the right coloring books for adults relaxation involves understanding design complexity, themes, formats, and tools. Whether you opt for simple and cozy illustrations or whimsical and intricate worlds, coloring provides a quiet, mindful escape from daily stress.
With options like Cozy Spaces, Hidden Garden, or Fuzzy Buddies, Bogiki offers books designed to foster relaxation, creativity, and joy. Make coloring a mindful habit, and enjoy the calm, playful, and cozy moments it brings into your day.
Treat your inbox to a lovely surprise! Sign up now for exclusive content and special gifts

studio@bogiki.com
*Currently, we are unable to handle your call/voicemail/phone message. Please go to our Contact Form and leave an email.


