


0


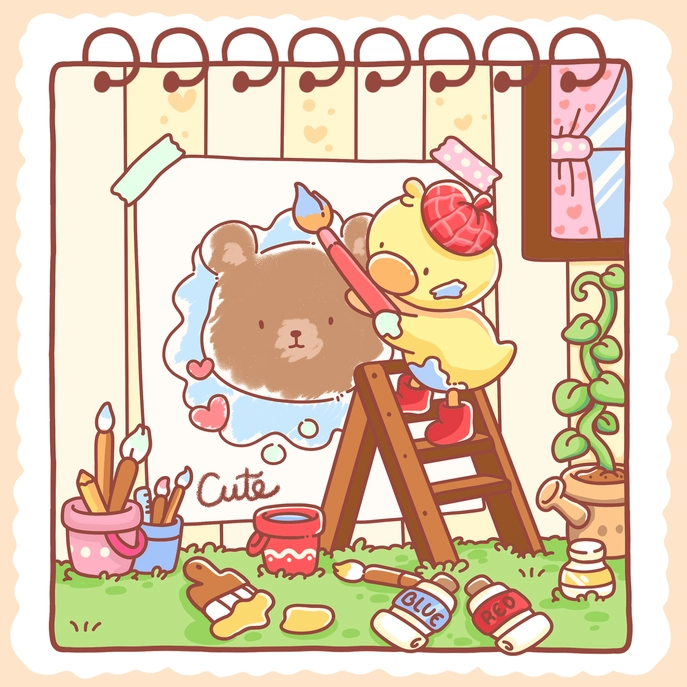
Both beginners and experts can enjoy books.

Prevents bleed-through and protects every design.

Every design is created by skilled human artists.

Trusted and loved by coloring fans worldwide.
Color Your World with Bogiki! Join the Bogiki community on social media and connect with other coloring lovers. Share your masterpieces, discover new designs, and get exclusive access to giveaways, updates, and more! Follow us on platforms as we spread joy and creativity together!
You have questions? We're here to help.

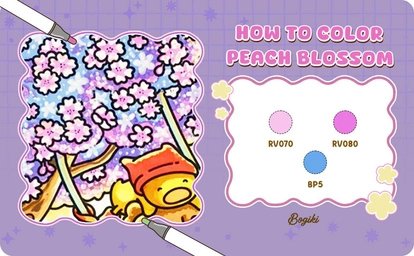
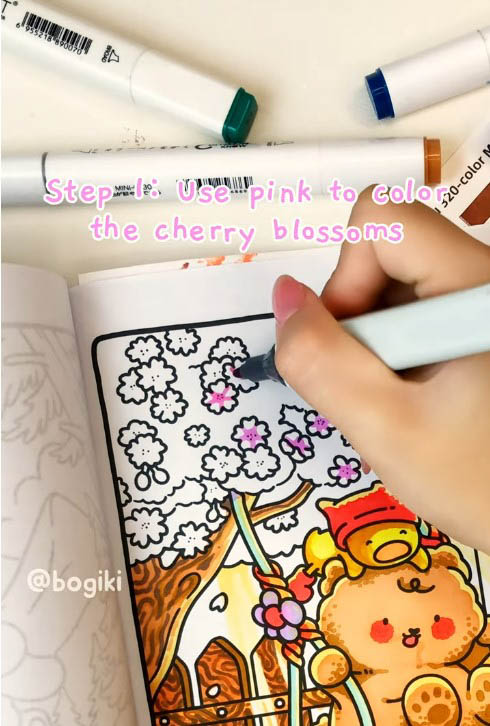
Step into the gentle beauty of spring with this charming tutorial on how to draw a peach blossom step by step with Bogiki. Each stroke brings to life the delicate petals and graceful form of this iconic spring flower. Pick up your markers, follow along, and let your creativity blossom with every page!
Peach Blossom is a gentle symbol of spring, always bringing a sense of peace and freshness. In the context of the How to Draw a Peach Blossom guide below, you’ll be taken step by step through sketching and coloring this beautiful flower in Bogiki’s elegant style. Get your favorite drawing tools ready, and let’s recreate the delicate, captivating beauty of the peach blossom together!
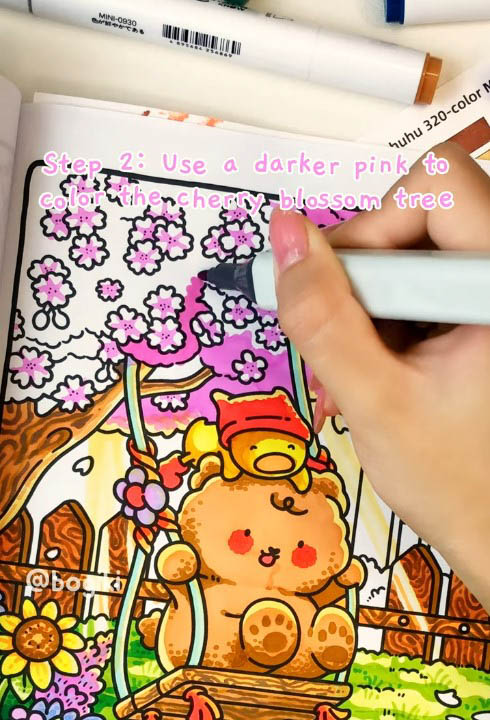
Start by using the pinkish-purple shade RV080 to color each petal of the peach blossom. This soft, gentle tone will help capture the delicate and graceful beauty of spring flowers. Be sure to color with a light touch to preserve the purity and softness of every detail.
Next, use the darker pink shade RV070 to color the trunk of the peach blossom tree. This richer tone creates a harmonious contrast with the petals while enhancing the vibrant beauty of the entire tree. You can apply more pressure along the edges or main branches to add depth and dimension to the illustration.
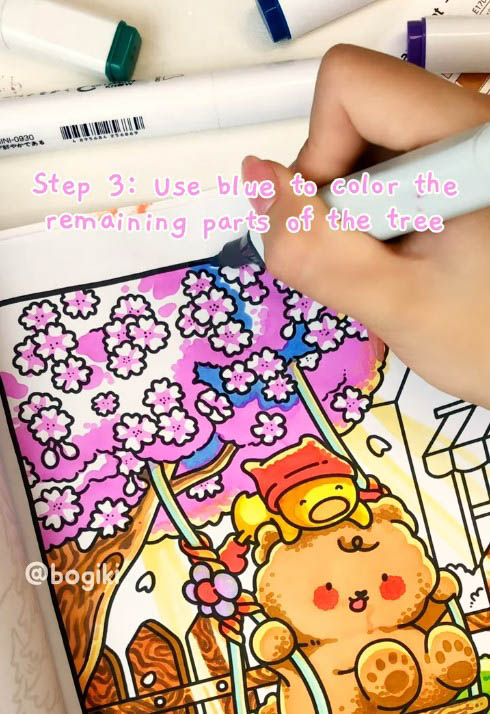
To complete the background and the surrounding details of the tree, use the blue shade BP5. This color not only highlights the pink tones of the blossoms but also brings a cool, calming feel to the overall artwork. Don’t hesitate to blend the color softly or fade it gradually to create a natural gradient effect.
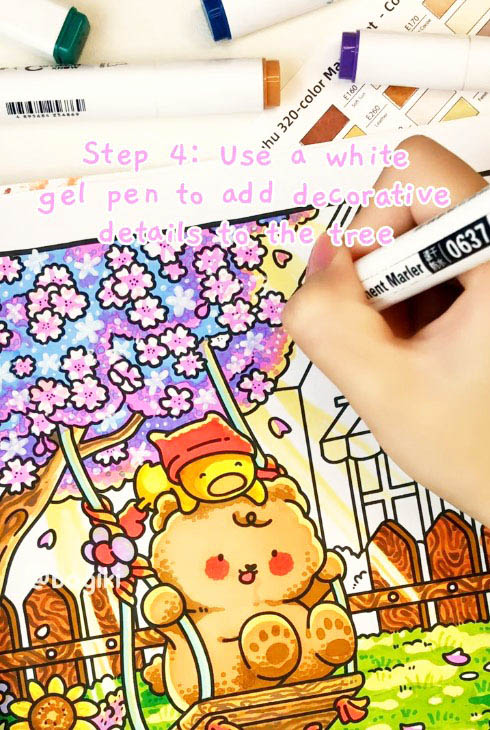
Finally, use a white gel pen to add small decorative details such as highlights, outlines, or subtle touches on the branches. These accents bring your artwork to life, adding sparkle and vibrancy. This is also your chance to express personal creativity, so feel free to let your inspiration guide you.
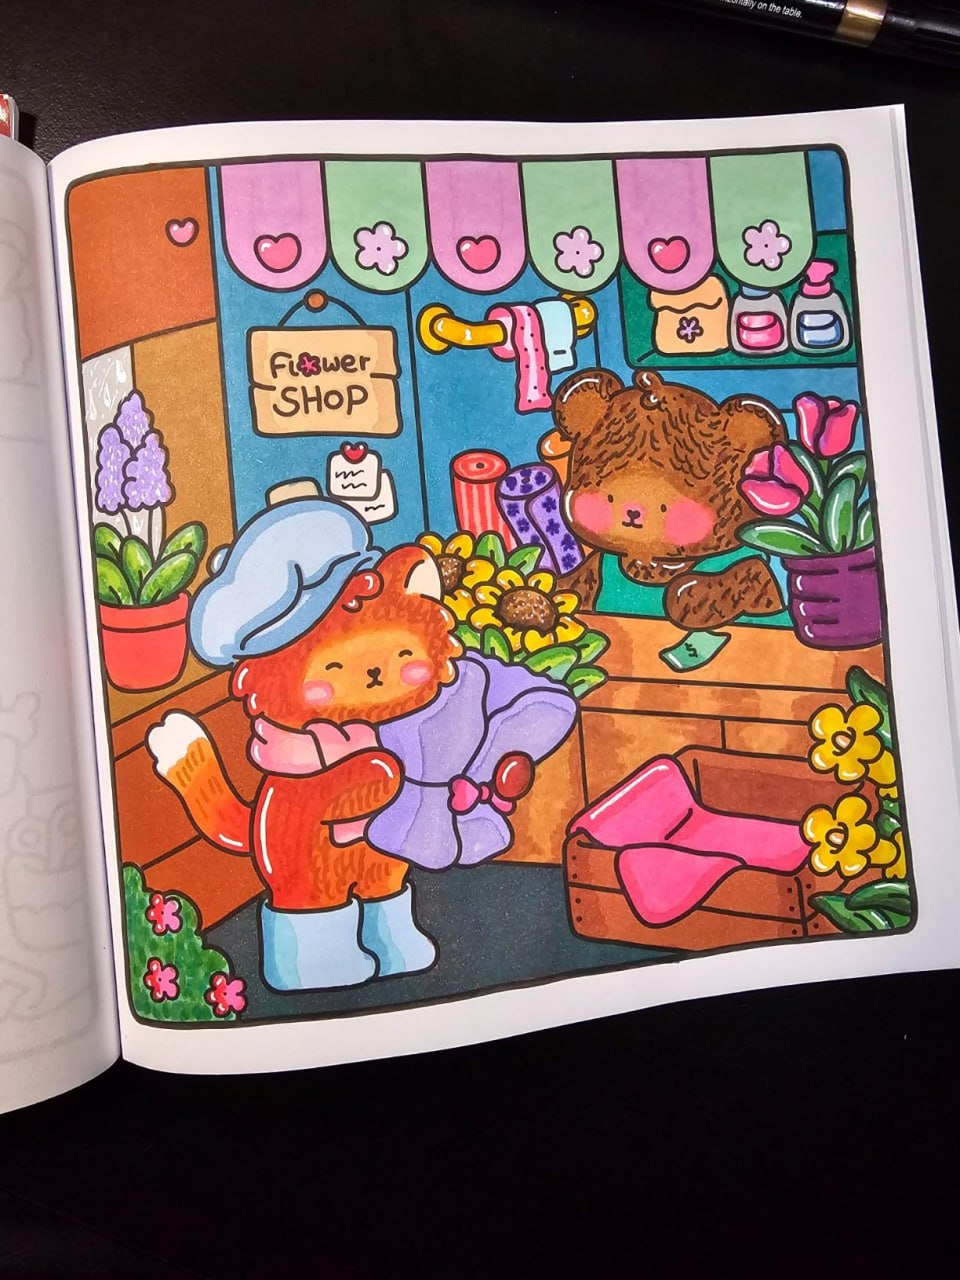
The Spring Moment coloring book is the perfect choice to relax and enjoy the refreshing spirit of spring. With 40 beautifully hand-drawn illustrations, the book features adorable fluffy friends in gentle, vibrant spring settings.
In addition, the single-sided page design allows you to color freely without worrying about ink bleeding through. Its convenient 8.5 x 8.5 inch size also makes it easy to carry wherever you go.
These soft and calming patterns will help you release stress and rediscover peace of mind with every stroke.
👉 Buy the Spring Moment Coloring Book and enjoy coloring now!
👉 Watch the full real-time video and see how to draw a peach blossom detail now!
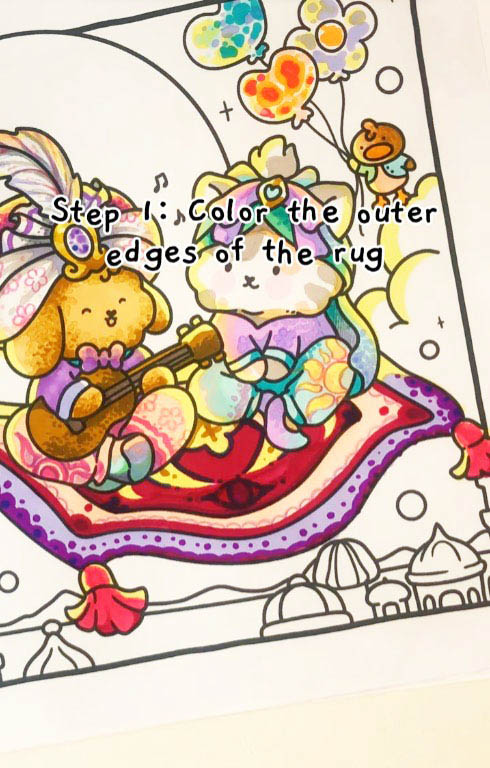
Step into a world of whimsy and wonder with our easy Magic Rug coloring tutorial from Bogiki’s Romantic Vibes collection. Let your creativity soar as two adorable characters float above the clouds on a magical journey filled with music, love, and charm. Grab your favorite markers and bring this enchanting scene to life. Your romantic adventure starts now!
The magic rug soars across the blue sky, carrying sweet melodies and romantic hues. With Bogiki’s step-by-step tutorial below, you’ll easily bring this dreamy and emotional scene to life. Get your markers ready and let the creative journey with Bogiki begin!
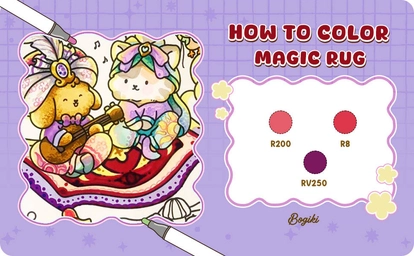
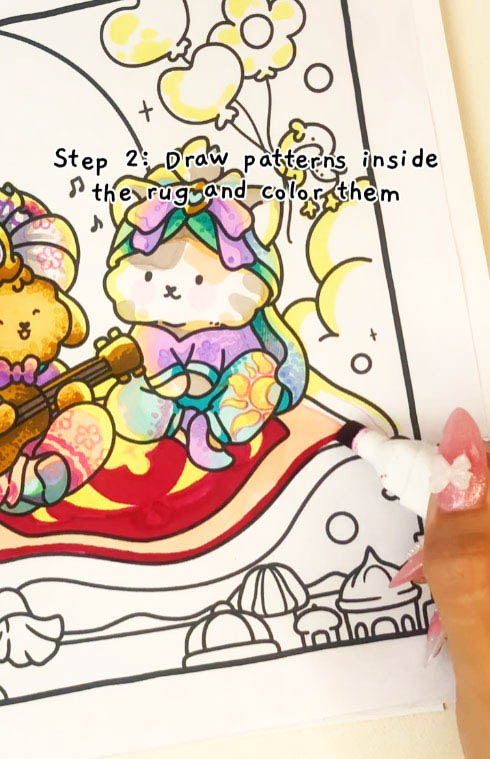
Next, draw decorative patterns inside the rug to create visual interest. Use the deep red shade R8 to color these details, adding depth and emphasis to the center area. This vibrant red brings a sense of elegance and liveliness to the entire design.
Return to the outer edges to continue refining the overall look. This time, use the light purple shade Y070 to add soft color accents along the edges of the rug. The combination of red and purple creates a smooth gradient effect, enhancing the magical and dreamy feel of the artwork.

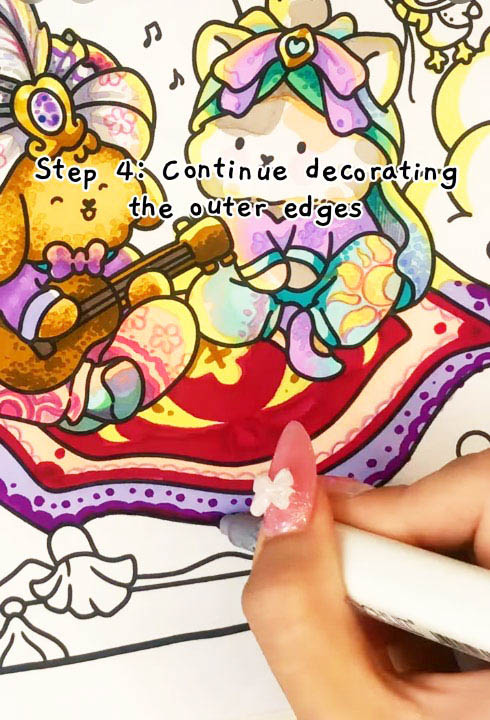
In the final step, highlight the small decorative details along the border using the deep purple shade RV250 to add depth to the rug’s frame. Don’t forget to draw the charming tassels at the four corners and color them with the rose red shade R3. These tiny elements will bring the rug to life, giving it a whimsical, floating feel straight out of a fairy tale.
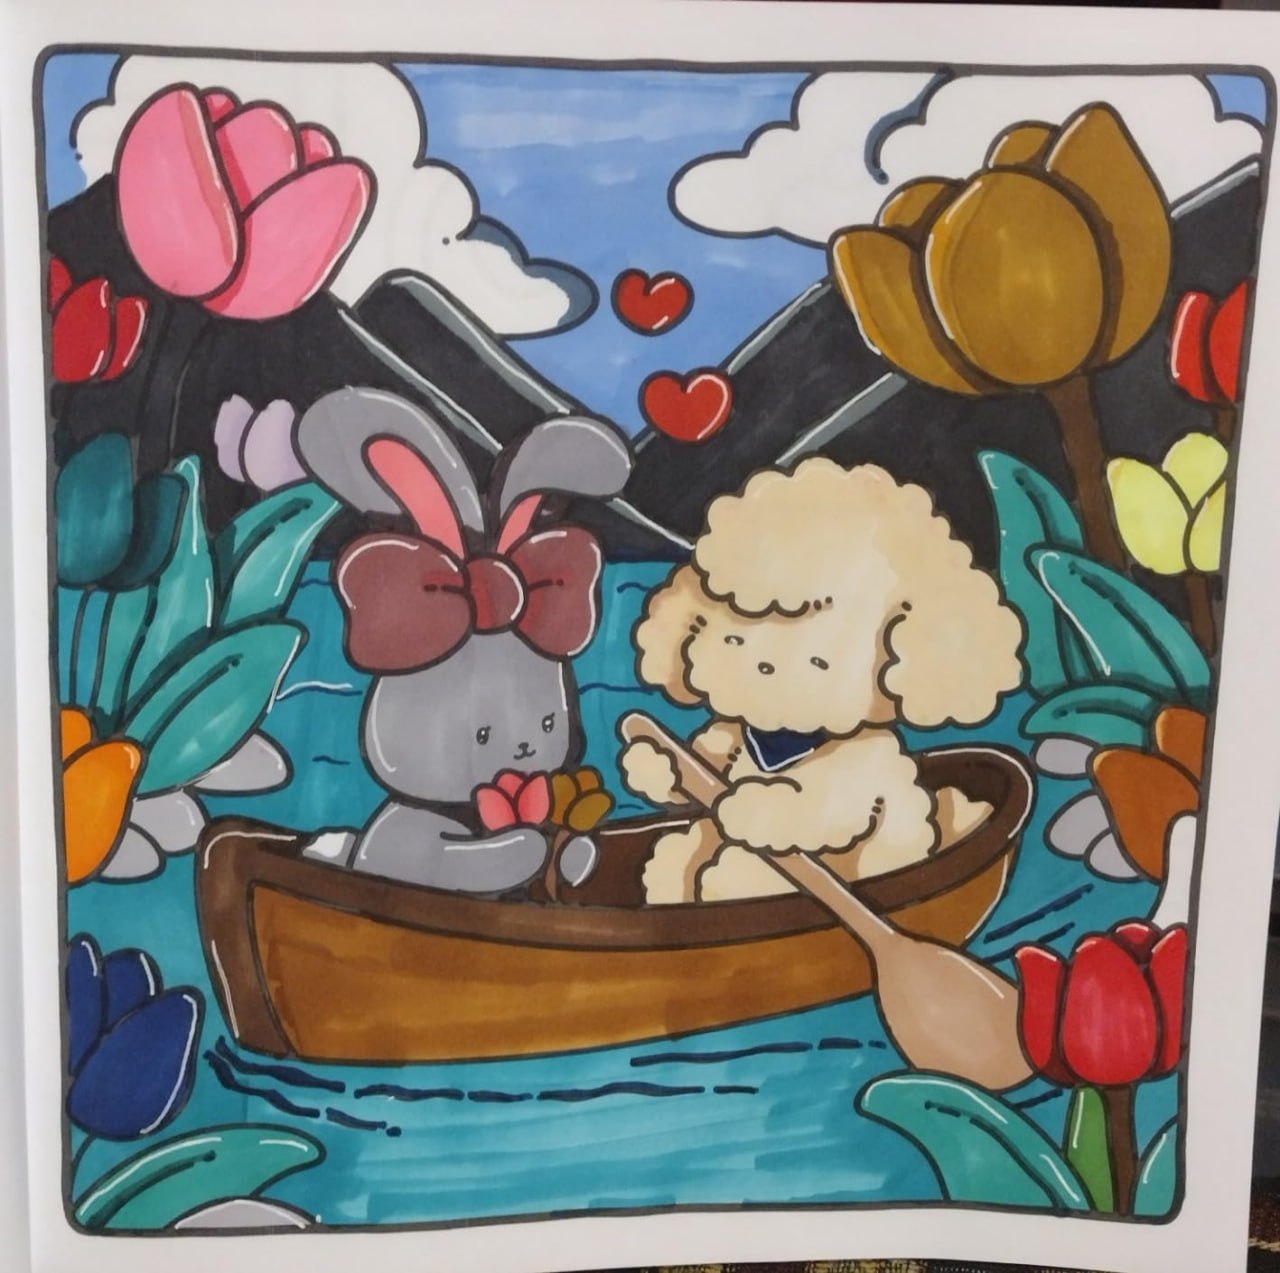
Enjoy the Romantic Vibes coloring book by Bogiki, where you’ll join adorable characters as they share sweet moments, cherish beautiful memories, and celebrate the joys of love. This book also features illustrations inspired by iconic romantic scenes from cinema, allowing you to color your way through timeless love stories.
👉 Buy the Romantic Vibes Coloring Book and enjoy coloring now!
👉 Watch the full real-time video and see the magic rug coloring tutorial detail now!
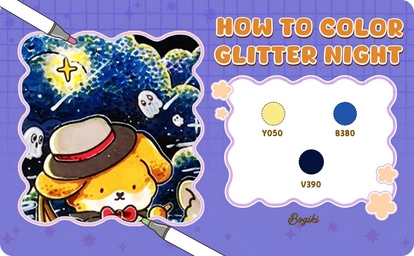
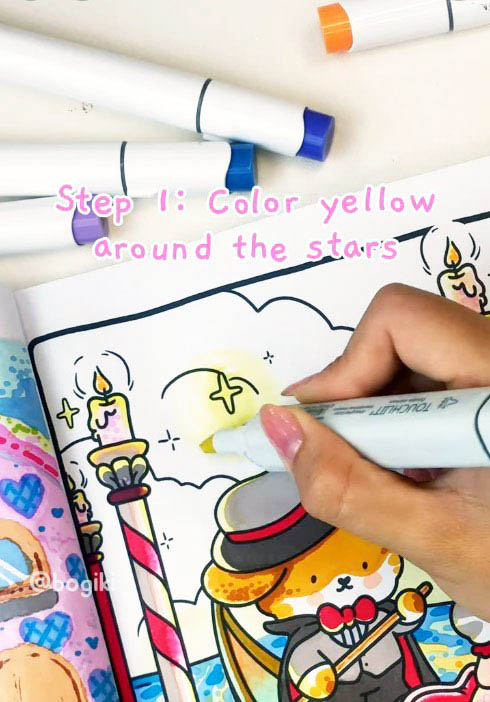
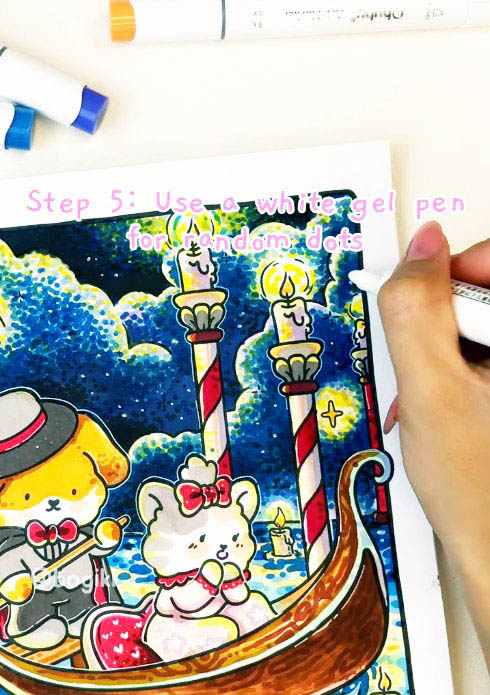
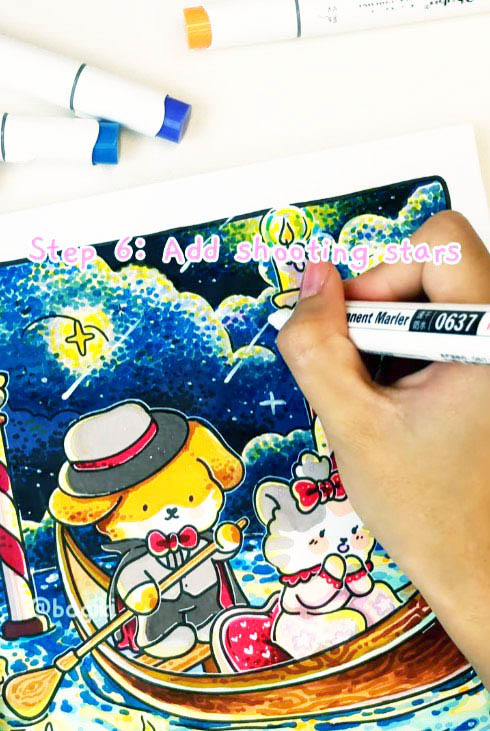
Step into a dreamy evening where the stars twinkle, candles glow, and romance floats gently under the night sky. In this glitter night coloring tutorial, we’ll show you how to bring Bogiki’s Romantic Vibes scene to life with shimmering skies and glowing details. Grab your markers, follow along, and let your creativity sparkle brighter than ever!
Step into a romantic, sparkling scene under a starry night sky, where candlelight reflects on the water and two adorable characters gently float down the river. In this step-by-step glitter night coloring tutorial by Bogiki, you’ll learn how to create magical lighting and shimmering effects that bring the artwork to life like never before. Grab your markers, and let’s begin this enchanting coloring journey together!
Start by highlighting the stars in the sky with a soft, bright yellow tone. Use color Y050 to gently shade around the sky, creating a warm, magical, and glowing effect. This foundational step is essential to make the glittering details stand out later on.
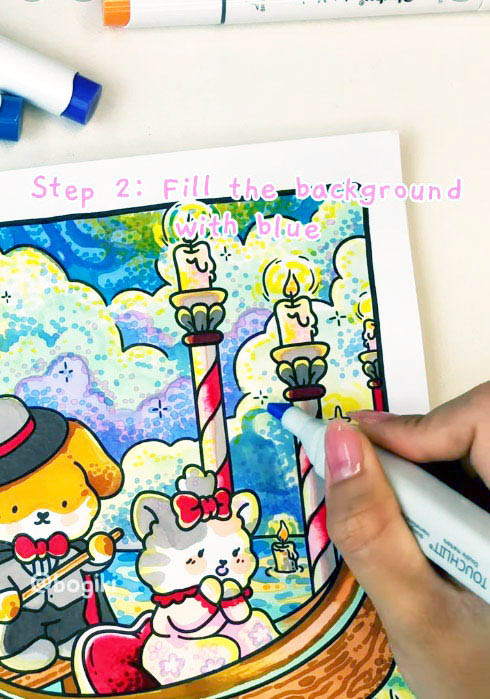
After finishing the glow around the stars, continue by filling in the night sky with blue using color B380. Use gentle circular motions to create depth and a sense of movement in the sky. Be sure to keep your strokes soft so the blue blends naturally with the existing yellow glow.
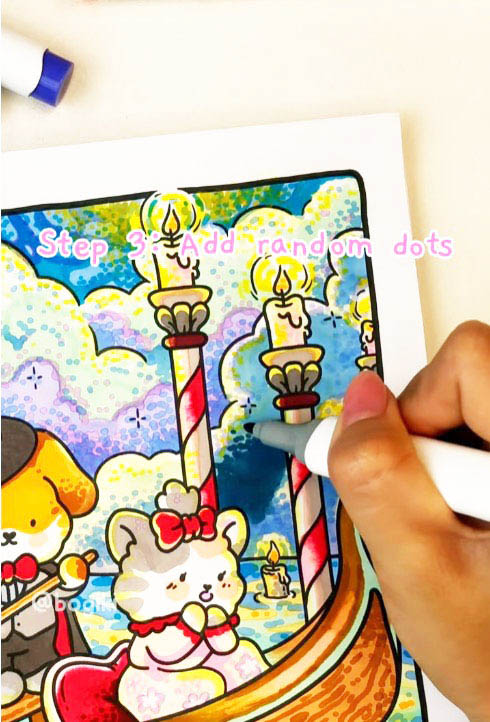
To enhance the sparkle, use the blue color B380 again to add small random dots across the sky. These tiny dots represent distant stars, creating a sense of depth and vastness. You can concentrate more of them in the upper part of the artwork to create a Milky Way effect.
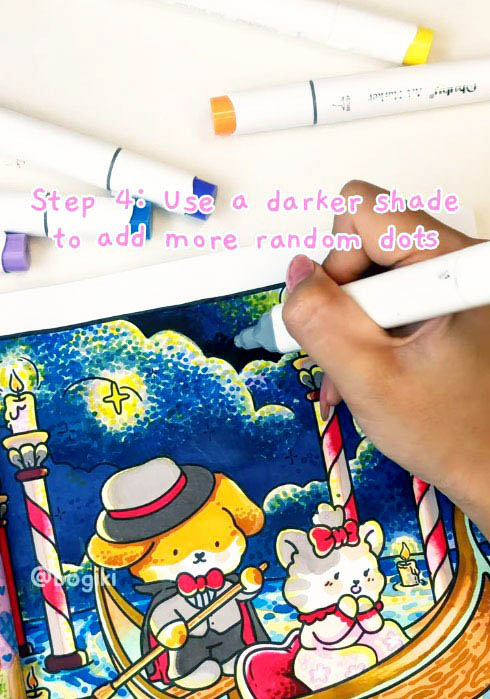
Next, use a darker shade of blue, such as V390, to add deeper dots to the night sky. In this glitter night coloring tutorial, layering various blue tones helps the sky appear richer and more realistic. Don’t hesitate to build up the colors to enhance depth and contrast.
Now it's time to use a white gel pen to add tiny highlights, like twinkling stars scattered across the night sky. Draw uneven, random dots in between the existing blue ones to create a natural sparkling effect. The white gel pen will serve as the perfect finishing touch, bringing your entire coloring piece to life.
Finally, using the same white gel pen, add a few gentle streaks of shooting stars gliding across the sky. These soft, elongated highlights will enhance the magical and dreamy atmosphere of the scene. As part of this glitter night coloring tutorial, you can draw one to three shooting stars, just enough to add charm while keeping the composition balanced.
Discover Romantic Vibes—a coloring book that invites you into a world of sweet moments, romantic memories, and heartfelt love. Inspired by iconic scenes from classic films, each page is a coloring journey through timeless love stories.
Inside, you’ll find:
👉 Buy the Romantic Vibes Coloring Book and enjoy coloring now!
👉 Watch the full real-time video and see the glitter night tutorial detail now!
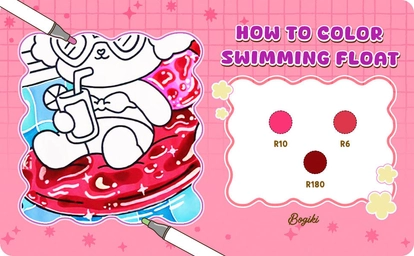
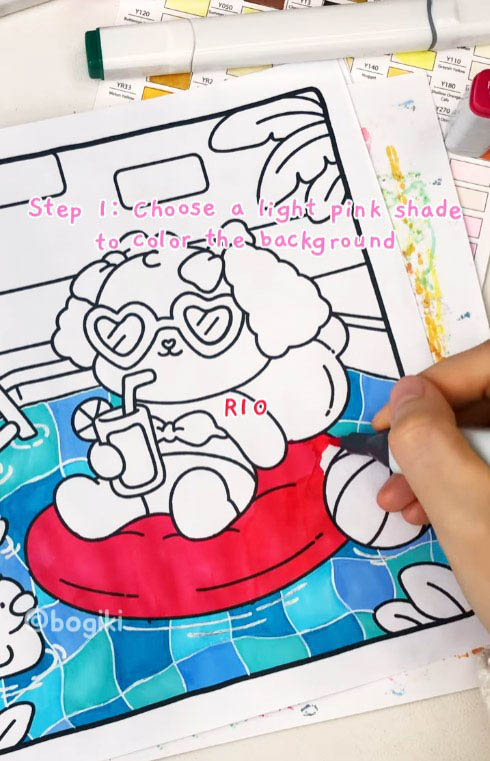
The adorable swimming float in Fuzzy Buddies Coloring Book by Bogiki is a charming highlight that captures the joyful and relaxing spirit of summer. In today’s guide, you’ll discover how to draw a swimming float and bring it to life with playful, vibrant colors. Grab your tools and start coloring now with Bogiki!
Ready to add a splash of summer fun to your artwork? In this tutorial, Bogiki shows you how to color a vibrant swimming float with step-by-step instructions. Use Touchliit or Ohuhu markers for smooth blending and a white gel pen to add bright water highlights. Let’s dive in and bring your float to life!
Start by choosing a light reddish-pink shade (R10) to create the base layer for the swimming float. This color adds a soft and cheerful touch, perfectly capturing the summer vibe of the illustration. Evenly fill in the entire surface of the float to set the foundation for the next details.
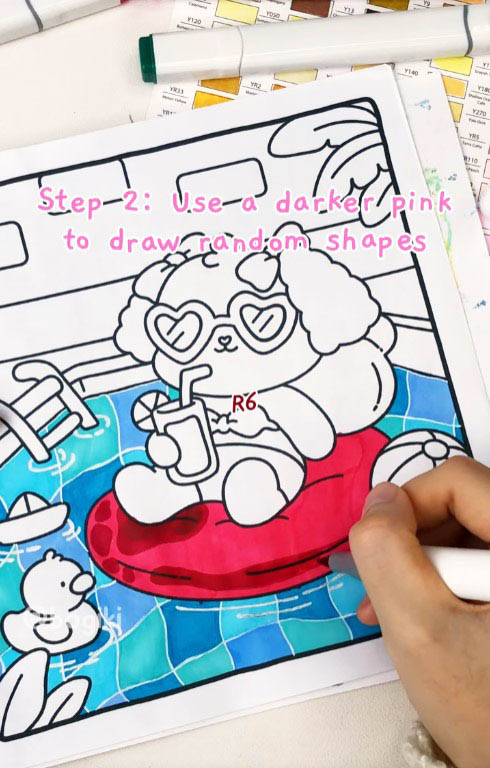
After completing the base layer, use a darker pink shade (R6) to draw random shapes on the float. These patterns will add depth and interesting highlights to the surface. Try to space them out evenly to maintain a balanced look.
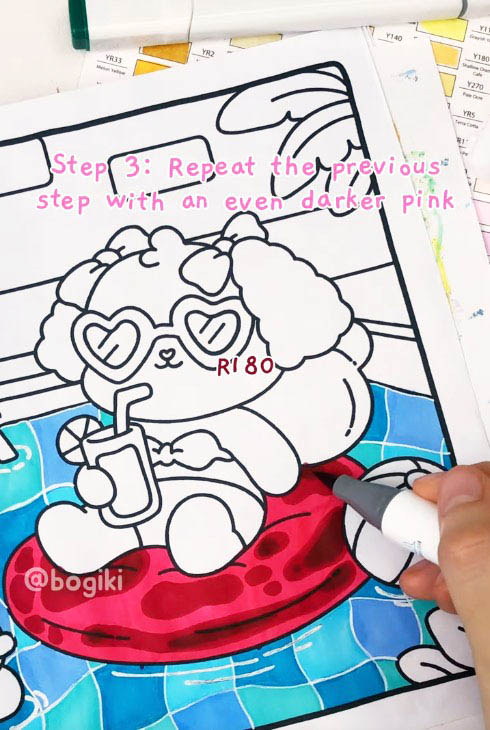
Continue by repeating the previous step, but this time use an even darker pink shade (R180) to fill in the remaining empty spaces. This layer will give the float a richer appearance and enhance its depth. Be mindful to apply the color moderately to maintain overall harmony in the design.
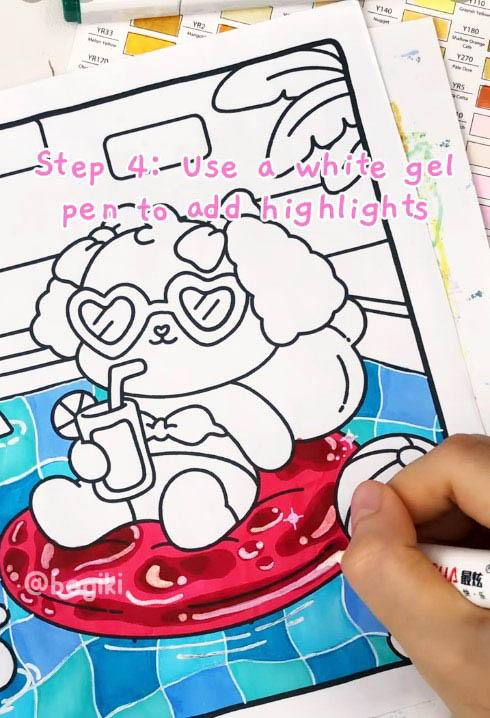
Finally, use a white gel pen to add highlights or light accents on the surface of the float. These bright strokes mimic the effect of light reflecting off the water, making the float look more vibrant and glossy. It’s a small step, but it creates a strong visual impact.
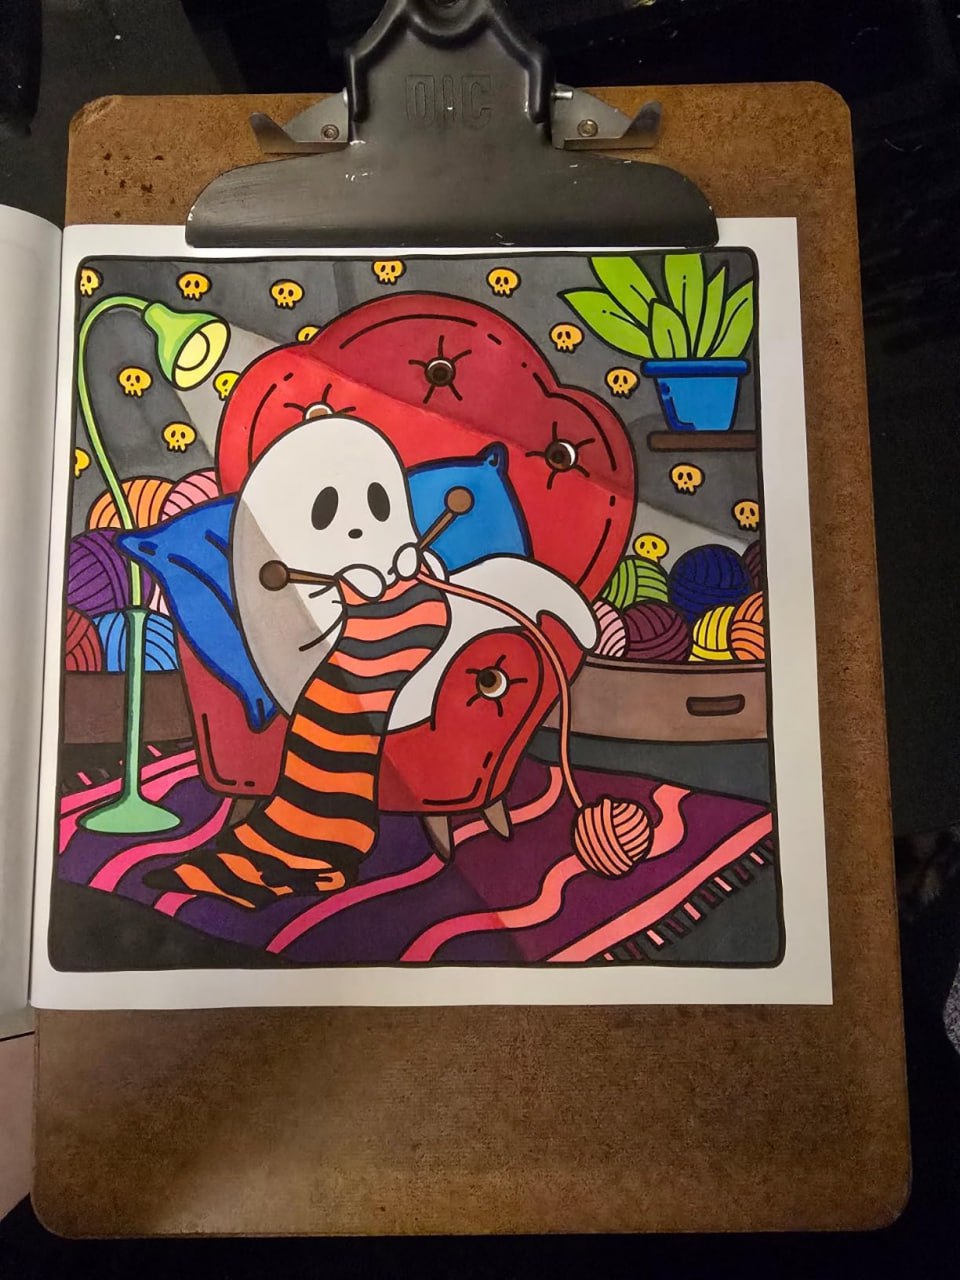
Step into a world of warmth and relaxation with the Fuzzy Buddies Coloring Book! Perfect for animal lovers and anyone in need of a cozy escape, this book features 40 charming, hand-drawn illustrations of cuddly critters in peaceful, homestyle settings.
Designed to soothe your mind and spark creativity, each page is printed single-sided to protect your artwork. Its handy 8.5 x 8.5-inch size makes it perfect for coloring at home or on the go. Let the Fuzzy Buddies brighten your day—one stroke at a time!
👉 Buy the Fuzzy Buddies Coloring Book and enjoy coloring now!
👉 Watch the full real-time video and see how to draw a swimming float detail now!
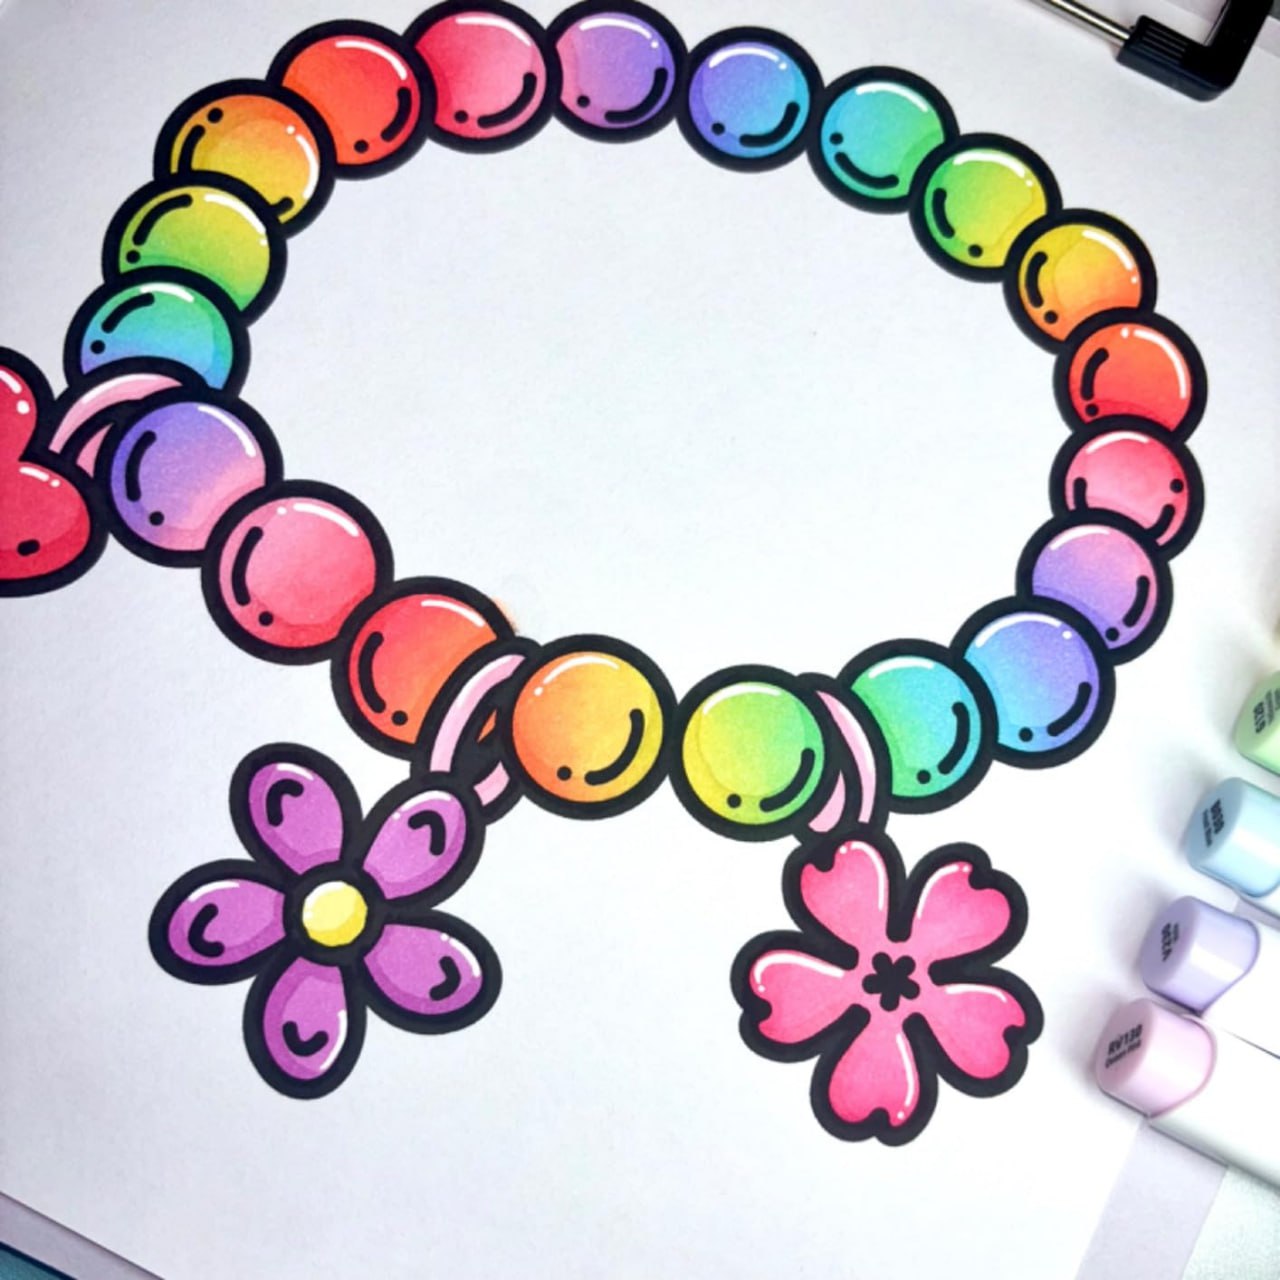
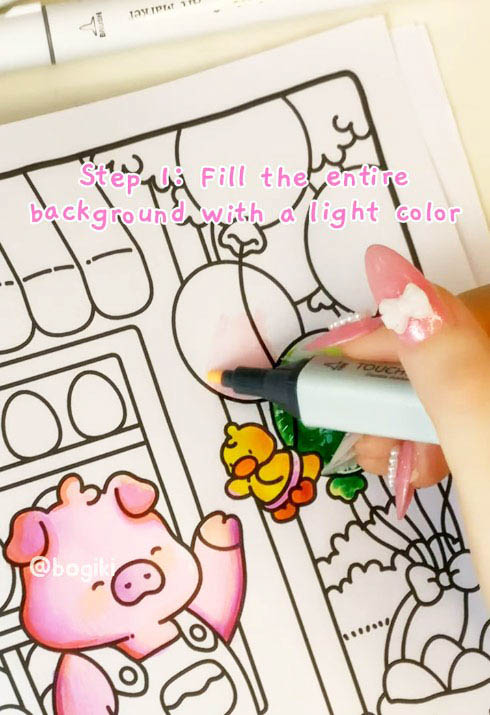
Coloring balloons always brings a cheerful and colorful feeling. With Bogiki’s how-to color balloons tutorial, you can easily create vibrant and adorable balloons. Each coloring step is guided to help you complete your favorite coloring page with ease!
To help you easily create bright and beautiful balloons, Bogiki brings you a simple step-by-step guide on how to color balloons. Let’s follow along and make your artwork shine with fun and creativity!
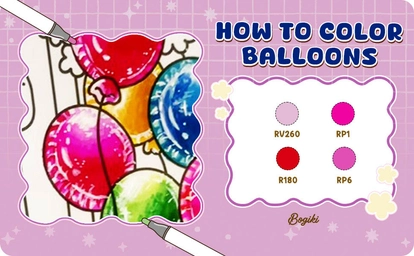
First, apply a layer of light color over the entire background to create a soft and bright feel for the artwork. Light pink (RV260) is an ideal choice, helping to highlight the balloon details later on. Make sure to color evenly to create a smooth base that’s easy to blend in the next steps.
Next, add a darker shade to the areas you want, but remember to leave some white space to create a lighting effect. Light pink (RP1) will help add depth to the balloons, making them look softer and more realistic. Keeping the white areas will give the impression that the balloons are gently glowing.

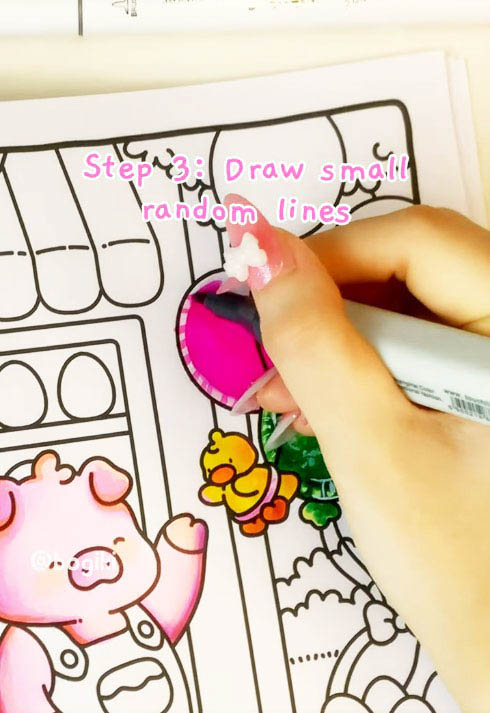
In this step, you’ll add extra detail to the balloons by drawing small, random lines over the colored surface. Use violet pink (RP6) to enhance depth and make the balloons look more lively. These small lines may seem simple, but they help add texture and a sense of movement to the illustration.
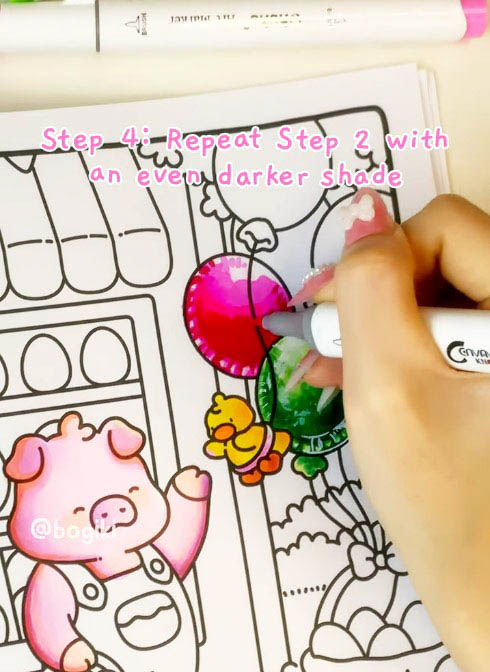
To enhance contrast, repeat the shading step using deeper tones like bright red (R180) and violet pink (RP6). Gently apply the colors to the shadowed areas of the balloons to create a stronger three-dimensional effect. This added layer will make the balloons stand out and appear more vibrant than ever.
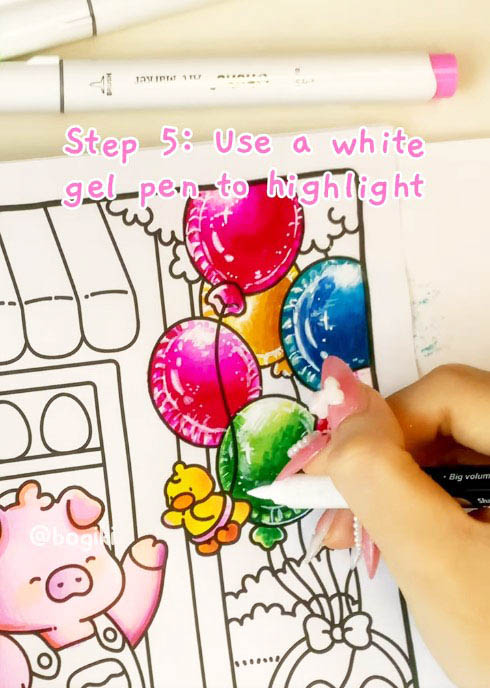
Finally, use a white gel pen to draw small highlights or light reflections on the balloons. This is an important step that adds a sparkling effect and makes the balloons look like they’re glowing under the sunlight. With just a few light touches, you can complete your artwork in a truly impressive way.
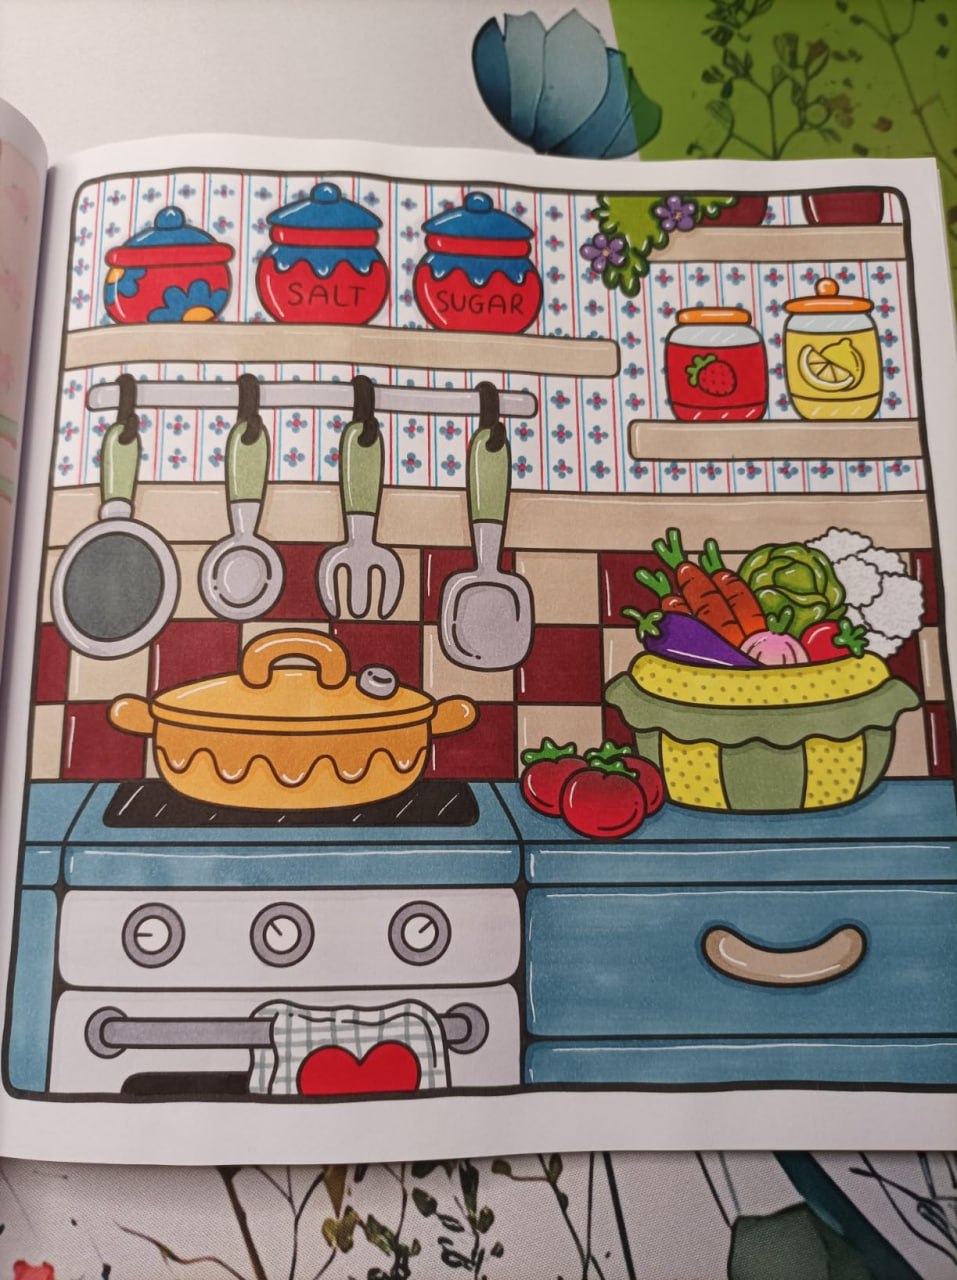
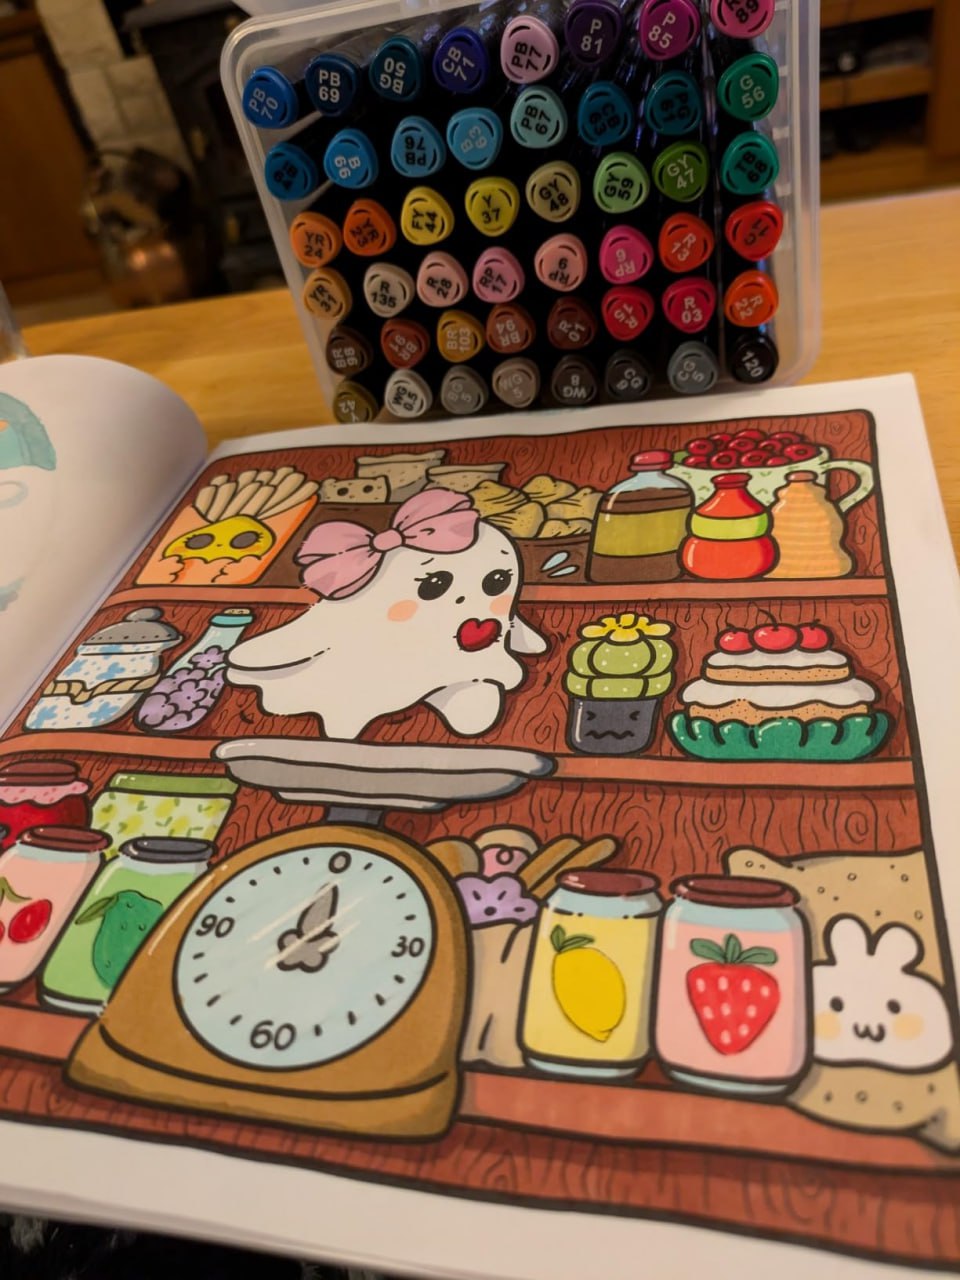
Let your creativity bloom and your heart melt with the Cuddle Buddies Coloring Book from Bogiki! This charming collection features 40 hand-drawn illustrations of cuddly animal friends enjoying life’s sweetest little moments—from baking treats to sipping tea in cozy corners. Perfect for fans of all things cute and comforting, this book is a relaxing escape into a world of warmth and whimsy.
What you’ll find inside:
👉 Buy the Cuddle Buddies Coloring Book and enjoy coloring now!
👉 Watch the full real-time video and see how to color balloons in detail now!
Treat your inbox to a lovely surprise! Sign up now for exclusive content and special gifts