


Both beginners and experts can enjoy books.

Prevents bleed-through and protects every design.

Every design is created by skilled human artists.

Trusted and loved by coloring fans worldwide.
You have questions? We're here to help.

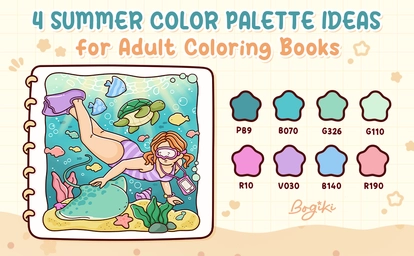
Summer always carries its own gentle little colors. Some days feel bright like fresh fruit under warm sunlight, while others feel calm like quiet waves moving slowly beneath the sea. That is why exploring different summer color palettes can make coloring pages feel even softer, cozier, and more comforting. In this guide, you will discover four summer color palette ideas inspired by peaceful summer scenes, helping you bring warmth, freshness, and quiet happiness into your coloring time.
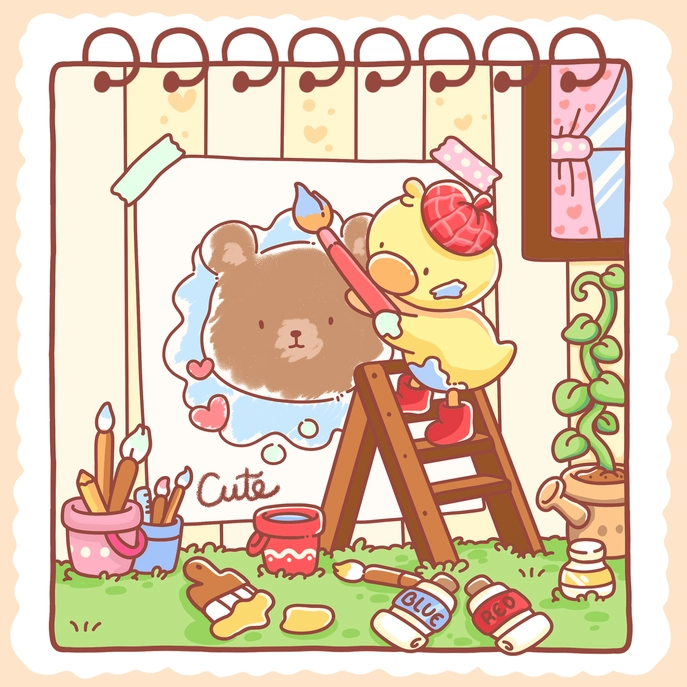
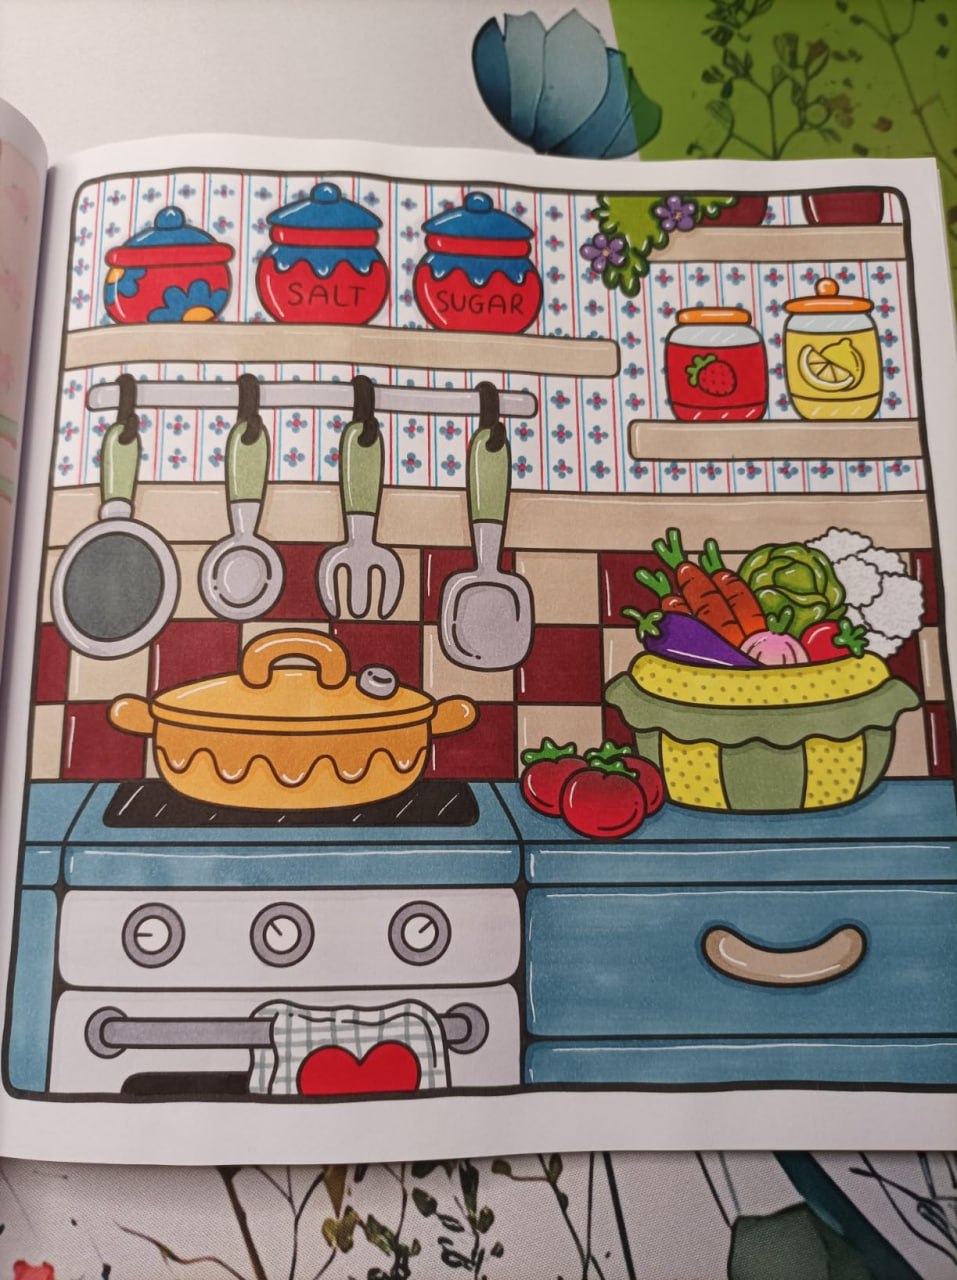
The light summer color palette ideas feel like a slow afternoon spent in a fruit garden where everything looks soft, sweet, and touched by sunlight. Fresh greens, warm peach tones, creamy yellows, and juicy reds come together gently, creating a cheerful atmosphere that still feels calm and easy to enjoy. This kind of cute summer color palette often feels playful without becoming too bright, making every little detail look warm and welcoming.
This color palette for light summer ideas works beautifully in illustrations filled with farm life and fresh summer harvests. Pages with apple trees, ladders, baskets, and tiny countryside details allow the colors to feel lively while still staying soft and balanced. In the Farm Cuties Coloring Book, these cheerful scenes create a lovely space to explore light summer palette colors in a way that feels peaceful, playful, and full of gentle summer warmth.

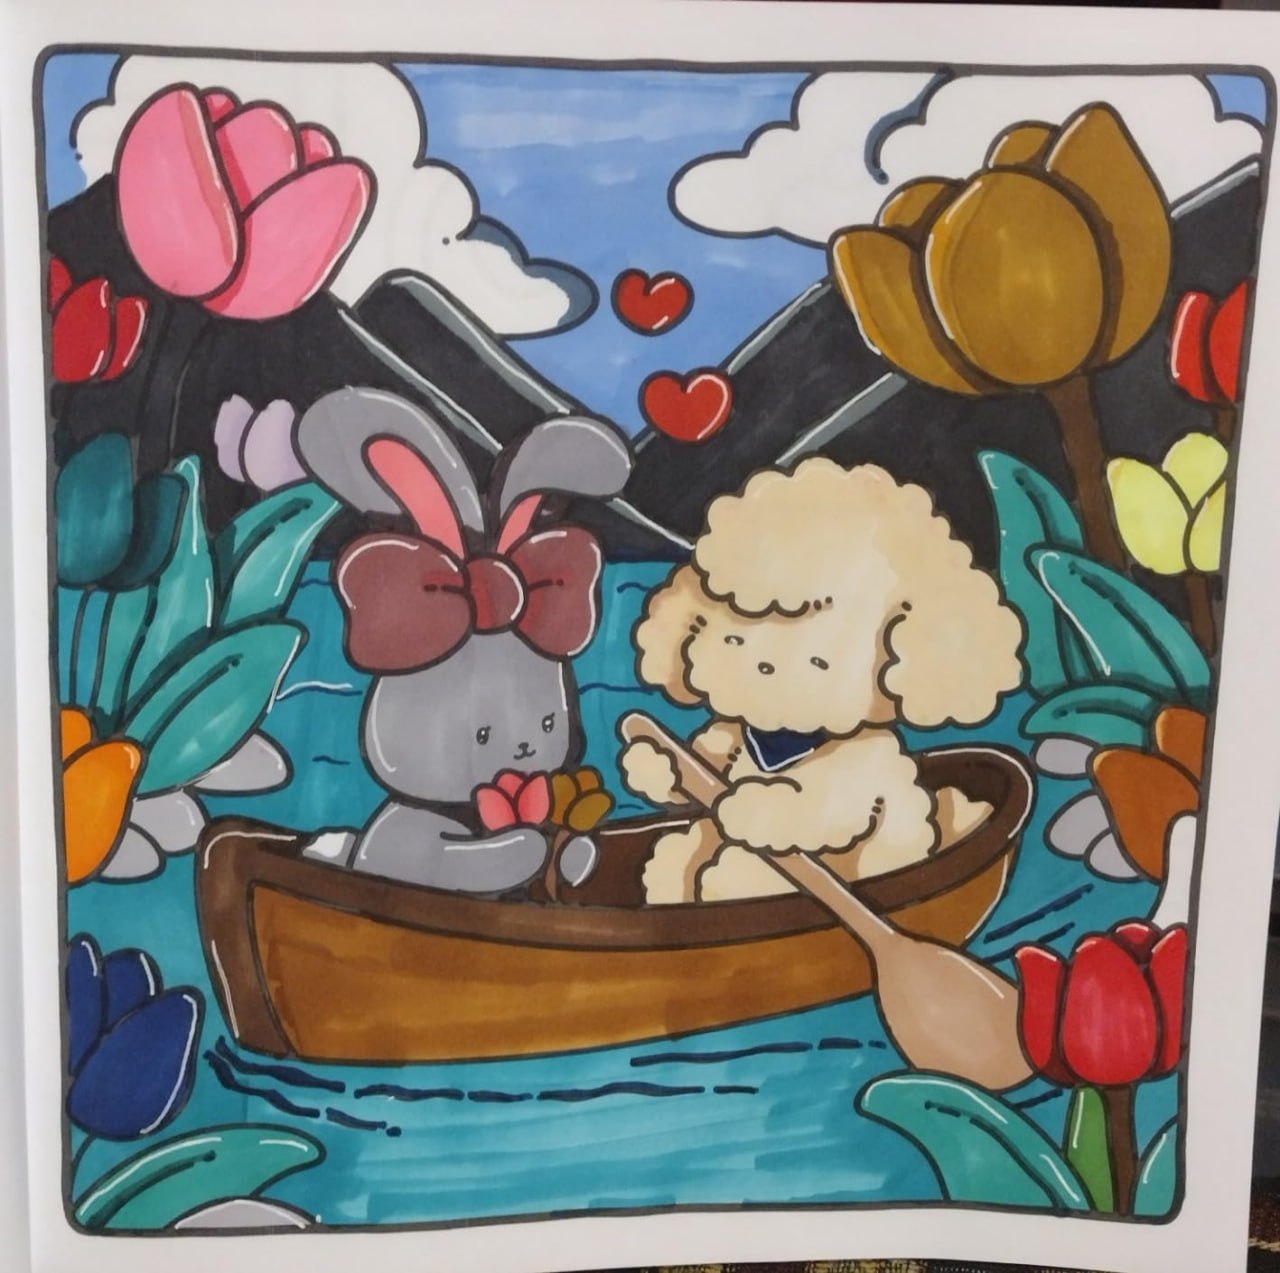
The cool summer color palette feels quiet and refreshing, almost like stepping into clear blue water on a warm summer morning. Soft ocean blues, sea greens, aqua tones, and gentle purples flow together naturally, creating a peaceful mood that feels light and airy. What is cool summer color palette ideas often becomes easier to imagine through underwater scenes, where everything moves slowly and softly beneath the water.
The cool summer season color palette fits naturally with illustrations inspired by oceans and water scenery. In the Girly Diaries Coloring Book, underwater adventures and dreamy summer moments allow cooler shades to blend smoothly across the page. This summer color palette creates a cool and refreshing coloring atmosphere where every scene feels soft, relaxing, and gently playful at the same time.

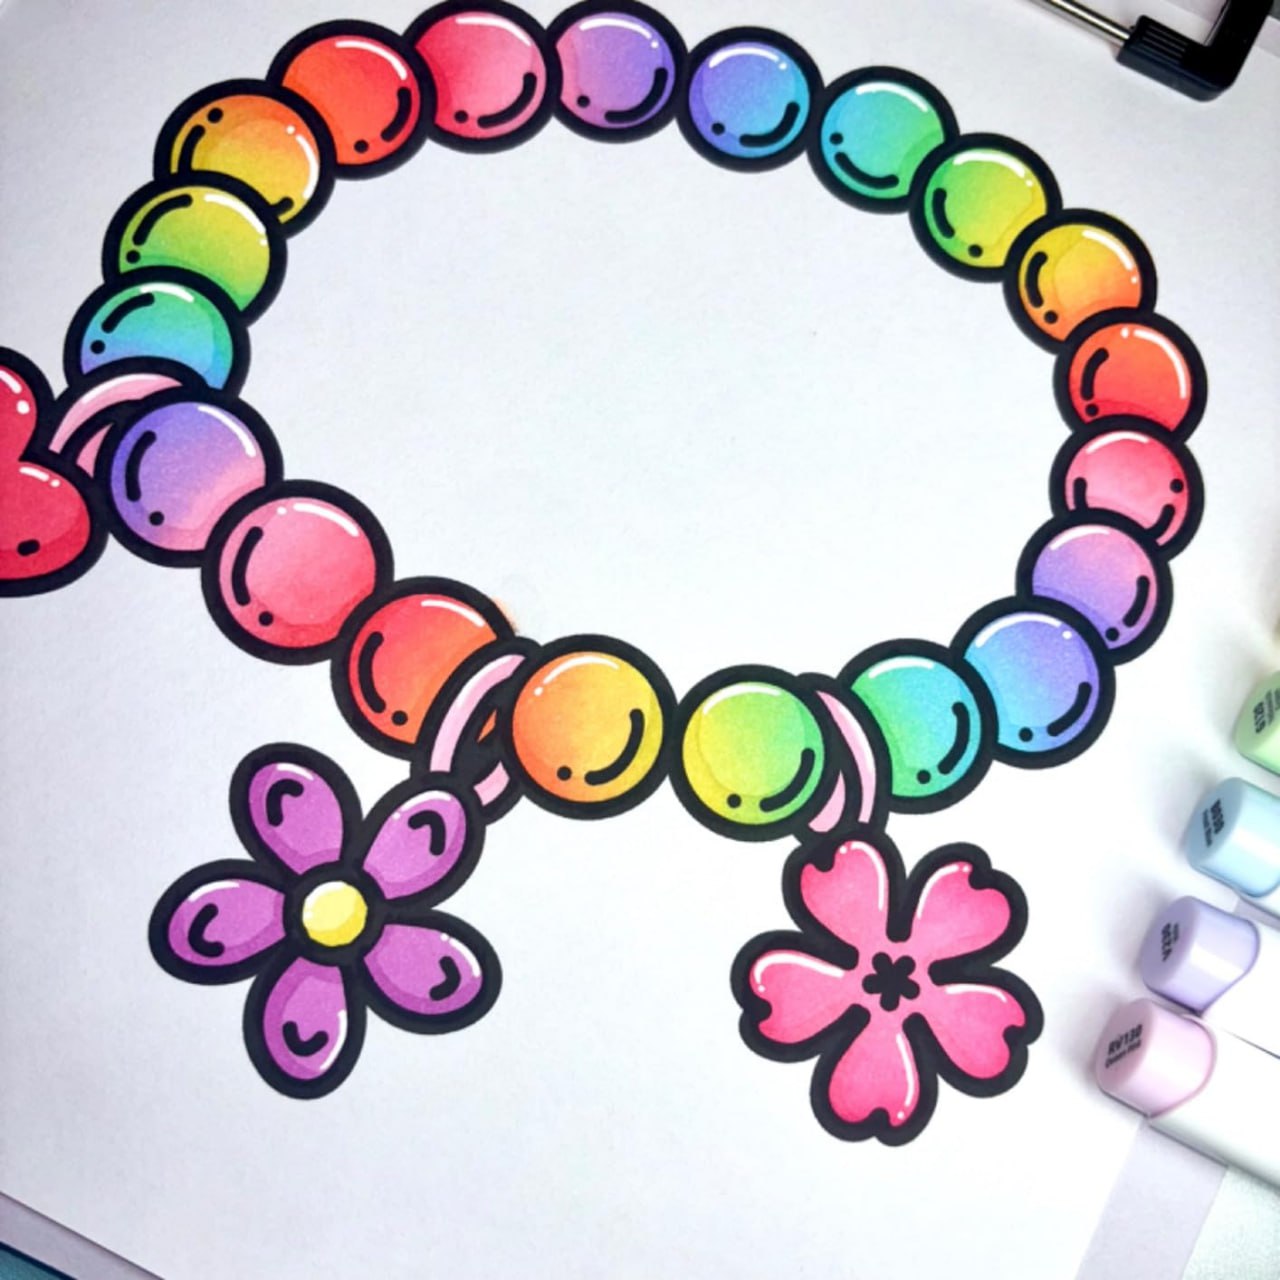
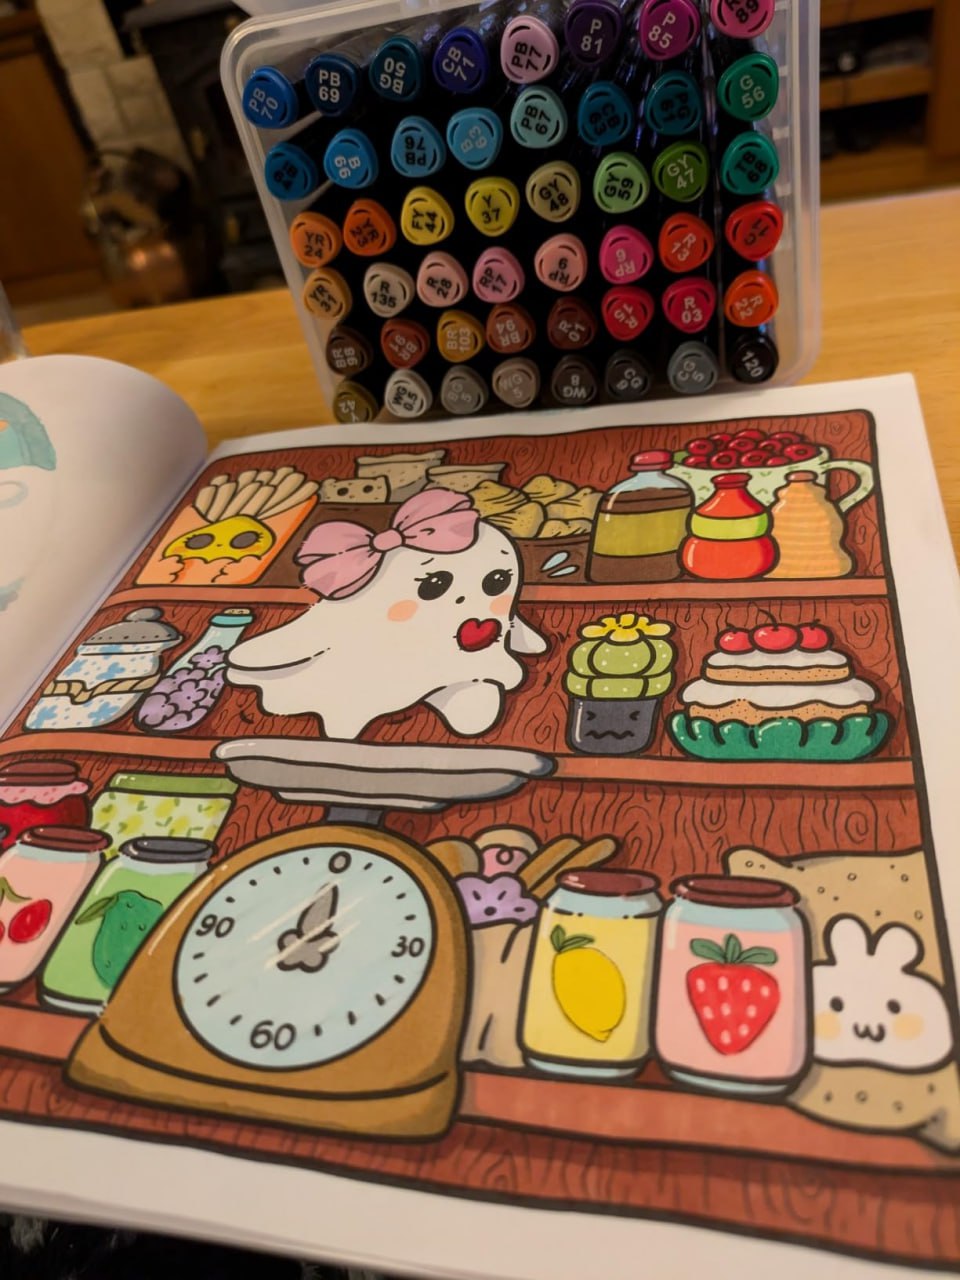
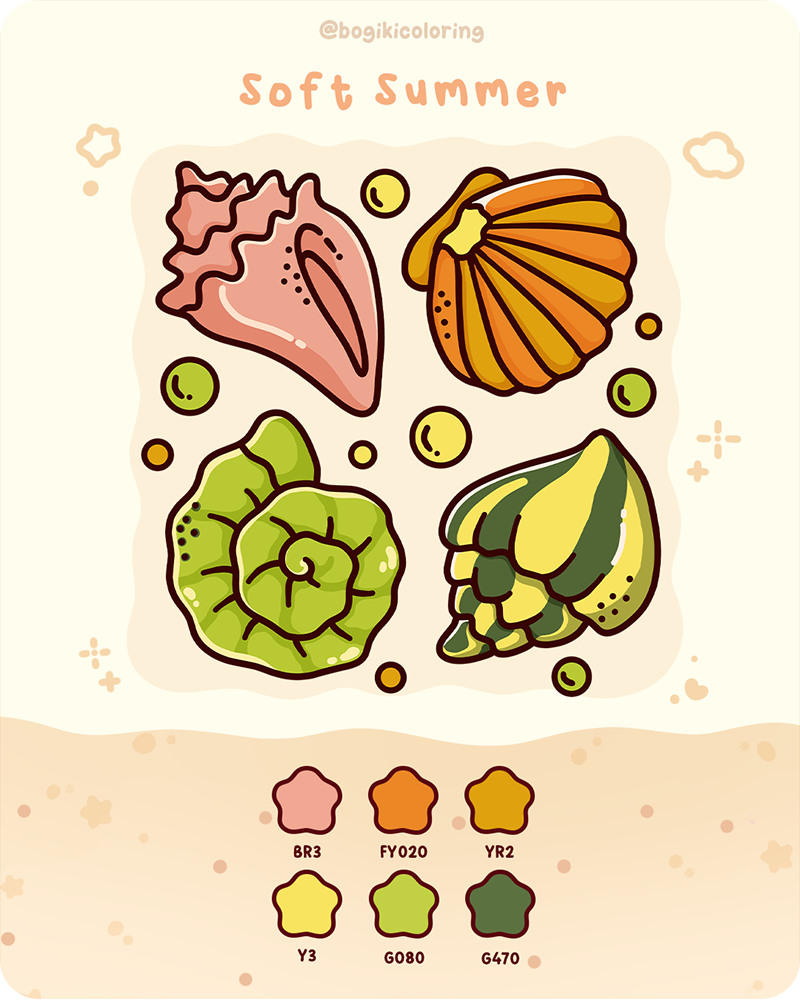
The soft summer color palette feels gentle in a very quiet way. Instead of standing out with strong contrast, these colors melt softly into one another like tiny seashells resting peacefully along the shore. Muted greens, warm shell pinks, soft yellows, and calm earthy tones create a relaxing balance that feels simple, natural, and comforting. Colors for a soft summer palette often carry a slower and more peaceful feeling, making illustrations look cozy without needing too many bright details.
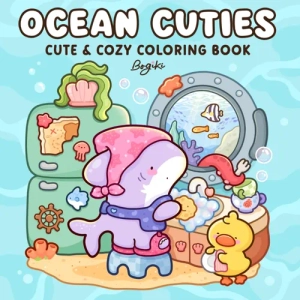
The Ocean Bold and Easy Coloring Book reflects the softness of this palette beautifully through clean and cozy ocean-inspired illustrations. Shells, sea creatures, and tiny seaside details create space for soft summer season color palette combinations to blend naturally across the page. If you enjoy calm and relaxing coloring moments, this color palette for soft summer can make each illustration feel warm, balanced, and quietly comforting.
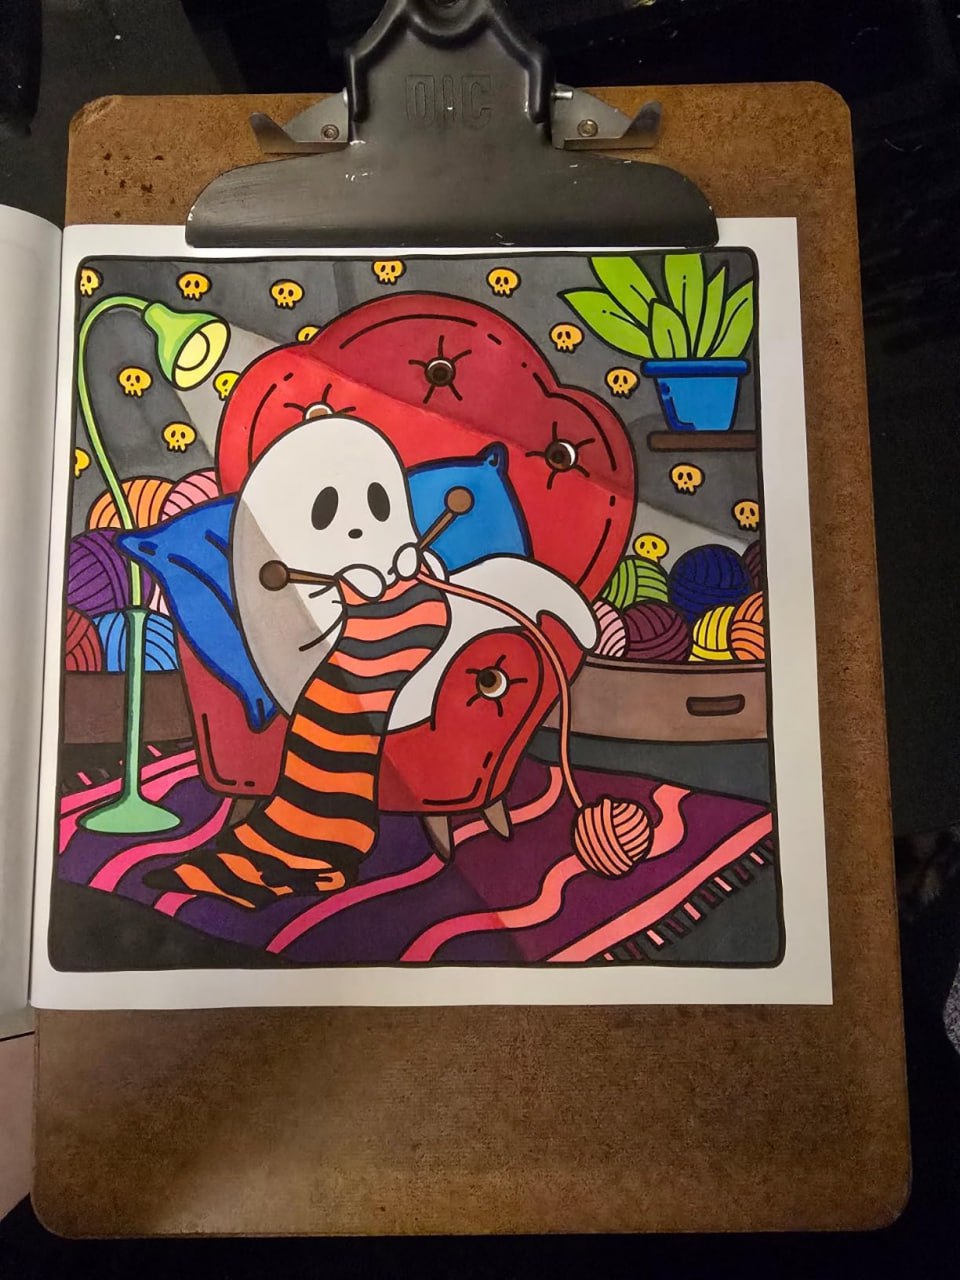
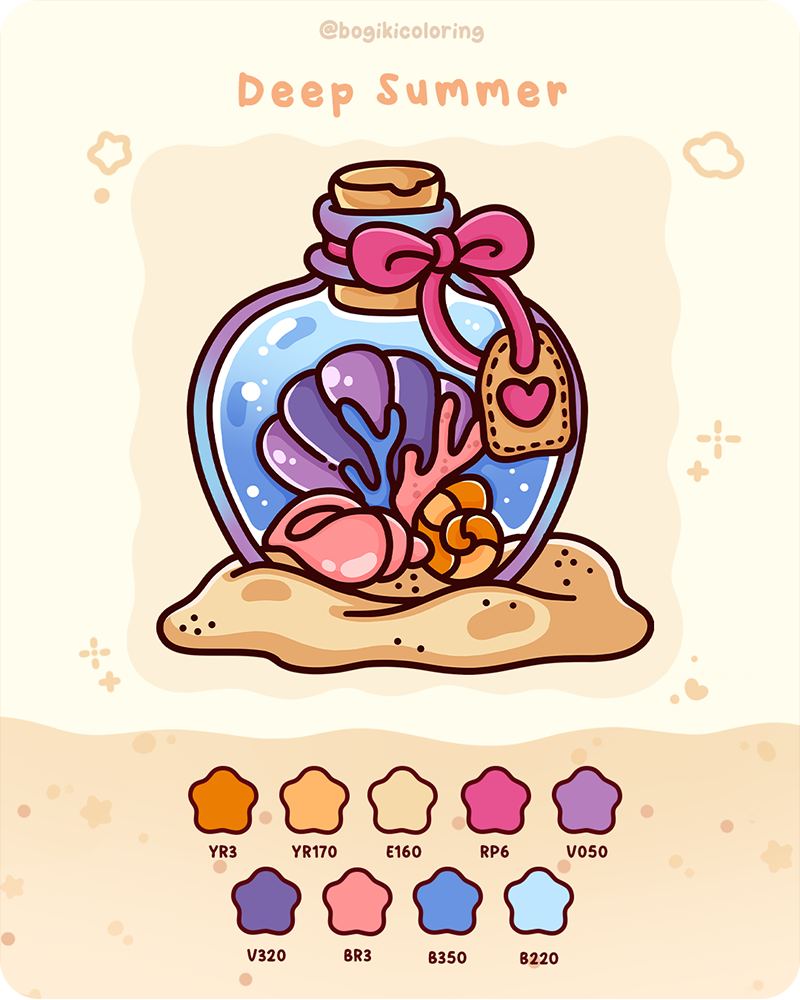
The deep summer color palette feels a little richer and dreamier, like small seaside decorations glowing softly inside a cozy beach house. Deep blues, rosy pinks, sandy neutrals, and warm purple tones bring more depth into the page while still keeping the gentle feeling of summer. Unlike brighter summer color palette ideas, this palette feels calmer and slightly more decorative, creating a soft and comforting seaside atmosphere.
This deep summer color palette pairs beautifully with decorative seaside illustrations that focus on tiny details and cozy objects. In the Ocean Oasis Coloring Book, shells, ribbons, corals, and beach-inspired decorations help deeper shades feel soft rather than heavy. The gentle contrast inside this deep, soft summer color palette creates coloring pages that feel dreamy, warm, and quietly magical.
Every summer color palette idea carries a different little feeling. Some feel fresh and cheerful like fruit gardens filled with sunlight, while others feel cool and peaceful like quiet ocean water. Softer palettes often create calm and comforting pages, while deeper tones bring warmth and cozy contrast into small decorative details.
When exploring different summer color palettes, there is no need to follow strict rules. Sometimes the loveliest pages come from simply choosing colors that make you feel relaxed and happy. Slow blending, soft layering, and gentle combinations can turn even simple illustrations into warm little summer moments filled with comfort and creativity.
If you enjoy exploring gentle summer color palette ideas, you may also love discovering other cozy palettes inspired by different seasons and celebrations throughout the year. Soft spring color palettes filled with fresh greens and delicate pastel tones can bring a bright and cheerful feeling to early year illustrations, while festive palettes like Christmas color palettes, Thanksgiving color palettes, and Easter color palettes create warm little holiday moments through comforting seasonal colors. Each palette carries its own quiet atmosphere, allowing every coloring page to feel soft, playful, and beautifully connected to the season.
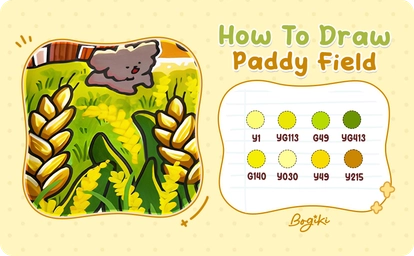
There are quiet afternoons in ripened rice fields, where sunlight softly settles over golden layers and a gentle breeze brings a sense of calm to everything around. In this guide on how to draw a paddy field, you will slowly explore and recreate that beauty through each layer of color and delicate detail. With a relaxed pace and soft, careful strokes, your paddy field drawing gradually comes to life as a peaceful, warm, and quietly poetic moment.
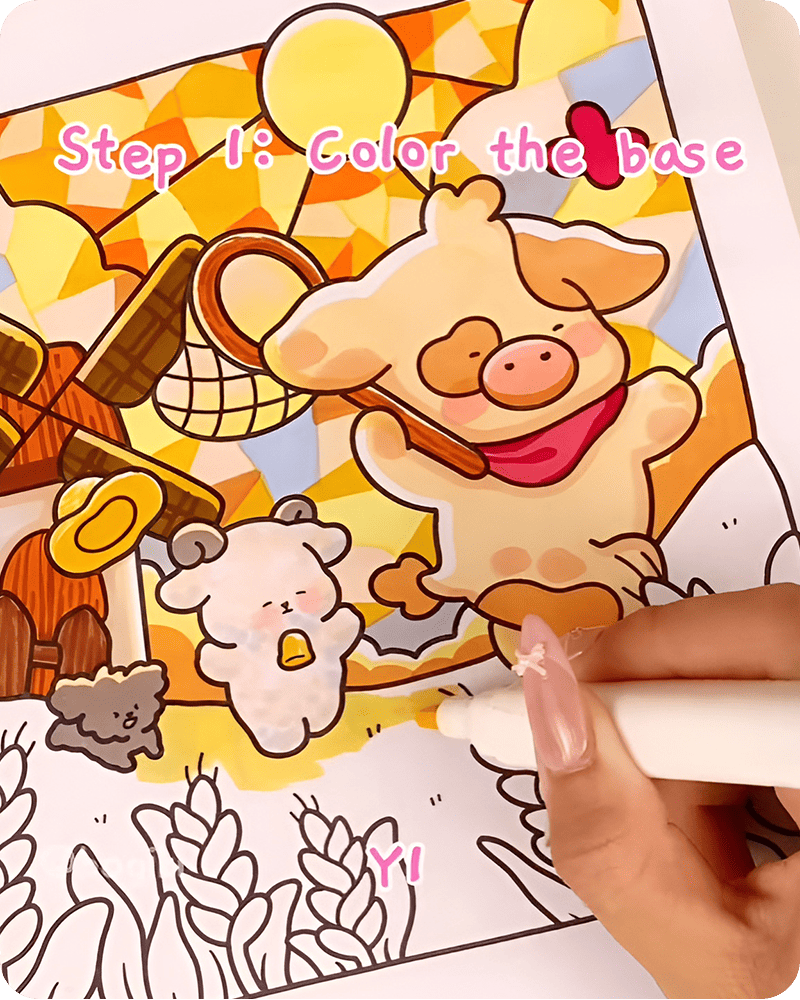
Begin by applying a light yellow tone, Y1, across the top area of the field. Keep your strokes soft and open so the color feels like sunlight gently touching the surface. This first layer sets a warm and peaceful mood for your paddy field drawing.
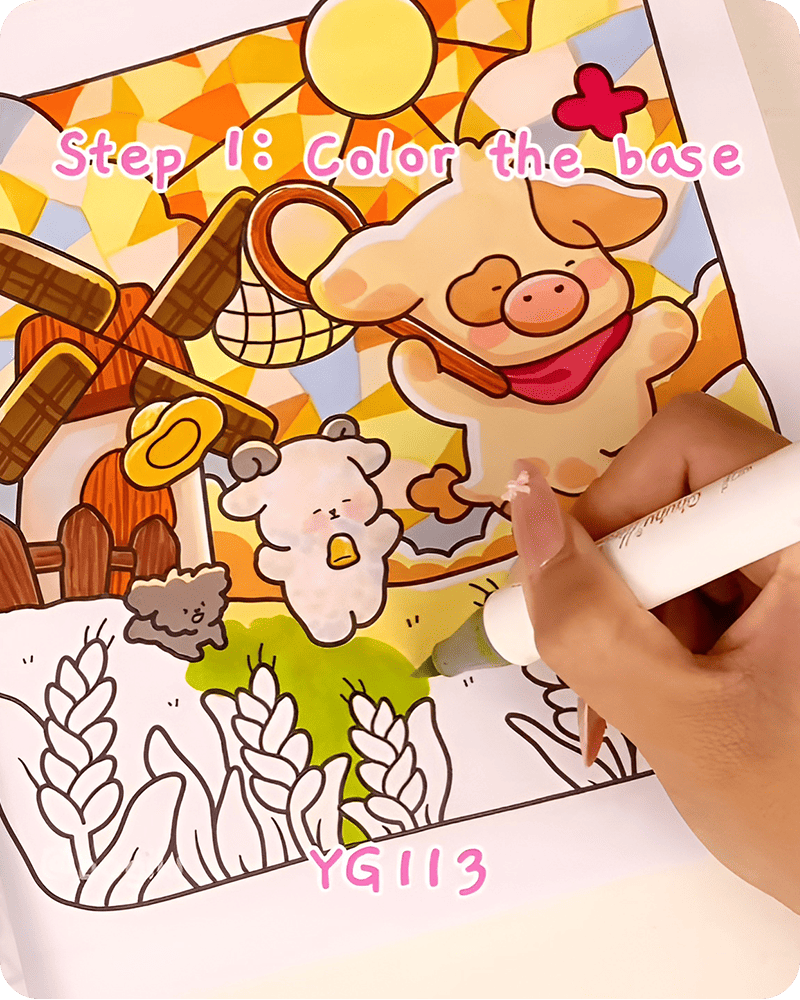
Next, use a light green tone, YG113, to color the middle section of the field. Let the green softly blend into the yellow above, creating a natural transition between sunlight and fresh growth. This gentle shift helps your drawing feel more organic and balanced.
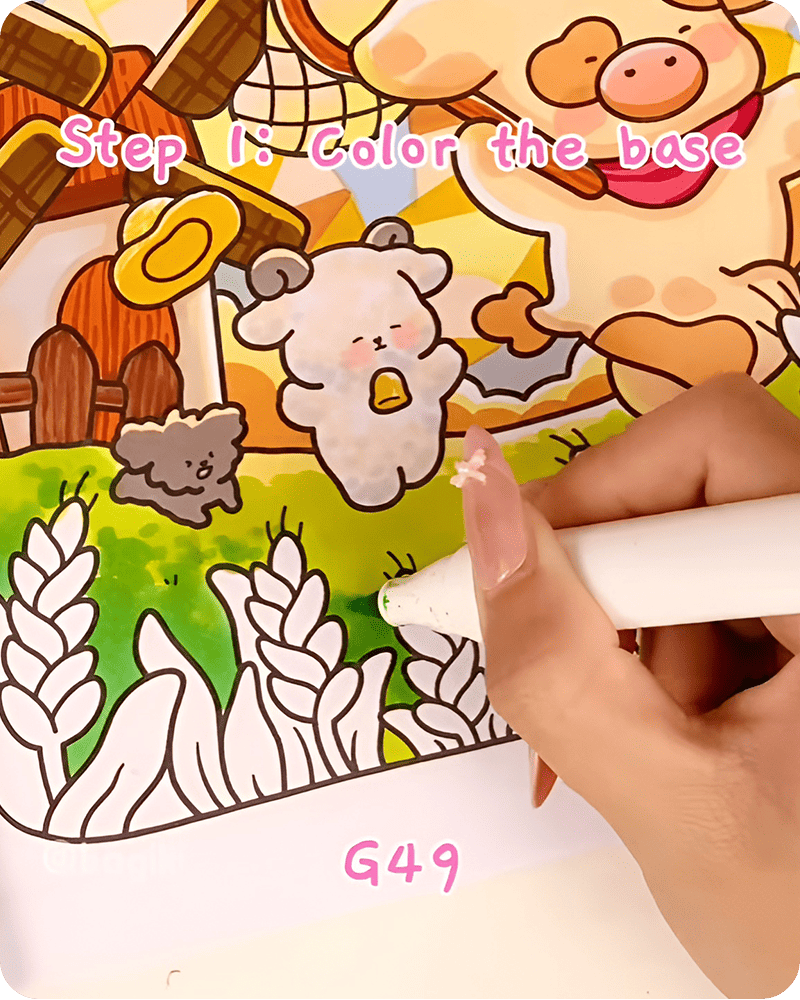
Finally, apply a deeper green G49 to the lower part of the field. Use slightly richer strokes here to add depth while keeping the texture smooth. In how to draw a paddy field, this layered base quietly builds a sense of distance and calm.
Using the tip of your marker, draw small, short strokes that curve slightly upward. These strokes represent simple grass clusters and should feel light and natural rather than perfect.
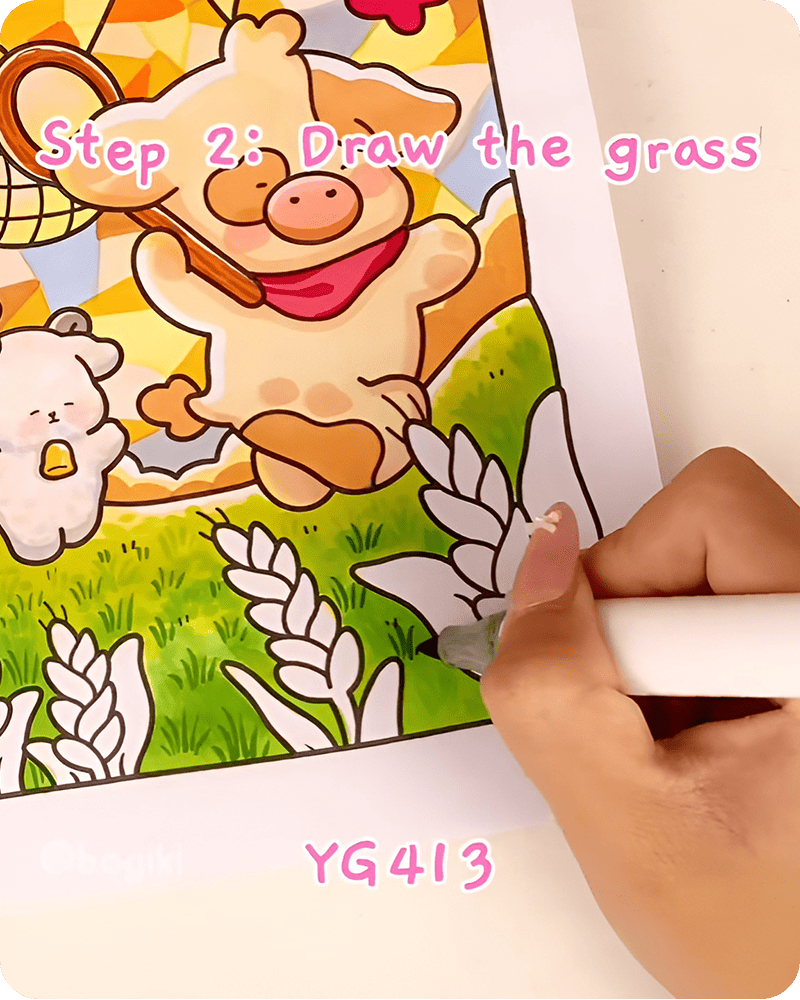
Scatter these clusters across the green areas of your field. Keep the spacing uneven so the scene feels more relaxed and organic. These small details in your paddy field drawing gently add texture without making the composition feel busy.
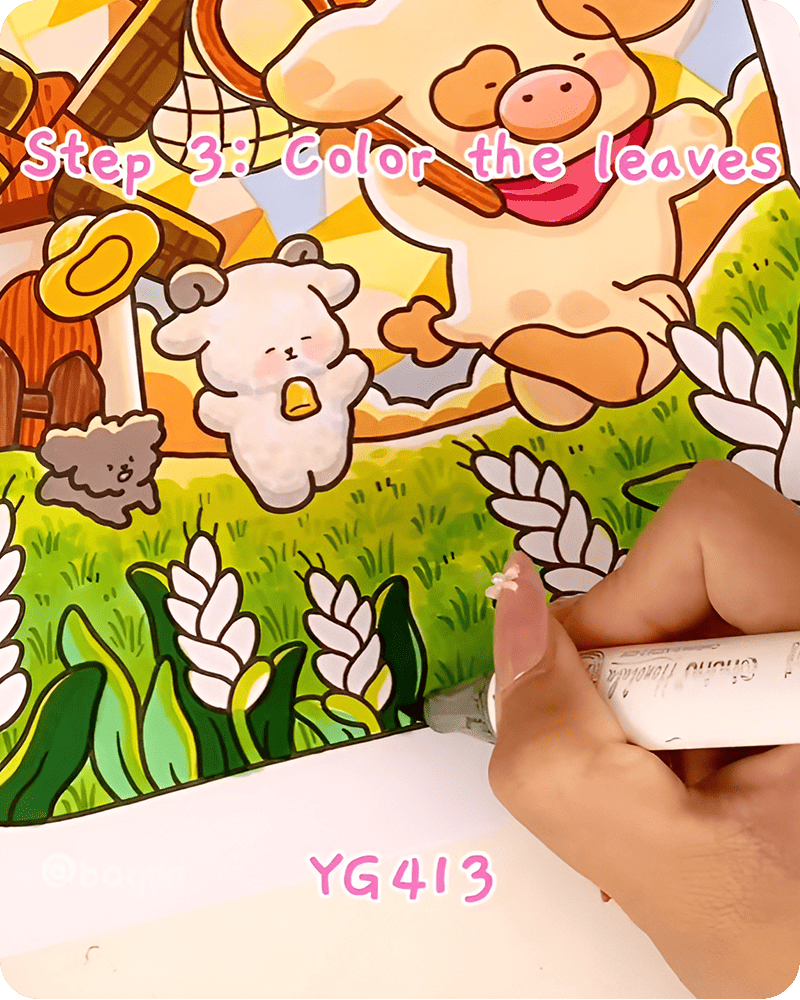
Start coloring one side of each long leaf using a fresh light green YG413. Apply the color softly and leave a small highlight or lighter space to suggest natural light. This helps the leaves feel airy and full of life.
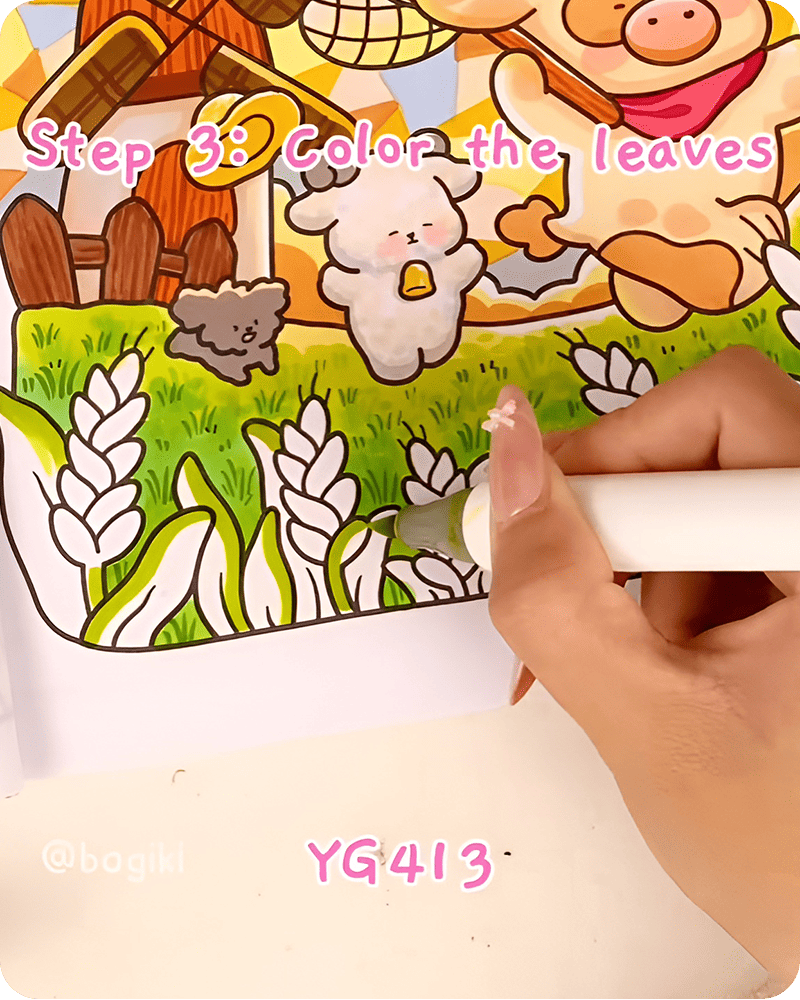
Then, use a deeper green G140 to fill the remaining side of each leaf. Let the two tones sit beside each other without overblending. This contrast creates a soft sense of depth while keeping the leaves calm and simple.
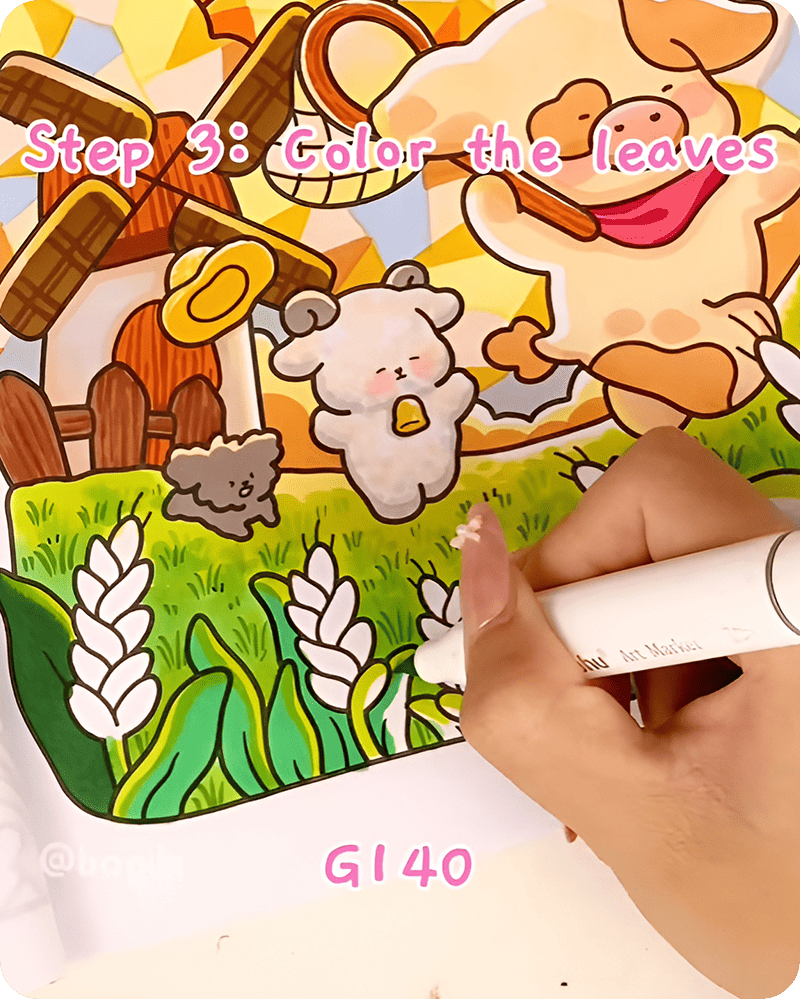
To complete this step, add a slightly darker green to areas closer to the base of the leaves or where they overlap. These gentle shadows help ground the leaves and make your paddy field drawing feel more dimensional.
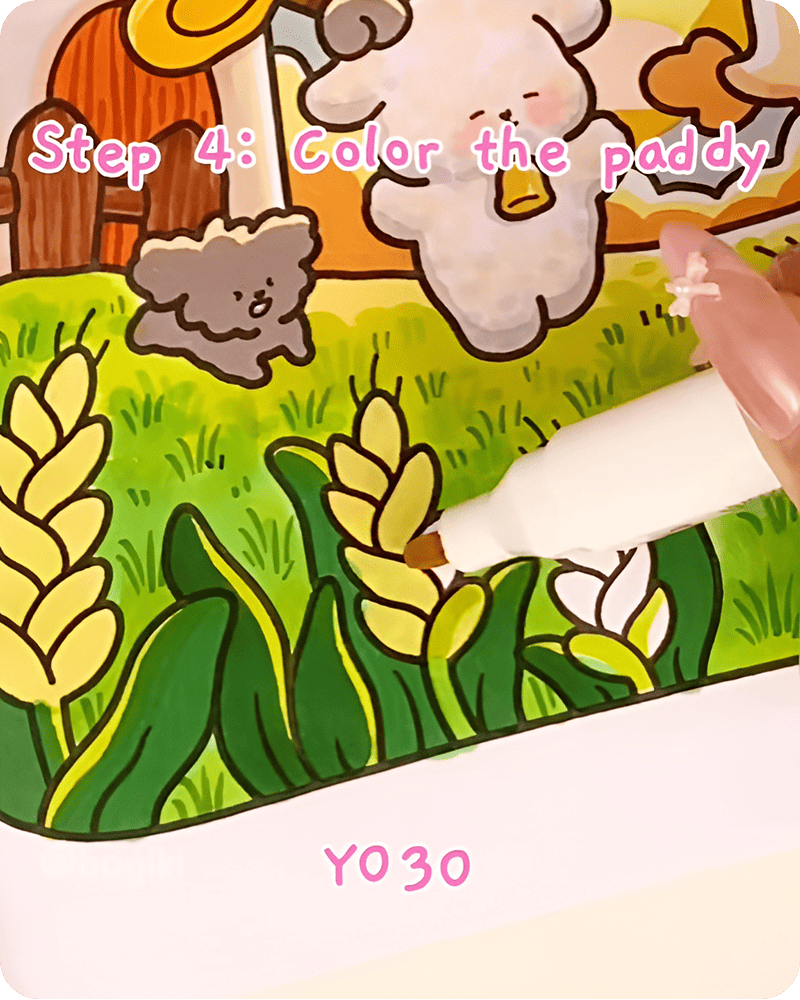
Begin by using a soft yellow Y030 to color the rice grains. Apply the color lightly across all the grains to create a bright and warm base. This layer gives your field a gentle glow.
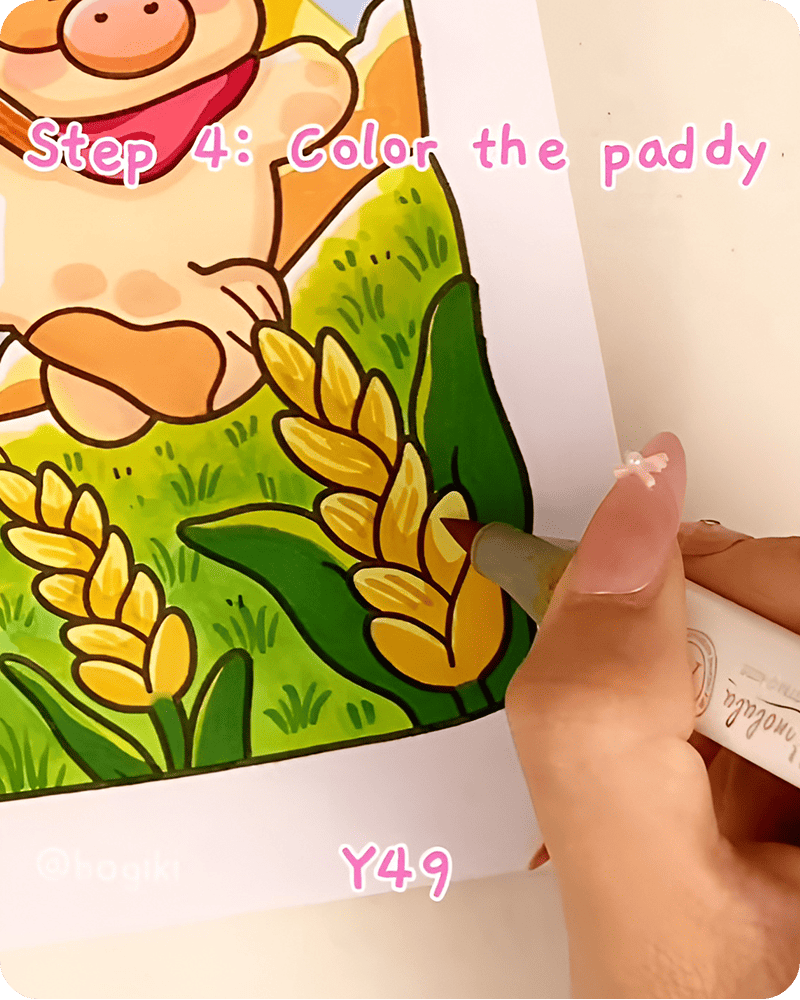
Next, use a deeper yellow Y49 to shade one side of each grain or areas that are slightly hidden. This technique helps each grain feel round and softly defined. As you continue practicing how to draw a paddy field, these small shifts in tone become easier and more natural.
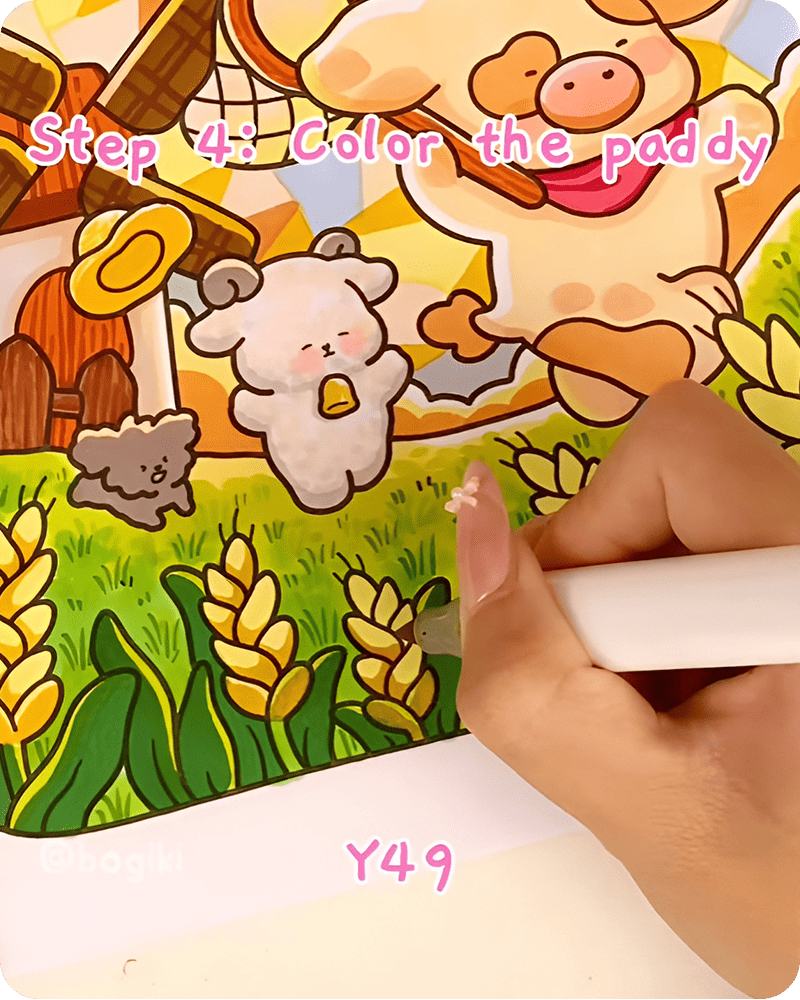
To enhance the texture, lightly draw fine lines on the grains using Y49. Keep these lines subtle so the grains remain soft and not overly detailed.
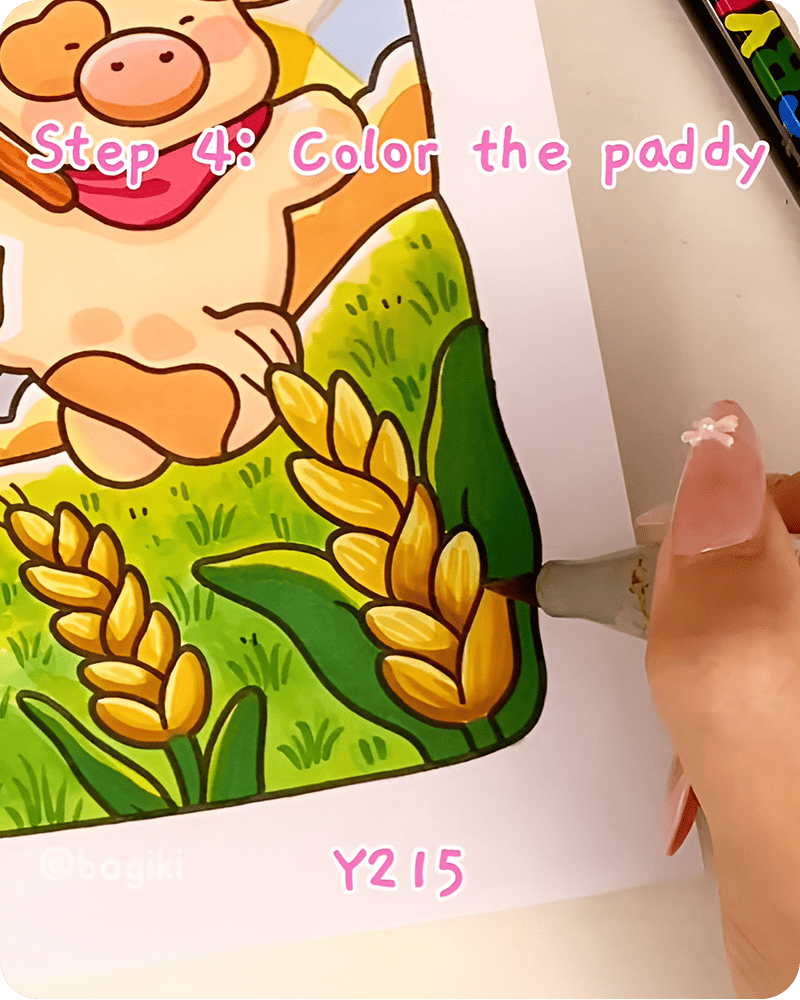
Then, add a touch of deeper shading using Y215 to create gentle shadows. This final layer gives your rice grains a more realistic and grounded appearance.
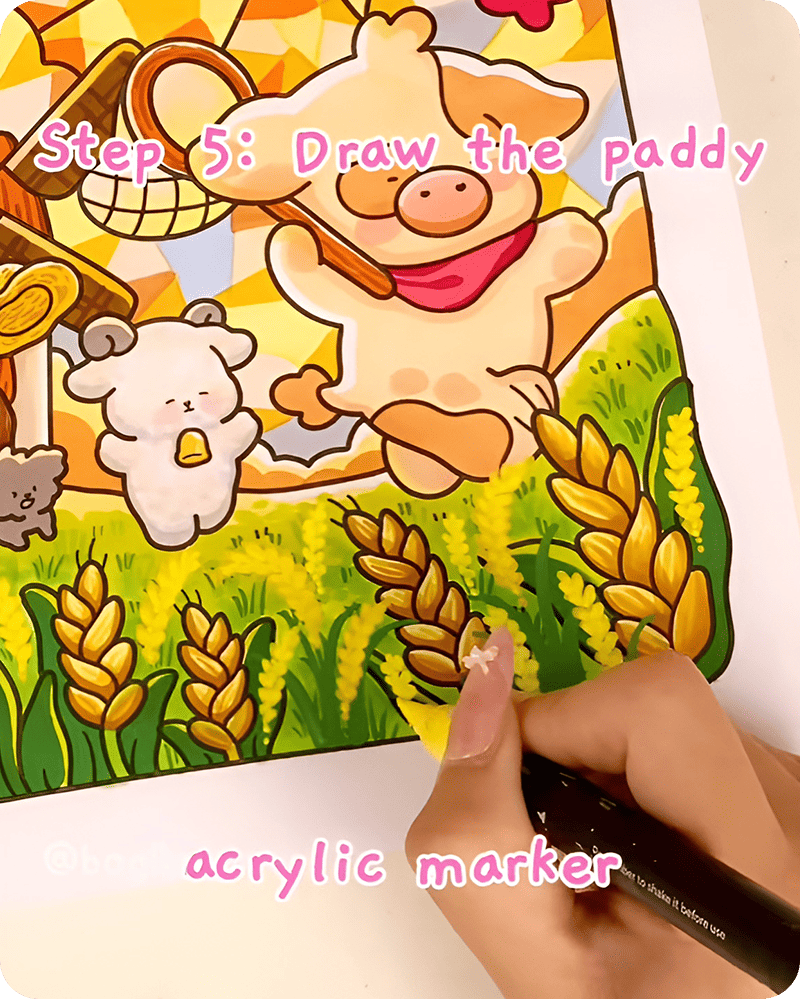
Use a green acrylic marker to draw a few thin grass strands rising above the field. Let them move naturally between the rice clusters to create variation and softness. These lines should feel light and effortless.
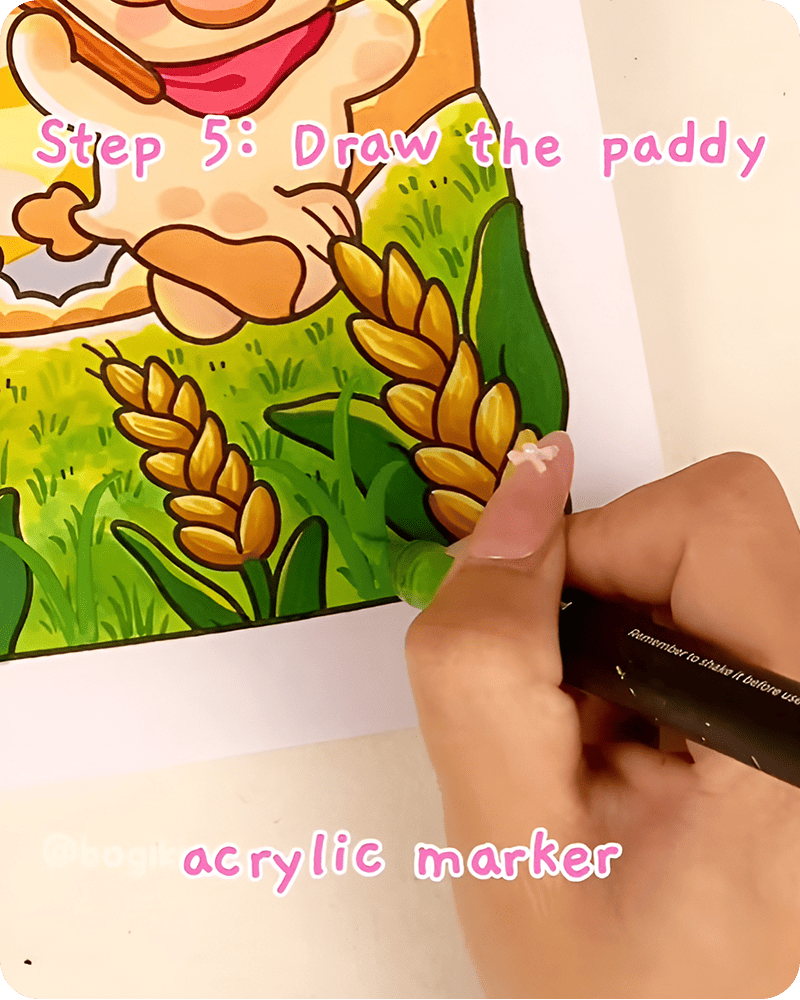
Then, use a yellow acrylic marker to add small rice flowers scattered throughout the field. These tiny accents bring a sense of movement and liveliness to your paddy field drawing.
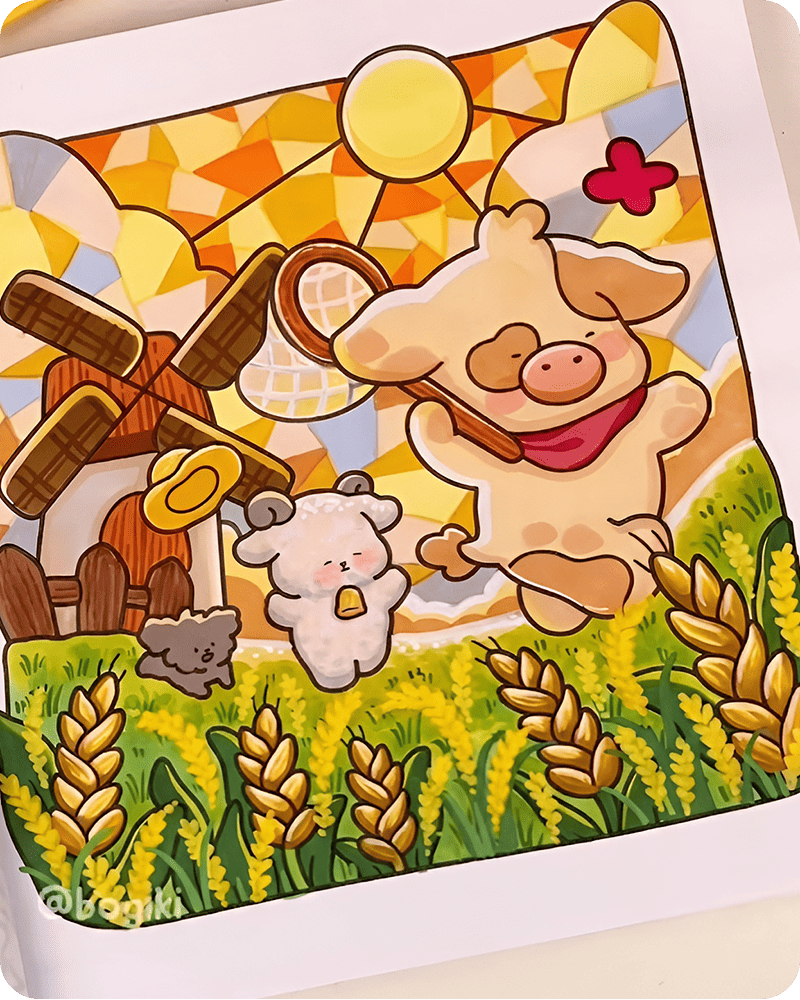
Take a moment to look at your full drawing. Notice how the layers of color, soft textures, and small details come together into a calm and balanced scene. In how to draw a paddy field, these final touches gently complete the atmosphere without overwhelming it.
As you finish your paddy field drawing, you may notice how each layer slowly builds a peaceful landscape. The combination of soft yellows and gentle greens creates a quiet harmony that feels both simple and comforting.
Learning how to draw a paddy field is not only about shapes and colors, but also about enjoying a slower creative rhythm. Each stroke, each blend, and each small detail becomes part of a relaxing process.
If you would like a softer way to begin, watching how to draw a paddy field can gently guide you through each stage before you try it yourself. As the colors transition from warm yellow light to calm green layers, you can see how the field slowly comes together in a natural and unhurried manner.
Let the video set a comfortable pace for your drawing. Simply observe how each stroke flows and allow your hand to move in a way that feels relaxed. This makes learning how to draw a paddy field feel lighter, easier, and more enjoyable.
After learning how to draw a paddy field, you may continue exploring more gentle nature scenes in a slow, creative rhythm. You can try learning how to draw a lavender field, where endless purple flowers stretch across the landscape and sway softly in the wind, creating a calm and dreamy atmosphere. Each simple stroke helps you build another peaceful scene to enjoy.
As your creative journey continues, you can also bring your coloring practice into the Farm Cuties coloring book, a warm farm world filled with adorable cow friends and other friendly animals. This book also includes the illustrated pages used directly in this paddy field drawing tutorial, allowing you to both observe and practice coloring in a relaxed and personal way.
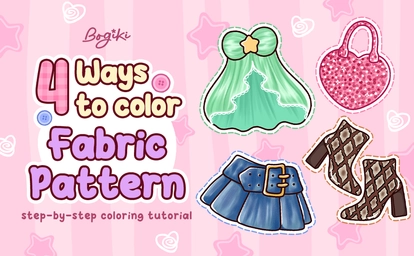
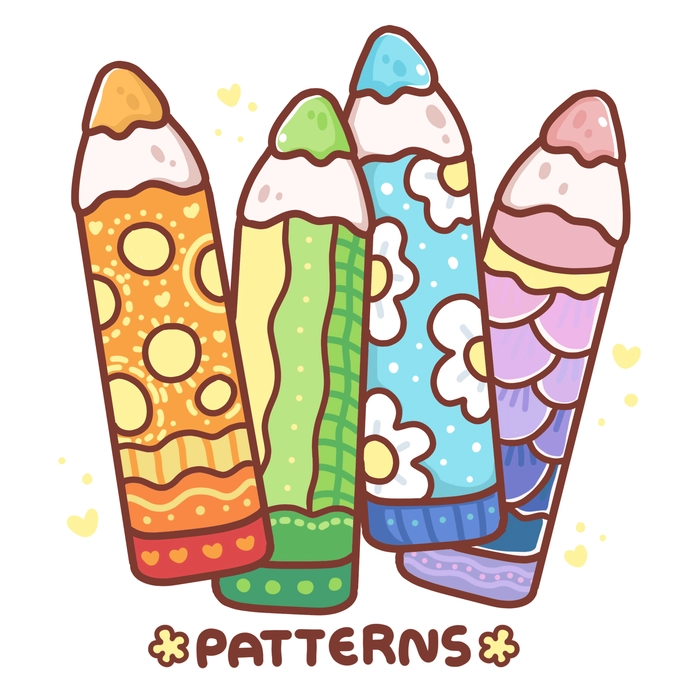
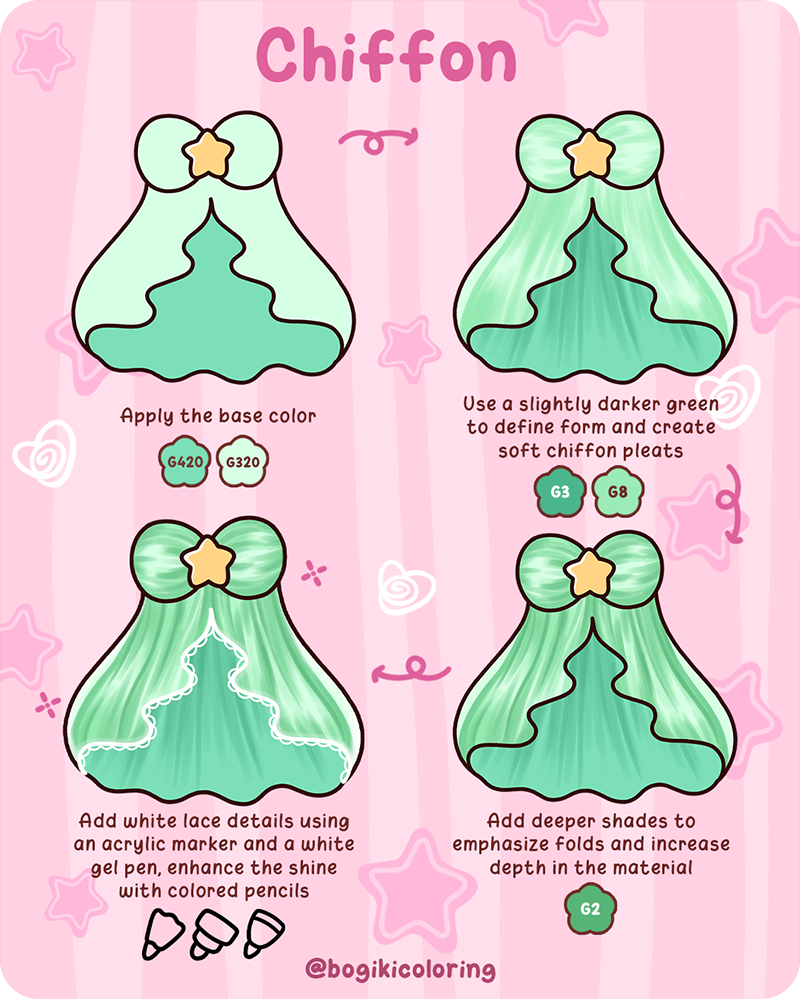
If you are curious about how to draw fabric patterns in a soft and relaxing way, this guide will gently take you through four simple ideas inspired by light summer outfits. From airy chiffon dresses to sparkling accessories, classic denim pieces, and playful snake skin details, each texture can bring your characters to life in a subtle and charming way. With soft layering, gentle shading, and small decorative touches, you can slowly build fabric styles that feel natural, cozy, and full of personality.
There is something quietly delicate about chiffon, where the fabric feels light as air and flows with every gentle movement. If you are learning how to draw fabric patterns, chiffon is a lovely place to start because it emphasizes softness rather than sharp detail. The folds are smooth, the transitions are subtle, and everything comes together in a calm and graceful way that feels perfect for cozy illustrations or dress designs.
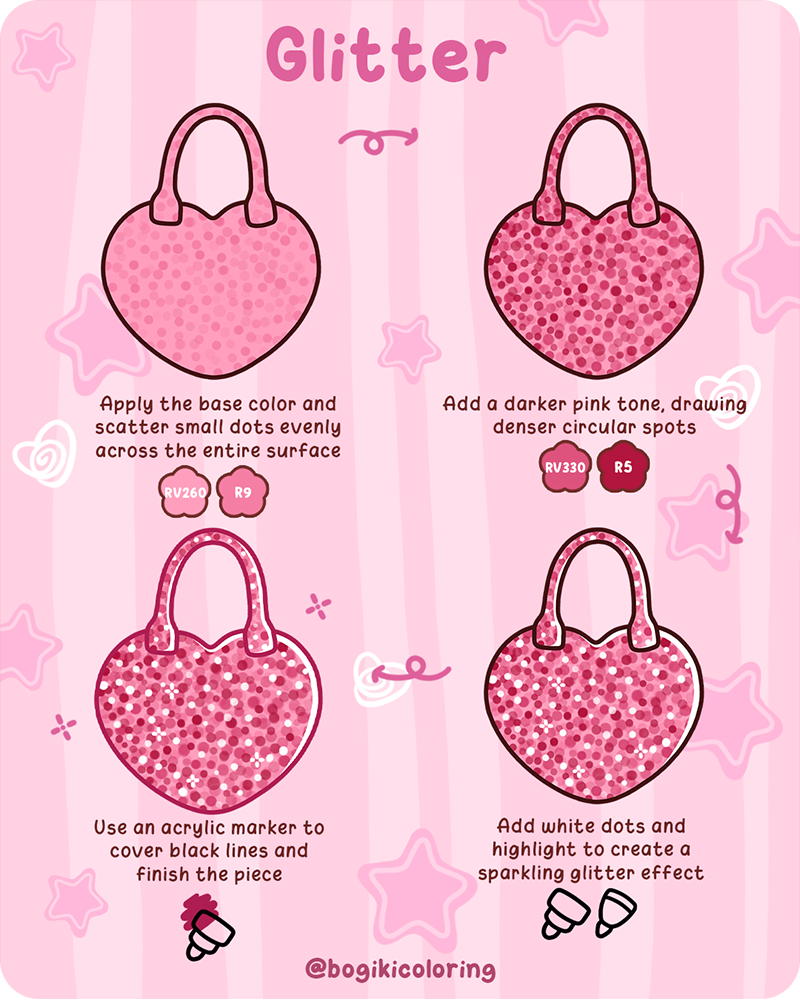
Glitter has a playful and glowing charm, like tiny lights scattered across a surface. When exploring how to draw fabric patterns, this style allows you to focus on rhythm and repetition instead of complex shapes. It is especially fun if you enjoy adding small details that slowly build into something vibrant and eye-catching, while still keeping the process simple and relaxing.
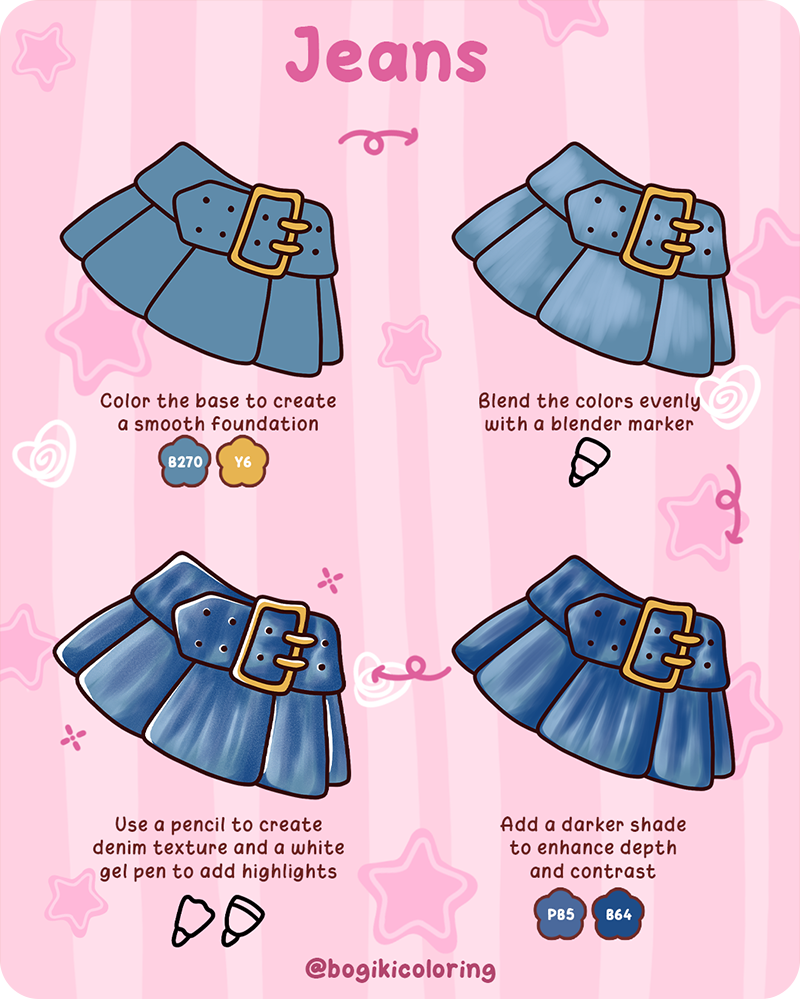
Denim carries a sense of everyday comfort, with its slightly rough texture and deep blue tones. When practicing how to draw fabric step by step, jeans are a wonderful way to understand layering and blending. Instead of focusing on perfect lines, you can gently build color and texture, letting the fabric feel worn, soft, and natural over time.
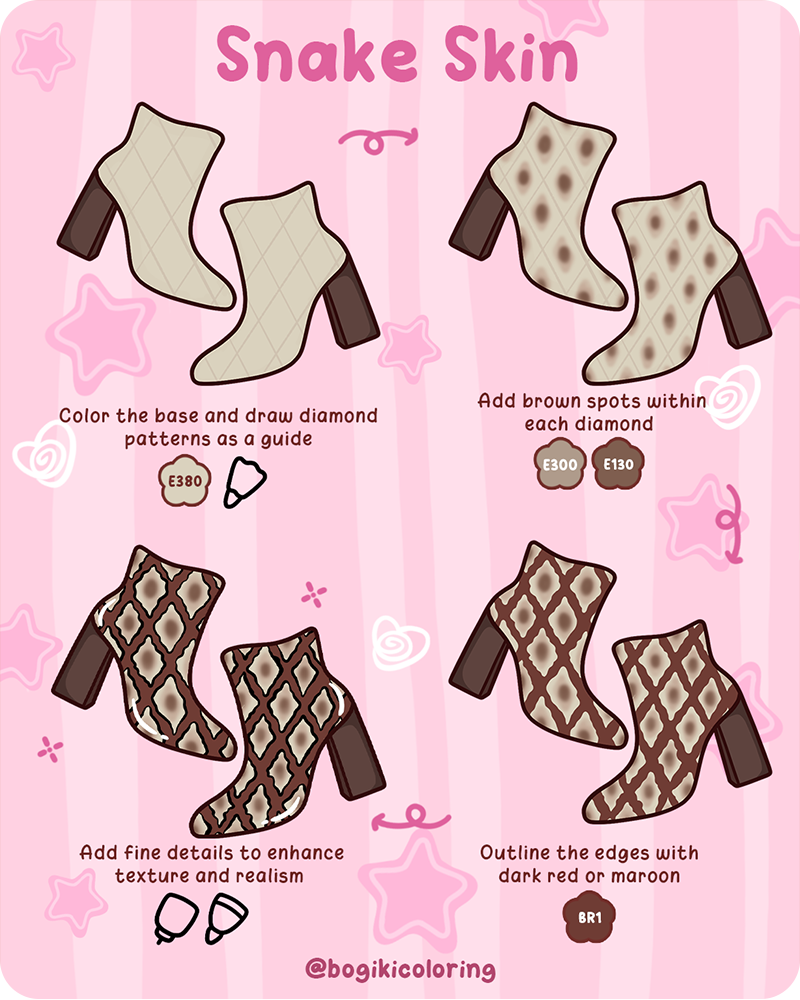
Snake skin patterns bring a slightly bold and textured feeling, yet they can still be drawn in a calm and simple way. If you are exploring how to draw different fabrics, this style introduces repeating shapes that guide your composition naturally. With soft coloring and a steady rhythm, the pattern slowly becomes more detailed, creating a balanced and eye-catching result.
As you grow more comfortable with how to draw fabric patterns, it can feel lovely to let your ideas gently shift with the seasons. From light summer outfits, you might wander into milder winter looks through 5 Easy Winter Clothes Coloring Ideas, where cozy sweaters, scarves, and layered pieces bring a quiet warmth to your characters. You can also explore small, playful details like boots or try something more colorful and free-flowing with tie dye in 4 Fabric Coloring Ideas, each one offering a slightly different creative mood.
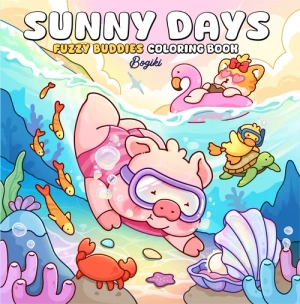
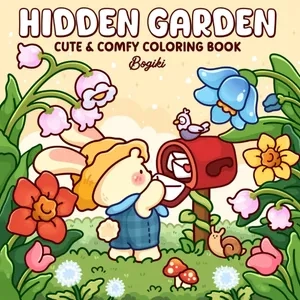
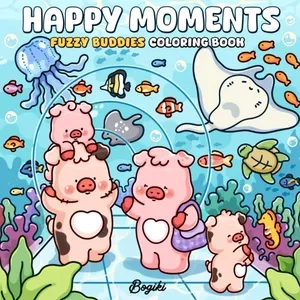
To continue your cozy drawing moments, you can bring these summer fabric textures into pages like Sunny Days Coloring Book or Happy Moment Coloring Book, where gentle beach scenes, sunny pool days, and fuzzy characters give you a calm space to practice and add your own outfit ideas. And when you feel like exploring softer winter textures like wool or fluffy fabrics, Hygge Frosty Coloring Book and Fuzzy Holiday Coloring Book open up quiet snowy scenes filled with warmth, where every little detail feels soft, peaceful, and comforting.
To make your how to draw fabric patterns step by step practice feel softer and more enjoyable, Bogiki has prepared a gentle practice page that you can easily download and start with anytime. It gives you a calm space to explore chiffon, glitter, jeans, and snake skin at your own pace, without pressure.
And when you finish, it would be really lovely if you shared your work with the Bogiki Community, where small, cozy creations are always welcomed and can quietly inspire others, too.
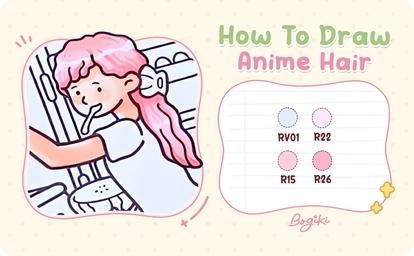
Add a touch of charm to your character by starting with a soft and cute anime hairstyle. In this how to draw anime hair step by step guide, you will explore how gentle colors and delicate strokes can slowly shape a natural-looking hairstyle. As you move slowly and enjoy each small step, drawing anime hair begins to feel more relaxing and easier than ever.
Start by applying a light pink base across the entire hair using RV01. Keep your strokes soft and even, allowing the color to sit gently on the surface. This first layer builds a calm foundation for how to draw anime hair step by step, helping the hair feel light and airy from the beginning.
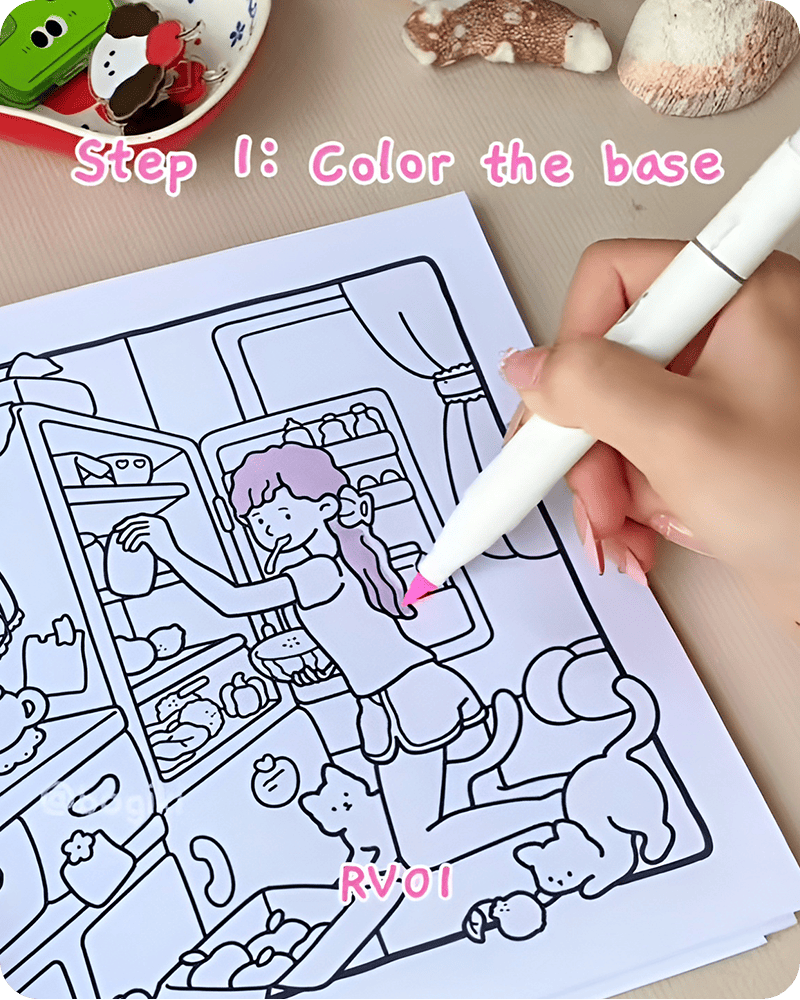
As the base color settles, the hair begins to feel cohesive and softly filled. This simple step already brings your anime hair drawing to life in a quiet and gentle way.
Now begin shaping the hair by adding darker pink tones using R22. Gently fill in sections of the hair to create variation between light and shadow. Focus on separating the strands into soft areas rather than sharp lines. This helps define the structure while keeping the look natural.
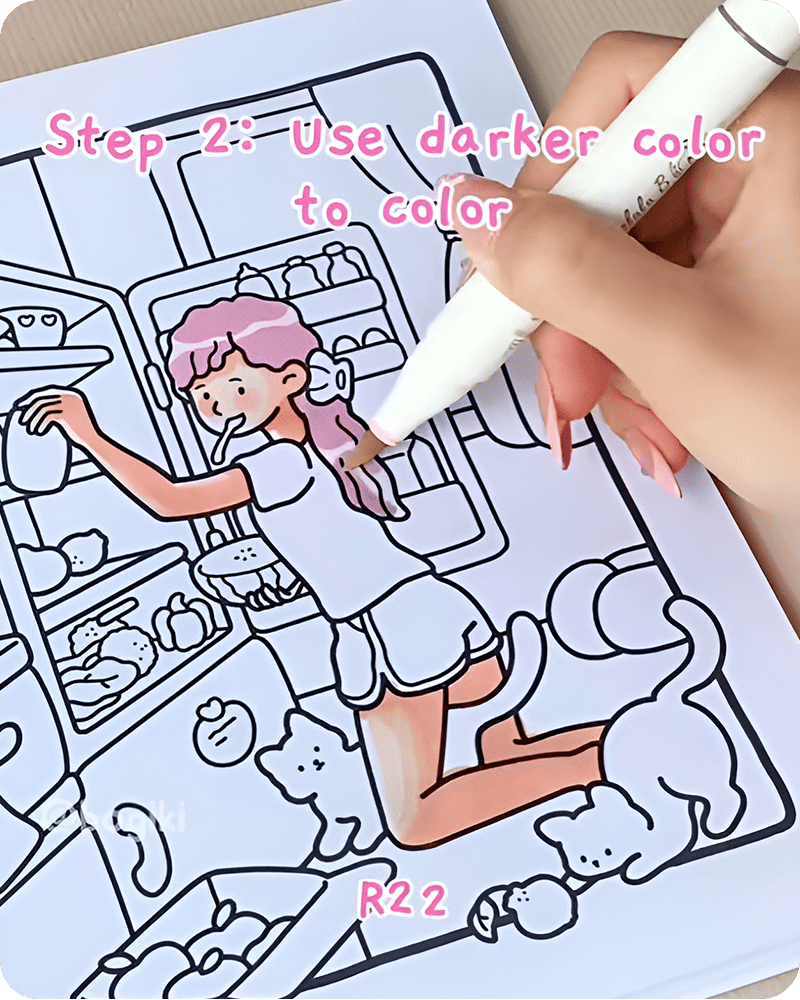
As you continue learning how to draw anime hair, think of the hair as flowing shapes instead of individual strands. Let each section connect smoothly so the hairstyle feels balanced and calm.
Next, use a soft beige tone like R15 to add shadows in areas where light is less present. Apply this color lightly under layers of hair or near the inner curves. These subtle shadows bring depth without making the drawing feel heavy.
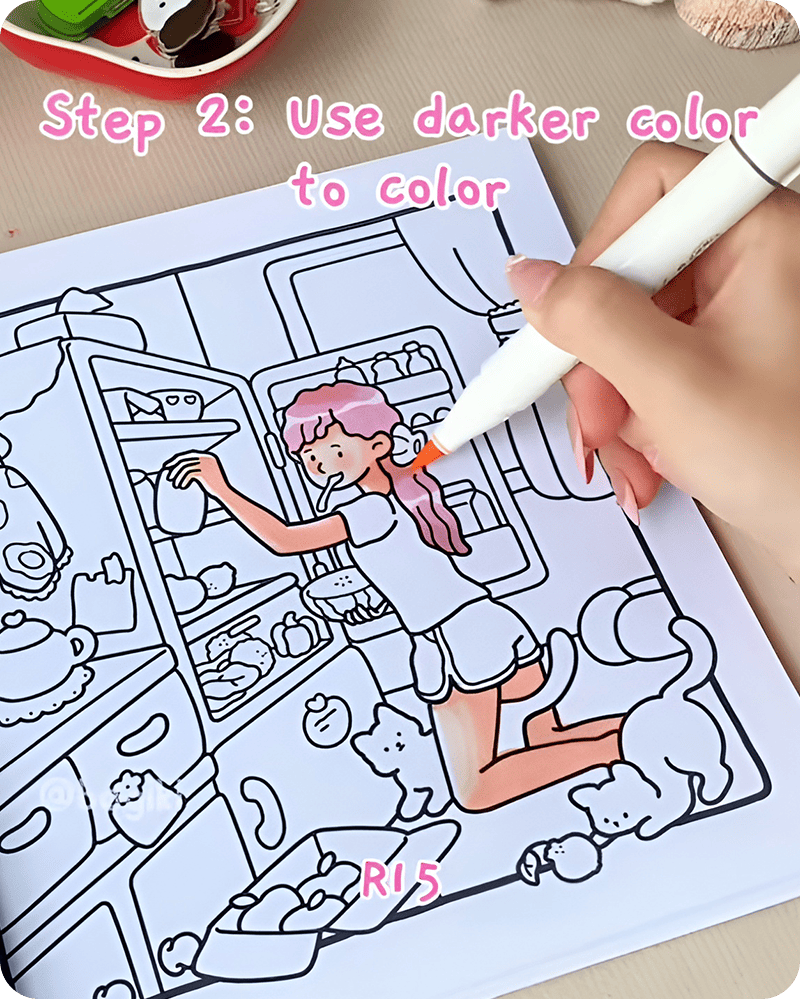
At this stage, your drawing of anime hair should start to show volume and form. The combination of pink tones and soft shading creates a cozy and slightly dimensional look.
Using R26, begin drawing soft curved lines across the hair. Keep your hand light and relaxed as you follow the natural flow of the hairstyle. These lines help suggest gentle waves and movement, giving the hair a more organic feel.
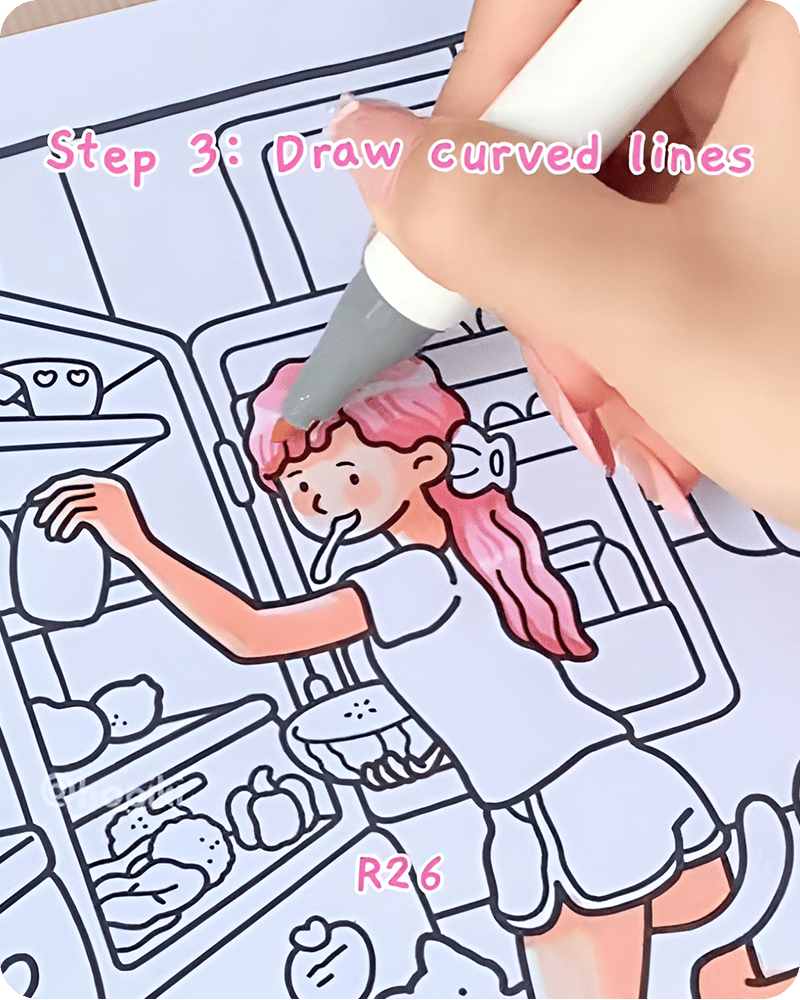
Let the curves vary slightly in length and direction. Small imperfections help the hair feel more natural and less stiff. This is an important part of how to draw anime hair easily, especially when you want a soft and cozy result.
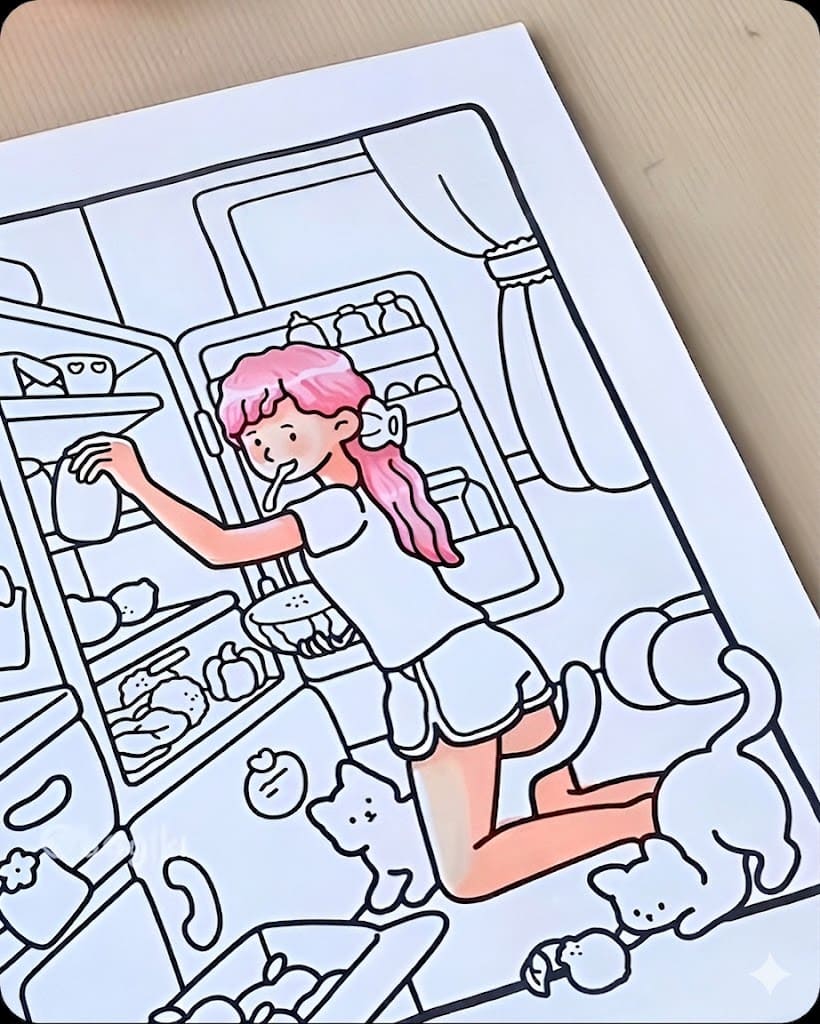
Take a moment to look over your drawing. If any areas feel too strong, gently soften them with light strokes from your base color. This helps blend everything together and keeps the overall look calm.
When learning how to draw anime hair step by step, it can be helpful to move at your own pace. Watching the process slowly, even in your own drawing, allows you to notice how each layer builds on the previous one.
Pay attention to how colors blend and how gentle lines shape the hair. This quiet rhythm makes anime hair drawing feel less like a task and more like a relaxing, creative moment.
After finishing your drawing, you might enjoy gently exploring more hairstyles to bring your character to life in different ways. You can try soft ideas like curly hair drawing, wavy hair drawing, or braided hair drawing through simple guides such as girl hair drawing ideas. If you prefer a slower pace, following How to Draw Hair Step by Step can help you discover each shape and flow in a calm and easy way.
To softly apply these ideas, you can step into a cozy coloring moment with the Soft Dreamy coloring book. With gentle illustrations of Luna and her friends, each with soft and varied hairstyles, it offers a quiet space to try different looks in your own calm way.
Another lovely option is the Girly Diaries coloring book, filled with cute characters and a variety of hairstyles to explore. It feels like a peaceful little corner where you can slowly play with colors and enjoy practicing new hairstyles at your own pace.
Treat your inbox to a lovely surprise! Sign up now for exclusive content and special gifts